Marine Switches - Battery, Ignition, Rocker, and Toggle Switches

About Marine Switches - Battery, Ignition, Rocker, and Toggle Switches
Where to Buy Boat Switches
If you're shopping for a switch for your boat, it's probably in the iboats.com marine switches category. Choose from rocker and toggle switches, battery switch panels, ignition switches and kill switches. With our large selection you have the ability to customize your boat's electrical control system in whatever way you see fit. Since we only carry marine specific brands specializing in marine electrical components, such as MarineWorks, Blue Sea Systems, SeaSense and Seadog, you can rest assured that the electrical switches and components you purchase from us will be of the best quality, and designed to withstand the rugged marine environment.
Marine Switches - Battery, Ignition, Rocker, and Toggle Switches How-Tos
Boat Switches 101
There are many types of switches that can be found on a boat. These simple devices come in all manner of shapes, colors, sizes, and designs. However, they all play the same role of breaking the flow of voltage or current. Lack of electricity or current means a device ceases to function. The boat switches may be classified in the following ways:
Contact Terminology
Contact terminology categorizes the marine switches according to how the terminal or points make contact. It is important to have an idea as this will determine the number of connections or devices that can be connected to a circuit. The most-common terminologies are as follows:
1. Single Pole, Single Throw (SPST): This is the simplest On/Off switch found in a boat. It is composed of two pins hence also referred to as a two-way switch. It connects or disconnects a single circuit/line. A good example is a light switch.
2. Single Pole, Double Throw (SPDT): A switch that may be referred to as a three-way is comprised of three points. It can, therefore, connect one line to two different points. The single line (COM) can be connected to either L1 or L2.
3. Double Pole, Single Throw (DPST): This switch resembles two SPST switches that are controlled by a single switch. It is made-up of four separate pins. The two lines are independent of each other.
4. Double Pole, Double Throw (DPDT): This marine switch resembles two separate SPDT switches that are connected to one switch. The total number of pins is six. Due to its design, bypass switching is possible.
5. 3 Pole, Double Throw (3PDT): It is a combination of a DPDT and SPDT switch. It features a total of nine pins. Besides true bypass switching, the switch also increases the number of functions for instance illumination or LED.
*Note: Throw is the total of conducting points while pole is the number of switch contact positions. The different arrangements can be used in push, toggle, push-pull, or slide boat switches.
Classifying Marine Switches According To Design
Switches used in boats can also be classified according to design. They will still employ similar contact mechanism. However, the mode of switching On/Off, the duration of staying On will vary. The following are the common types of switches:
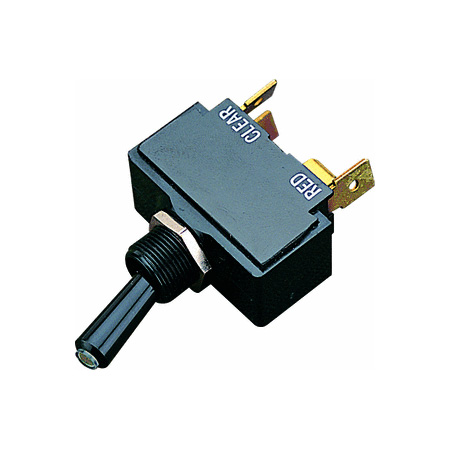
1. Toggle Switch: Toggle boat switches are simple On/Off switches. They comprise of a small lever that can be pushed up or down. Pushing up (on) makes full contact while pushing down (off) disconnects the circuitry. It is used in the switchboard, electrical panel, circuit breakers, etc.
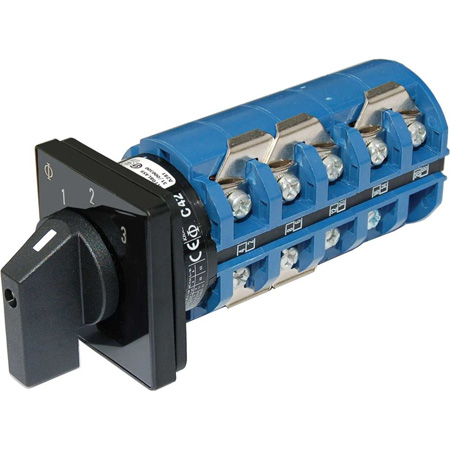
2. Rotary switch: The switch that is circular consists of two separate positions that may be biased with a spring (momentary). Turning or twisting the handle provides contact to one of the two positions. It may come with several levels for multiple connections.
3. Battery Switch: The switch is mainly used to connect the battery to the circuitry. It may come as SPST for single batteries or SPDT for separate power sources. The switch will have three terminals. One negative and two switch terminals.
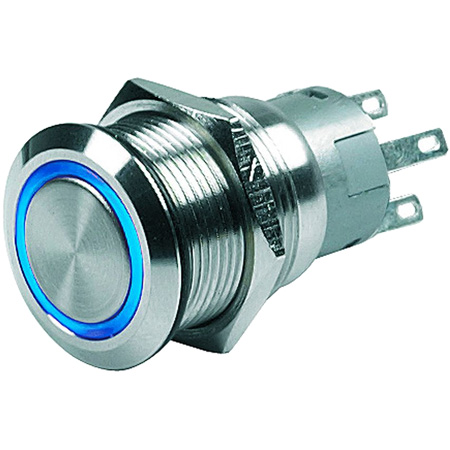
4. Push Bottom: This is a form of the biased switch. It will make contact momentary or as long as the button is pushed. Upon releasing, it disconnects the circuit. It is used for bells or horns.
5. Push-To-Break: This is a type of push or biased switch. It makes contact when the switch is pushed. However, unlike the push button, it also breaks the circuit. It is suited for emergency situations such as breaking current flow abruptly or alarms.
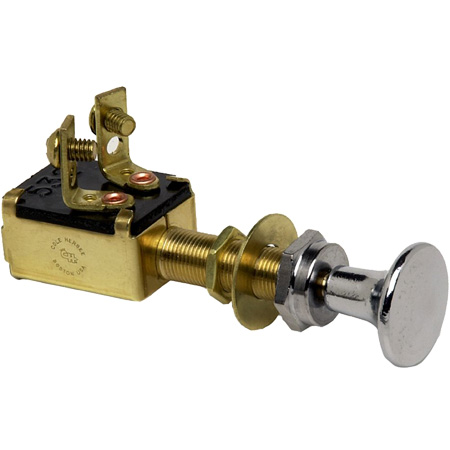
6. Push-Pull Switch: The switch works by pushing and pulling. Pushing it creates full contact and stays on. Pulling it breaks the contact entirely. It is useful in situations where high currents and voltages are involved.
7. Ignition Switch: This switch is used to start the engine as well as power other accessories. It may be three positions (Off, Ignition, Start), or four positions (Accessory, Off, Ignition and start). It breaks the power at different levels and connects several components.
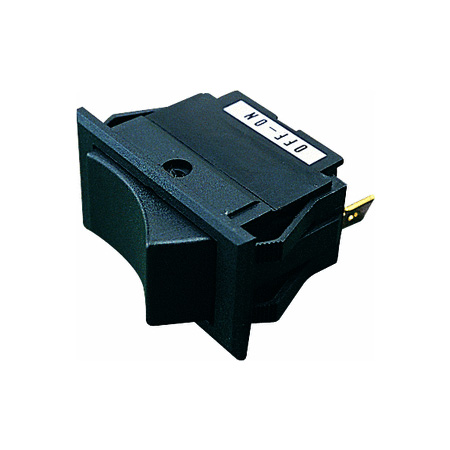
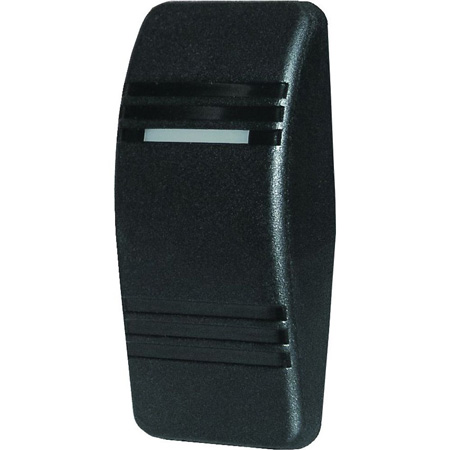
8. Rocker: This switch follows a rocker mechanism rather than a trip. One side of the button will be up while the other will be down. (O) symbol indicates the On position, and the off position is symbolized by a dash or hyphen (-). Some illuminate when on. It's found in display monitors, surge protectors, power supply units and more.
A boater may get a bit overwhelmed when selecting the right switch. Poor choice may lead to setbacks such as poor contact, overheating, electrical resistance, the switch burning-out, and more. Before installing boat switches it's necessary to think of the location, amount of current and voltage, ease of use, and also intended use. The whole selection process can be simplified by matching attributes and qualities of the switch to replace with the switches of interest, and using a switch from a reputable manufacturer, such as Blue Sea Systems, Sierra, SeaSense, etc.
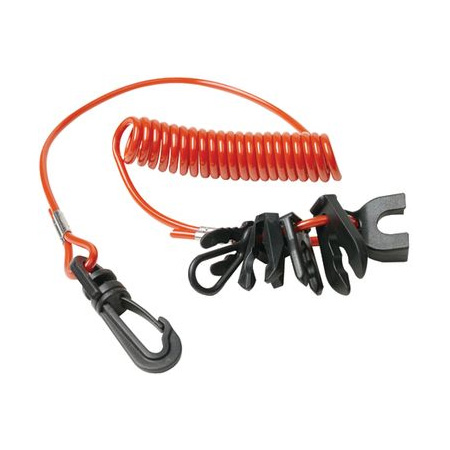
All About Emergency Boat Kill Switches
Every boat owner needs to make sure that an emergency boat kill switch has been installed in the boat. Although it may seem like a very basic accessory, the importance of the switch can never be overlooked. The kill switch may also be referred to as an emergency stop or in short, e-stop. An emergency kill switch is a type of switch that cuts off power to the boat completely. Unlike an ordinary switch, emergency switch doesn't follow a sequential procedure. Due to not following a systematic order there is always the risk of damaging some equipment when used.
How It Works
Normally, switches are supposed to work in a systematic fashion. The shutdown will start from a particular point and end at another point. This allows the equipment to finish what they were doing thus avoiding any damage due to abrupt power interruption. However, an e-switch naturally breaks the power (current) without warning. By turning a switch or inserting a key, the existing circuit is overridden hence disconnecting the main power. Sensitive equipment or those that need some time to shutdown will therefore be affected. The goal is always to save lives even at the expense of the boat or the equipment.
When Is an Emergency Boat Kill Switch Used?
E-switches are used to prevent a bad situation from getting worse. Simply put, they are the last line of defense. There are several scenarios that may require a kill switch to be activated.
Some likely causes are as follows:
Natural Calamity: - Natural catastrophes such as hurricanes, tsunamis, or storms may put the boat in danger hence the need to use a kill switch.
Fire: - In case a boat catches fire, the best way to cut off the ignition may be through the kill switch.
Accident: - A kill switch is also used during an accident to stop the engine from running hence minimizing the risk.
System Malfunction: - The switch may be used when the boat experiences mechanical or system error.
Installing a Kill Switch in a Boat
Items required:
Wrench / spanner
Electrical pliers
Key-type emergency switch
Electric drill
Electrical quick-connectors
Spade drill bit
Marine silicone/ sealant
Screwdriver (optional)
Instructions
1. Use the spanner or wrench to unhook the battery's negative cable.
2. Find a suitable location such as the control console.
3. Look under the console for the main positive (red) wire running from the battery. You may need to flip open the cover or use a screw driver to unscrew the connecting screws.
4. Locate the ignition switch and cut the positive (red) wire using the electrical pliers. Maintain the length of about six inches.
5. Attach the spade bit to the electric drill and cut an opening on the marked spot of the console.
6. Use the connector to join one end of the cut ignition wire with one of the wires coming from the kill switch. Connect the other cut end with the other wire coming from the switch. Apply some silicone sealant to prevent moisture affecting the wire.
8. Position the switch in the console from the back and use the attachment ring to screw the switch onto the brackets. Use the pliers to tighten it further.
9. Ensure the wires are firmly joined and reconnect the battery's negative cable.
10. Test if it works by inserting the key and starting the engine. Pulling the key should shutoff the engine. In the case it doesn't, try again.
Handy Tips
Always install the emergency stop in an area that is easily reachable. The boat's console is usually the best location.
Attach a cord to the lanyard of the switch's key for added security. The wrist or belt is the most convenient places to attach the key.
Use warning and danger signs to alert other people of its location.
Carryout tests on the kill switch regularly to ascertain that it actually works.
An emergency kill switch is a simple device that can be found on iboats.com. A good switch is that which is easy to use and will cut off the power supply instantly. There are several ways that come handy in getting the appropriate emergency boat kill switch.
- Boat Ignition Starter Switches 25 items
- Emergency Boat Kill Switches and Lanyards 13 items
- Marine Rocker Switches 17 items
- Marine Toggle Switches 19 items
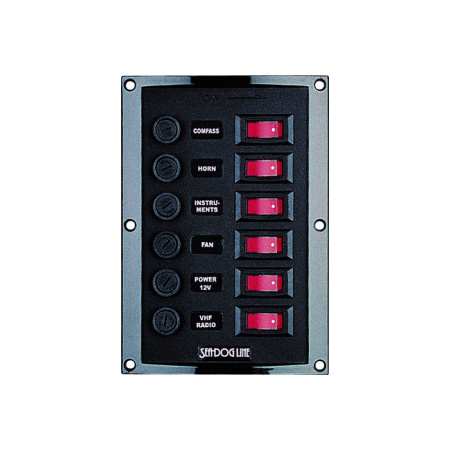
- Marine Switch Panels 7 items
- Boat Contura Switches 8 items
- Marine Push Buttons 9 items
- Marine Rotary Switches 2 items
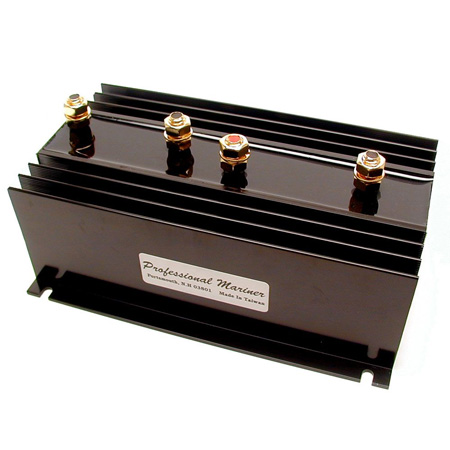
- Boat Battery Isolators And Charging Relays 2 items
- Marine Push- Pull Switches 11 items