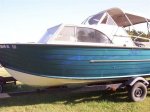
Re: What do i got here??? 1973 starcraft 21'
Impeller isn't too bad...If I can do it, well ya know
It's not a tough job at all to replace your impeller if you're careful and a tad bit handy with a tool-box.
The first thing you need to do is drain the gearcase lube; don't refill it yet.
Place gearshift in foward gear and leave it there, it will assist with re-installation later.
Remove the trim tab (zinc) on lower unit; the bolt is under the little plastic cover above it an down inside the hole.
Remove the bolt up in the hole where the trim tab used to be.
Still looking up, and a few inches foward, there's two round holes with 5/8 head nuts in em; remove those.
Get off your knees now, and all the way foward on top of L/U centered is another 5/8 head lock nut; remove that and NOW screw it back on 4 or 5 turns. You'll see why in next step.
The last two attaching nuts are on either side of gearcase and can be removed with a 5/8 open end wrench; the gearcase must be wiggled and lowered to allow complete removal of these nuts.
Wiggle the case and lower it til the front nut is all that is holding it on. Holding the L/U remove the front nut and let the unit slide down for removal.
Don't mash you or your first mate's hand between case and floor...it's heavier than you think!
Stop and locate the tiny seal (looks like a little rubber washer) that seals the oil passage between upper and lower units. It may still be on top-center-starboard side of lower/unit.
Now you're ready to change the impeller.
Remove the o-ring on top of drive-shaft and further down the shaft remove the thick rubber seal (it slides up) on top of plastic pump housing.
You'll notice two 7/16 head nuts, one 1/2 head nut, and a 5/16 head bolt that allow removal of the the pump housing; loosen and remove those.
Remove parts in this order: upper housing, impeller, pump key, top gasket, stainless wear plate, and lower gasket.
The impeller may remain inside of housing during removal and the key will probably fall out; it's small so don't lose it.
You can pick up a pump repair kit right at your local NAPA auto parts store.
It will have all you need and some extra stuff for different models. If you need a new wear plate, or upper housing, grab em while you're there.
Slide the lower gasket, wear-plate, and top gasket down the shaft in reverse order.
Hold the key in place and engage the impeller with key (slide impeller over key).
Squirt a little Dawn Dishsoap on the impeller BEFORE the next step, your blades will thank you..
Slide upper plastic housing down, and WHILE turning the drive-shaft clock-wise, push housing down over impeller; it's a little tough and watch out so as not to damage gasket in the process.
You might want to try it a couple times without the gasket first, you know....a practice run or two!
Install and tighten nuts and screw as removed, don't over torque....35-40 in.lbs. on 1/2 in. heads--25-30 on 7/16 head and 15-20 on 5/16 head.
Turn drive shaft clockwise and be sure prop shaft is also turning clock-wise which is Fwd. gear on right-hand rotation drives. If unit has jumped out of gear you may have to turn shift-shaft (little shaft in front) COUNTER-CLOCKWISE to obtain Fwd. gear.
Place plastic water-tube alignment helper in hole on pump housing. Slide rubber seal down drive-shaft and replace top o-ring. Be sure little seal is in place on starrboard top of L/U and you're ready to re-install unit.
You have to pay attention to water-tube and shift-shaft alignment while installing unit. If drive-shaft splines don't seem to be going in place and up, you can turn prop counter-clockwise to turn drive-shaft splines. If you accidentally turn prop clock-wise in this step you will probably have moved shifter back to a Neutral position so use care.
Start the 2 5/8 nuts on either side an snug em up a little....STOP at this point and be sure unit is shifting from F-N-R via control box. Don't crank engine; get in and out... and in and out... and in and out... and in and out... of boat, or enlist a first mate for the afternoon.
Replace the remaining bolts and torque as follows:
Mercury models
5/8 nuts-35 ft. lbs.
9/16 head bolt-28 ft. lbs.
Trim tab bolt-180 inch lbs.
Check your owner's manual for other models....more tourqe charts coming soon.
Refill outdrive with lube and crank engine to check for proper shifting, water-pump, and thermostat operation. Dispose of waste oil and empty beverage cans in a proper manner and go tell your wife and/or buddies how much money you saved to purchase more beverages.
________________________________________
No shift after replacing water pump (Mercury)
Take the lower-unit back down , put control handle in neutral position.
Turn shift shaft on foot counter-clockwise until it seems to stop with fingers......with a pair of pliers; continue turning CCW and it will click over to neutral position, check that the prop shaft spins to be sure it is in neutral.
Put foot back on with control and foot in neutral. The old generic Merc and Mariner instructions "remove and replace lower-unit in foward gear" may not work so well on your particular motor.
If you need to line up driveshaft when reinstalling foot it helps to have someone turn flywheel so that driveshaft splines line up.