1970's Lund - Quick Rehab.

edgepa

Petty Officer 3rd Class
Joined
May 30, 2011
Messages
93
Hi All-

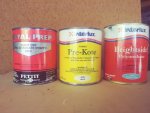
I have a quick rehab project on the horizon -- our family has 1970's Lund fishing boat that we have used for many years. She has been a work horse! However, currently, the auto bilge pump is the only keeping her afloat. Unfortunately this boat is long way from home base. So the only course of action is a quick dedicated rehab during 2 weeks of vacation. Here's my plan:

1. Gluvit the seams.
2. Seal leaking rivets (need guidance here)
3. Repaint insides (to protect the Gluvit).
4. Repaint outsides
5. Replace plywood seats

1 thru 3 are crucial, 4 and 5 are the nice to have's. The key is to have all material/tools ready ahead of time because there is no way to source much of anything on site. So far I have:
- 1 qt Gluvit (is this enough?)
-3/8 ACX plywood for seats
- paint stripper
-tools (angle grinder, saws drills, etc).

I haven't bought paint yet. I was planning on going with the tractor paint method since it is above the waterline. However the boat is in the water for approx. 3 months during the summer. Is that going to work? Also not sure if the tractor paint will work well in the interior? Will be easy to apply? Maybe rattle can makes more sense?

Final question for today -- Can this be completed on a trailer without pulling the engine?

Thanks
Edgepa
 

Attachments

  • photo296649.jpg
    photo296649.jpg
    814.1 KB · Views: 0

edgepa

Petty Officer 3rd Class
Joined
May 30, 2011
Messages
93
In looking through the garage, I found a box of paint that I picked from my father after he passed away. It looks like he may have had this project on his radar. I have a 1 qt of quick dry zinc chromate, 1 qt of Pre-Kote primer, and 1 qt of Brightside Polyurethane (single part). I plan to use this on the inside after I use the Gluvit. Is this enough paint for coverage?

Still need to figure out the confirm plan for the outside above the water line. Since the boat is in the water (freshwater lake) for approximately 3 months, is there an issue with using the tractor paint method?
 

Attachments

  • photo297370.jpg
    photo297370.jpg
    155.1 KB · Views: 1

edgepa

Petty Officer 3rd Class
Joined
May 30, 2011
Messages
93
I picked up Rust-oleum enamel last night - I am down to my final day of materials gathering. However, the big box store didn't carry a hardener. I making calls today to try to source. I also plan to get another qt of the enamel. Better to have too much than not enough.

Also picked up a rattle can of Aluminium Primer. The can indicates it is to be used on bare metal, but doesn't say that it is zinc chromate. The rattle can might be easier in tight spots, but don't know if I can use it in conjunction with the paint-on zinc chromate that I already have.

All advice would be greatly appreciated.
 

Attachments

  • photo297620.jpg
    photo297620.jpg
    112.1 KB · Views: 1

oldrem

Commander
Joined
Nov 7, 2013
Messages
2,002
Any farm stores around you? TSC, Farm & Fleet, Fleet Farm ? They all carry hardener around here
 

edgepa

Petty Officer 3rd Class
Joined
May 30, 2011
Messages
93
Thanks Oldrem. Picked some up at TSC in Fargo while in transit. It looks like the weather will be crappy for another day or so. The plan is to pull the motor with the help of a couple of strong kids.... If I can get them up by noon! Then pull the boat and carry it up to the work area. First step will the water test to find the problem spots.
​​​​
 

edgepa

Petty Officer 3rd Class
Joined
May 30, 2011
Messages
93
It's on...

We wrangled the boat out of the water and up to a work area. It didn't take long to find at least a primary issue. There is a 2" crack near/ through a rivet. A second crack is starting on the next rivet. I plan to use Marine Tex to repair. Question- Should I drill small holes at the ends of the crack to lessen the spread? If so, can I just fill with Marine Tex?

Pulling Engine.jpg Pulling Motor

Boat on Dock.jpg Up on the dock

Up the ramp.jpg
Up the ramp

On the blocks.jpg On the blocks
 

oldrem

Commander
Joined
Nov 7, 2013
Messages
2,002
I think pics are needed of the cracks. If they're in a structural area you may need to get it welded.
 

edgepa

Petty Officer 3rd Class
Joined
May 30, 2011
Messages
93
Hi Oldrem,

The first picture shows the crack (or should). The crack is 2" long in the nearly middle of the hull. Doesn't seem structural, but is beneath the 3 third seat.

I thought I have read here that welding a riveted boat boat is a no- no.

Edgepa
 

edgepa

Petty Officer 3rd Class
Joined
May 30, 2011
Messages
93
I just checked from another device and the picture of the crack didn't load. Trying again..

The Crack.jpg .
 

oldrem

Commander
Joined
Nov 7, 2013
Messages
2,002
Not sure about anyone else, but that's not something I would trust to an epoxy based product. I'm hoping some like Watermann can pop in on this one.
 

Watermann

Starmada Splash of the Year 2014
Joined
Jan 12, 2013
Messages
13,822
That's a pretty good crack going there and yeah welding it near a seam would be bad not too mention that thin AL is being stress cracked so it would continue to be an issue and crack the weld.

My advice is to patch over the crack, this gives the area more strength and be a better way of dispersing the stress causing the cracking.

Remove the rivet, stop drill the ends of the crack, create a patch that extends 1" from end side and ends of the crack. I use 5250 AL in .080 thickness for patches. This is commonly found in street signs :lol: I managed to procure several from an old county sign shop and they work great.

The patch piece will need a rivet on either side of the crack near the corners of the patch and one in the original hole. The patch should also be back buttered with 3 M 5200. This repair will take abuse and last many years if not forever.
 

fishrdan

Admiral
Joined
Jan 25, 2008
Messages
6,989
I had several cracks in my jon boat like that. Made circular patches that extended 3/4-1" past the end of the crack. Instead of just drilling the end of the crack with a 1/16" bit to stop the crack, I opened it up for a rivet. 5 rivets, center rivet to replace the original, 2 rivets for the crack ends, then 2 rivets fore/aft on the patch.

I patched inside and out, and used a thin license plate for the inside patch, since it would slide under the rib. Might not be able to patch inside on the Lund (slide a patch under the rib). I used JB weld to seal the patch, which is holding up fine, but was considering 3M 5200. If using 5200, "lightly" mist the 5200 with water before riveting, 5200 cures slowly and needs moisture to cure.

edit: I used a SS screw, nut and washers to replace the original rivet, not a rivet, so it would apply pressure to the patch and squeeze out the excess adhesive.
 
Last edited:

edgepa

Petty Officer 3rd Class
Joined
May 30, 2011
Messages
93
Ugh, not the news I wanted. Since I am limited on time (vacation) here and tools, I can't do the patch myself at this time. I will check in town to see if there is anyone available to do a patch. Would the Marine Tex work as a temporary repair until the end of the summer? Probably another month in the water.

This is probably just lipstick on the pig since the crack is now center stage, but stripped the paint yesterday in preparation of a repaint.

paint strip 4.jpgpaint strip 1.jpg
paint strip 3.jpg
 

Watermann

Starmada Splash of the Year 2014
Joined
Jan 12, 2013
Messages
13,822
No slathering some epoxy over the top of the crack won't work, it'll just crack out again very quickly. Hopefully the handy man in a can type doesn't show up to say use that flex seal garbage.

If you decide to have that welded then have them weld a patch over it not just a bead on the crack. Cost will be a factor too and getting them to do the work in a timely manner.
 

edgepa

Petty Officer 3rd Class
Joined
May 30, 2011
Messages
93
I found a guy who is willing to do it, but indicated he'd be using pop rivets. Other than that, he suggest the same course of action, drill stopping the crack, a patch extending a inch beyond, backed with 5200.... so pop rivets okay?
 

Watermann

Starmada Splash of the Year 2014
Joined
Jan 12, 2013
Messages
13,822
If solid rivets aren't an option then I would use stainless machine screws and nylocs on the bottom rather than blind rivets.
 

edgepa

Petty Officer 3rd Class
Joined
May 30, 2011
Messages
93
Thanks Watermann for the advice. I want to avoid the short term fix that just masks the problem for another day.

There's someone else who can do it with bucked rivets. He contracts out of a outboard shop, but he's availability might not be until the end of the season -- the winters are long and the summer is short so I don't blame him for wanting to be out on the water. Waiting to hear back on timing. Until then, I will proceed with the paint since that is under way.
 

edgepa

Petty Officer 3rd Class
Joined
May 30, 2011
Messages
93
Finished stripping the paint this morning...
stripped 2.jpg

I will clean-up with acetone this afternoon and tomorrow apply the quick dry zinc chromate followed by one of these -- I assume the Aluminium Primer (middle can) is the best option -- but open to all advice.

choice.jpg

Painting to start on Sunday if all goes well...
 

Attachments

  • stripped 2.jpg
    stripped 2.jpg
    209.2 KB · Views: 0
Top