choover852
Cadet
- Joined
- Jan 11, 2013
- Messages
- 16
I am doing some work on a 22' islander and have a question regarding the decking. I have torn out one section of the old decking, cut new, and painted with Tuff Coat. I bought some coated TEK self tapping wood to metal screws and thought these would be pretty slick. The problem is, the aluminum sub framing is too thin and the hole strips out very easily. Any suggestions on what kind of screw to use for fastening the deck? I would rather use screws than rivets.
 our faces.
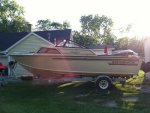
![IMG_0873[1].jpg](https://forums.iboats.com/data/attachments/161/161741-fd600de8d80432e81715b74ee5d3db31.jpg "IMG_0873[1].jpg")
![IMG_0817[1].jpg](https://forums.iboats.com/data/attachments/161/161742-e74f94f4291a033230f72feadb7dee01.jpg "IMG_0817[1].jpg")
![IMG_0824[1].jpg](https://forums.iboats.com/data/attachments/161/161743-4019f0eb7c86649c0593a9e798a07a42.jpg "IMG_0824[1].jpg")
![IMG_0821[1].jpg](https://forums.iboats.com/data/attachments/161/161744-98da9d3140837cd7c71e9ca43b59d759.jpg "IMG_0821[1].jpg")
![IMG_0823[1].jpg](https://forums.iboats.com/data/attachments/161/161745-9f5c729b17635e3e9609a7ed524509e4.jpg "IMG_0823[1].jpg")
![IMG_0887[1].jpg](https://forums.iboats.com/data/attachments/162/162462-bd31d05e8b07f01be34b9f72209c95b4.jpg "IMG_0887[1].jpg")
![IMG_0885[1].jpg](https://forums.iboats.com/data/attachments/162/162463-bd1fbd10b207c4641c888407a5bc15d1.jpg "IMG_0885[1].jpg")
![IMG_0880[1].jpg](https://forums.iboats.com/data/attachments/162/162464-3dbf7baa774e50e0ff9d15175070da0e.jpg "IMG_0880[1].jpg")
![IMG_0879[1].jpg](https://forums.iboats.com/data/attachments/162/162465-795cee8778ce108af0d57218e6c232e2.jpg "IMG_0879[1].jpg")