2006 SeaRay 185 Restoration

AMMO DAWG

Petty Officer 1st Class
Joined
Aug 3, 2012
Messages
227
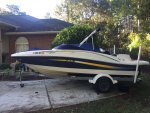
Hi all, didn’t think I would ever do another renovation, but here I am tearing into a 2006 Searay 185! We sold my last project boat which was a 1999 Rinker Flotilla, too much boat for me and the wife. We wanted something smaller and a little easier on the fuel. I spend five years messing with that last boat, and in the end I pretty much replaced everything, gave a guy with a young family an awesome deal and an awesome boat!

Well that’s past history and here we are (again), this time I will be boating in the spring (famous last words) and done with this project. This is a partial restoration, I chose this model because it had very little wood to worry about, and I’m too old for stringers, transoms and deck replacement. Now that I have had time to tear into it the boat was probably somewhat misrepresented, but I’m done being upset and want to get it to a reliable state so we can enjoy boating and fishing again. I apologize starting the post a little later in this project, I wasn’t going to do a post originally, but then I remembered how much this site has helped me with tough questions and challenges in the past and I want to share what little knowledge I have gained and also get slapped around if I go down a “don’t do that stupid” path.
 

Attachments

  • photo303752.jpg
    photo303752.jpg
    1.1 MB · Views: 2

AMMO DAWG

Petty Officer 1st Class
Joined
Aug 3, 2012
Messages
227
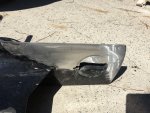
So after having the boat home for a few weeks I think I have found most of the demons. It was touted as mechanically sound, just needed some love, but that is far from the case. First off I don’t have pictures, but I can’t even express how filthy this boat was, the engine bay literally black with grime, oil and dirt, all that grime did well to mask the true condition. The upholstery is pretty much shot, knew that going in, I’m getting pretty good with the old sewing machine and will be tackling that a little later. The boat has a Mercruiser 3.0 with an Alpha 1 Gen 2 outdrive and the owner was clear that it had a sheared starter bolt and some external damage to the outdrive. Hull itself is sound, lots of dock rash and failing vinyl graphics as you will see in the pictures.
 

Attachments

  • photo303753.jpg
    photo303753.jpg
    669.5 KB · Views: 2

AMMO DAWG

Petty Officer 1st Class
Joined
Aug 3, 2012
Messages
227
So first thing I took on was to see how hard it was going to be to deal with that starter bolt, after taking an inspection mirror to it I realized someone attempted to get it out and boogered the hole up pretty good. I knew the engine was going to have to come out to properly deal with it. I also found the reason for the sheared bolt, wrong starter, wrong bolts and the aft starter brace was missing. I also had noticed when I turned the key on to check out the electrical components, no warning buzzer, hmmmm. So basically only the radio worked, no blower, no nav lights, no horn, no bilge pump etc. Next I pulled out the dash and found the buzzer had been clipped clean off, now I was worried. Also, lots of creative wiring back there. So I decided, to tackle the mechanical stuff first and move on from there.

I first drained the outdrive and the fluid didn’t look too promising, probably been in there a good long time. The owner also had said the impeller had just been replaced, doubtful; look at the build up in the pictures around the housing. So the outdrive is off to my buddy who is an amazing marine welder to fix the skegg, and two pieces on the sides. I will post those pictures when it comes back.
 

AMMO DAWG

Petty Officer 1st Class
Joined
Aug 3, 2012
Messages
227
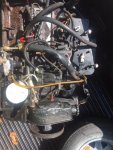
I next pulled the engine and when I got it on the ground and washed some of the grime off it was clear that it probable got doused with salt water, probably a “forgot the drain plug” episode or two. Lots of corrosion on the lower half of the engine. So I started tearing the engine apart and more and more corrosion. The oil pan was pretty bad around the drain plug, the engine mount feet had quite a bit of corrosion, the oil Sending unit was eaten clear through, hence I’m sure the buzzer became a nuisance! Exhaust elbow, etc, etc. Cap and rotor looked like they might be original, there was fuzz around the terminals. The oil also looked like crude oil, so the block and heads went off to the machine shop to see if it really had 200 hours on it and just needed a refresh.

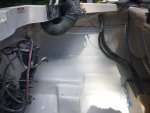
I did struggled with should I just repower with a 4.3, but the cost of a complete motor and different outdrive was just not sellable to the money manager in the house. So while the engine is off getting a rebuild and addressing that starter bolt hole I figured I would tackle the engine bay/bilge first. Two and the half days of scrubbing with every cleaning product known to man and “oh no, you’re not coming in this house, shower outside mister” and I got her pretty clean. I noticed large chunks of gelcoat have come off in the bilge, I don’t know if they just didn’t prep it well during fabrication or moisture got under it, but I took a scraper to dislodge loose pieces and then a grinder to feather the edges of the remainder, quite a dusty mess. After a good vacuuming and thorough wipe down with acetone I put down a couple coats of Bilgekote, didn’t want to mess with gelcoat. Looks so much better, how it holds up, time will tell. Nothing much I can do if more of that gelcoat comes loose, looks to be okay, we will see.
 

Attachments

  • photo303754.jpg
    photo303754.jpg
    550.4 KB · Views: 8
  • photo303755.jpg
    photo303755.jpg
    765.5 KB · Views: 6
  • photo303756.jpg
    photo303756.jpg
    581.6 KB · Views: 6
  • photo303764.jpg
    photo303764.jpg
    1.8 MB · Views: 6
  • photo303765.jpg
    photo303765.jpg
    824.8 KB · Views: 6
Last edited:

AMMO DAWG

Petty Officer 1st Class
Joined
Aug 3, 2012
Messages
227
Started addressing the serviceable engine parts, removing the surface rust and treating it and repaint. Feel like I’m making some progress. I really would like to replace at least one of the engine mount feet and the exhaust elbow but the budget just doesn’t support it right now. So if anyone out there has those parts sitting around for 3.0 and a reasonable price please let me know.
 

Attachments

  • photo303757.jpg
    photo303757.jpg
    1.2 MB · Views: 3
  • photo303758.jpg
    photo303758.jpg
    1.4 MB · Views: 3

AMMO DAWG

Petty Officer 1st Class
Joined
Aug 3, 2012
Messages
227
Outdrive is back, he never ceases to amaze me, amazing welder, turned out great. I believe I’m going to replace the seals along with the impeller to just be on the safe side, got all winter
 

Attachments

  • photo303759.jpg
    photo303759.jpg
    652.9 KB · Views: 3
  • photo303760.jpg
    photo303760.jpg
    1.3 MB · Views: 3
  • photo303761.jpg
    photo303761.jpg
    1,018.7 KB · Views: 3

AMMO DAWG

Petty Officer 1st Class
Joined
Aug 3, 2012
Messages
227
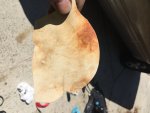
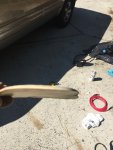
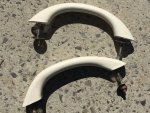
I noticed all the grab handle were black with mold and were meant to be white. I looked online and original searay grab handles are few and far between and the few I found were at a premium price. There are generic handles, but they just weren’t contoured the same so in an act of desperation I prepared a mixture of outdoor bleach and water and soaked them all night. Victory, they came out nice and white and seem to be in good repair, I will do the other four and treat them with some vinyl protector. So don’t toss them handles, give the old bleach a try. Well that’s where I am today, as I make more progress I be sure to get some pictures. Thanks for viewing.
 

Attachments

  • photo303762.jpg
    photo303762.jpg
    195.4 KB · Views: 2
  • photo303763.jpg
    photo303763.jpg
    928.2 KB · Views: 2

AMMO DAWG

Petty Officer 1st Class
Joined
Aug 3, 2012
Messages
227
Thanks, I'll probably need plenty of that in the coming months!
 

AShipShow

Lieutenant Commander
Joined
Jul 8, 2016
Messages
1,803
Good luck! I'll be tagging along wishing I had warm weather to plug forward, alas I have snow in my future :mad-new:
 

AMMO DAWG

Petty Officer 1st Class
Joined
Aug 3, 2012
Messages
227
Thanks Jasin and Mad Props, appreciate the support! Mad Props great carb video, I'll be using that.
 

AMMO DAWG

Petty Officer 1st Class
Joined
Aug 3, 2012
Messages
227
I had some pictures from when I first pulled the engine, I'm supposed to get the prognosis on the engine today from the old boy at the machine shop, sure hope it's rebuild able.
 

Attachments

  • photo303894.jpg
    photo303894.jpg
    143.9 KB · Views: 4
  • photo303895.jpg
    photo303895.jpg
    142.8 KB · Views: 4
  • photo303896.jpg
    photo303896.jpg
    140 KB · Views: 4

AMMO DAWG

Petty Officer 1st Class
Joined
Aug 3, 2012
Messages
227
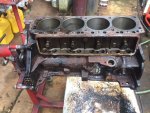
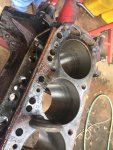
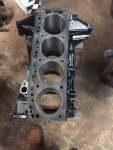
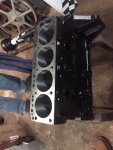
Went over to the machine shop yesterday and wasn't much good news. I was hoping to get away with just some new bearings and rings and a good cleaning, but that's not the case. Pretty certain this old engine had gotten some water in a couple cylinders by the looks of it. Couple of the pistons were stuck in the cylinder and there is some etching. The fella at the machine shop assures me it all can be overcome and I've grown to trust him over the years. In the end I'm looking at probably some boring, new piston rings, new stainless steel valves, new cam, gaskets, seals etc. You're probably saying isn't it just cheaper to get a new engine, however the machinist is a good friend and the great labor rates make it less painful. In the end I know I'll have a good engine and piece of mind. There are some pictures attached of the engine tore down.
 

Attachments

  • photo303959.jpg
    photo303959.jpg
    102.8 KB · Views: 3
  • photo303960.jpg
    photo303960.jpg
    136.6 KB · Views: 3
  • photo303961.jpg
    photo303961.jpg
    151.6 KB · Views: 3

AMMO DAWG

Petty Officer 1st Class
Joined
Aug 3, 2012
Messages
227
Here's some more engine pictures
 

Attachments

  • photo303962.jpg
    photo303962.jpg
    141.8 KB · Views: 3
  • photo303963.jpg
    photo303963.jpg
    121.7 KB · Views: 3
  • photo303964.jpg
    photo303964.jpg
    139.5 KB · Views: 3
  • photo303965.jpg
    photo303965.jpg
    175.2 KB · Views: 3

TBarCYa

Senior Chief Petty Officer
Joined
Apr 13, 2005
Messages
781
When you're ready to tackle the interior there's a place in Washington state that has the OEM patterns for the Sea Ray / Maxum / Bayliner boats. I got a full interior (all 7 seats) for about a grand and other than the bucket seat at the helm, the installation wasn't bad at all. PM me and I'll send the info.
 

AMMO DAWG

Petty Officer 1st Class
Joined
Aug 3, 2012
Messages
227
[No message]
 

Attachments

  • photo304527.jpg
    photo304527.jpg
    111 KB · Views: 4
  • photo304528.jpg
    photo304528.jpg
    107.8 KB · Views: 3
  • photo304529.jpg
    photo304529.jpg
    114.8 KB · Views: 4
  • photo304530.jpg
    photo304530.jpg
    162.8 KB · Views: 3
Last edited:

AMMO DAWG

Petty Officer 1st Class
Joined
Aug 3, 2012
Messages
227
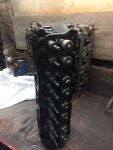
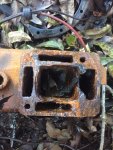
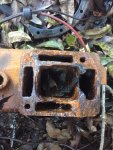
Slowly getting there with the engine work, heads are done, new SS valves, new guides and seals. He resurfaced the block interface and the intake/exhaust interface. Block was bead blasted and dipped, also been bored to 30 thousand over to adress the light pitting in the cylinders. Reassembly should start on Monday and with any luck I'll have a long block ready to go by weeks end. I thought the intake/exhaust manifold was serviceable at least for the near term, when the machinist blasted it he found out it was full of JB weld, who puts JB weld on such a critical component, no wonder water got in the cylinders! Check out the pictures.
 

Attachments

  • photo304527.jpg
    photo304527.jpg
    111 KB · Views: 3
  • photo304528.jpg
    photo304528.jpg
    107.8 KB · Views: 2
  • photo304529.jpg
    photo304529.jpg
    114.8 KB · Views: 2
  • photo304530.jpg
    photo304530.jpg
    162.8 KB · Views: 3
  • photo304531.jpg
    photo304531.jpg
    109.8 KB · Views: 2

mickyryan

Rear Admiral
Joined
Apr 18, 2016
Messages
4,216
i found that after pricing all the work to be done and parts it was cheaper to get a new long block , curious to how you fared on pricing rebuilding self compared to 2600 for brand new. along for the ride:)
 

AMMO DAWG

Petty Officer 1st Class
Joined
Aug 3, 2012
Messages
227
You're absolutely right, had I known upfront just how bad it was I think I would have gone to a company like Marine Power and gotten a brand new long block for like $2900. Since I have worked with this old boy before he goes easy on me and I know he does quality work, so I will be into it with parts for about $1500. So it will be bit cheaper, but only because I have a local shop that's giving me a great deal. If I had to give advice to anyone else I would recommend as you suggested and just go get that brand new long block! Thanks for following the post.
 
Top