4.3 gl not shifting into forward

Antoniorocko

Cadet
Joined
Jul 21, 2019
Messages
7
I have a Volvo 4.3 gl on a 2000 four winns horizon 180. A few weeks ago I begun to have really rough shifts and sometimes delayed shifts (1-2 seconds at first but then it started to increase in frequency and delay) I checked the shift cable and the shielding was rotted pretty bad exposing the core, I replaced the cable and it appeared to fix the issue for about a day or two and then the issue returned. I initially assumed the cable had too much slack so I biased the cable to apply some pressure towards forward. This seemed to help briefly but then it started getting worse. I got to the point where i tried to launch today and it would not shift into forward at all. However keeping it in the position where it should have shifted but not rev the engine I was able to very slowly move forward, it is very slow but it does technically move forward. It has never had an issue shifting into reverse.

I have ave also had the issue of when the engine gets hot it begins to idle high, somewhere around 1,100rpm +/- 100. The engine starts out right about 600 rpm. I tried removing the shift cable and adjusting the cable to fit to the throttle plate in its natural position, with no change so I tried to bias it towards idling low and the the engine would not start ( I assume because it was cold so I was starting it too low)

i assume the high throttle is causing the shifting issue, but this is my first boat and I have only had it about 4 months so I am still learning about this engine. Any help is appreciated.
 

Antoniorocko

Cadet
Joined
Jul 21, 2019
Messages
7
Thanks AllDodge hopefully someone knows what I’m dealing with. I also forgot to mention it has been “run on” or “dieseling” on me recently. It only used to happen when I was running it hard and quickly cut it off, but now it is occurring even after simply idling. I replaced the spark plugs thinking the previous guy had the wrong kind in but no luck. I wonder if it is as simple as bringing the idle down, but again it won’t fire if I do.
 

alldodge

Moderator
Staff member
Joined
Mar 8, 2009
Messages
43,177
Dieseling is caused by either, carb running to rich, incorrect idle (to high), incorrect timing. In most cases its the carb
 

Saline Marina

Petty Officer 2nd Class
Joined
Sep 9, 2014
Messages
162
I would take off the external cover on the SX-M (I have similar 4W, 4.3GL, SX-M) and look at the shift linkage to make sure there isn't any lost motion. With the cable disconnected you should be able to shift the linkage at the sterndrive by hand into the fwd/neutral/rev positions.

Under that cover there's the brass pin which is tapped and can be adjusted to provide bias. I had the brass piece on the wrong side of the stainless piece originally when I first replaced the lower unit. My only clue was that I couldn't get the cotter pin into the brass piece. There's also a stainless steel washer that's part of that stack (brass piece, stainless bracket linkage part, ss washer, cotter pin). Once I flipped the brass piece 180 degrees it all went back together perfectly and shifts as normal.

I would also advise looking at the "keeper" which is a flat piece of ss with a U-shaped cutout in the end, which slides into the undercut groove in the cable housing. I had mine slip out on the first trip to the lake causing some shifting abnormalities but once reseated and retightened all was well.
 

Sparkinator

Chief Petty Officer
Joined
Aug 15, 2009
Messages
423
I would also advise looking at the "keeper" which is a flat piece of ss with a U-shaped cutout in the end, which slides into the undercut groove in the cable housing. I had mine slip out on the first trip to the lake causing some shifting abnormalities but once reseated and retightened all was well.

I’ve had this exact thing happen as well the shift cable would slide and only engage if it happened to catch on the keeper.
 

Antoniorocko

Cadet
Joined
Jul 21, 2019
Messages
7
So i have double checked the cable keeper and the brass nut/pin that attached to the shifting linkage, all appears correct. If I remove the cable I am able to shift it by hand fairly easily so i don't think the shift mechanism is failing or anything.

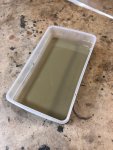
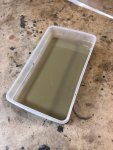
I decided the first step would be to drain the oil from the out drive. When I initially opened the top bolt that has the dip stick attached i immediately noticed a terrible burn smell. i looked at the color of the oil and it seemed very light which i found odd. i went to open the drain bolt and fill limit bolt, but they were both very much stuck in place. after fighting them for a while with an impact screwdriver and a liberal amount of pb blaster i was able to get them free. As i had feared oil is extremely milky and smells terrible, it is more viscous that i would expect but not excessively so (in my opinion anyways).
IMG_3506 (1).jpg
I know this means somehow water is (or at least has) got its way into the oil. At this time i do not know the source of the water leak. i know i need to perform a compression test, so does anyone have any recommendations on how to do this? I know to keep it below 10 psi, but would i just fit the rubber tip of the blower nozzle against the top port and apply air, while having someone look for bubbles/leaks?

Assuming that doesn't point me in a useful direction, my tentative plan is to find the most likely points of leaks, or all of them if it is reasonable, replace all of the seals, fill it back up and hope it doesn't strand me. I am unfortunately aware that my clutch is at high risk of being trashed. If this is the case, i just hope i can get it running well enough to get to winter where i can tear it down and replace everything that needs it.

i started to pull off the shift mechanism to take a look at the side of the cone clutch and gears, i noticed that it looks sealed up with some white rtv or something, so i have a sneaking suspicion that the previous owner knew a little more than he lead on. i hadnt seen how this was removed so i let it be for the night. I suppose it wouldn't be the true "used boat experience" if he was fully honest with me...

As if that isn't enough of an issue to contend with, can someone point me in the direction of a good resource to adjust my carb? the dieseling is a pretty small item compared to this water leak, but it is still something dogging me.

As always thanks for the advice.
 

Attachments

  • IMG_3506 (1).jpg
    IMG_3506 (1).jpg
    812.9 KB · Views: 1
  • IMG_3506 (1).jpg
    IMG_3506 (1).jpg
    812.9 KB · Views: 1

alldodge

Moderator
Staff member
Joined
Mar 8, 2009
Messages
43,177
Pressurizing the drive with 10 psi should show what is leaking. Many make an adapter to attach to the fitting, then use a bicycle pump to air up, but compressor is ok with a regulator adjusted Get the motor idling, then adjust the idle screws until the engine starts to run rough, then back out until it stops
 

Antoniorocko

Cadet
Joined
Jul 21, 2019
Messages
7
i pulled off the prop and i can smell the burnt oil on the thrust washer so i am pretty sure either the prop shaft seal or the O-ring on the bearing carrier, either way i ordered both as well as new o-rings for the oil fill screws. Volvo oil and a pump to fill from the bottom, so hopefully this puts it to bed.

i am still stuck at getting the bearing carrier out. To pull the bearing carrier you need a volvo specific tool, of course however i found a video of a homemade tool that i am going to try out tomorrow, link: https://www.youtube.com/watch?v=iSNEq14Yo2I
 

alldodge

Moderator
Staff member
Joined
Mar 8, 2009
Messages
43,177
I can see it being easy enough to make a tool like that, but also see the pipe and coupler would need to be welded, and might also need a nut on the end or side. When loosing the pipe is going to loosen unless a pipe wrench is used on the coupler only. Then how is torque measured on re-install
 

Antoniorocko

Cadet
Joined
Jul 21, 2019
Messages
7
@AllDodge I was actually able to get it off with the home made too. v actually just used the coupler and held it with a pipe wrench. You do have a good point about torquing it, however there is a retainer that holds the back of the bearing carrier. the retainer imprinted on the bearing carrier, so making the risky assumption it was installed correctly last time, i can set it back to that location. Otherwise I could always try to weld an old socket to the end if it, but i doubt the pot metal this coupler is made of would hold.

I was discouraged that the prop seal and the bearing carrier o-ring look pretty good. I have new ones coming in two days so I am just going to wait and put the new ones in, but I have less faith is this being the solution at this point. I am hoping that it was possibly one of o-rings on the oil drain/fill bolts, they looked extremely fatigued, so it is possible they are the cause.
 

Antoniorocko

Cadet
Joined
Jul 21, 2019
Messages
7
i replaced the prop shaft seal, it was actually in poor shape. along with the bearing carrier o-ring, the oil plug o-rings, the dip stick o-ring and the shift mechanism o-ring. i filled it back up with 75w-90 volvo gear oil and took it out this past weekend. It technically could shift but it took a little pumping on the shifter so it looks like the clutch is glazed over and needs to be replaced.
 

Antoniorocko

Cadet
Joined
Jul 21, 2019
Messages
7
So i followed the process outlined in the following awesome video series: https://www.youtube.com/watch?v=ev60BYaX5C0 and I was able to successfully replace the clutch and lap the gears. I took it out on the water the next day and all was well.

When I got home I checked the oil just to confirm i didn't have any leaks, well I do, the oil is milky again. what I found is the prop shaft has a good bit of play in it, I can move it in and out as well as side to side. hard to say how much but probably 1/8"+ in any direction. I loosened the set screw and the retainer in the lower unit and tried tightening the bearing carrier further, I was able to get it maybe 1/8th-1/4th of a turn tighter, but functionally it did nothing for the tightening up the prop shaft. I don't know the specified torque (if anyone does please share) but I was starting to put a lot of force down and became concerned about using any more. It is definitely seated past where it was when I initially disassembled it, but I of course have no idea if the previous guy tightened it up correctly.

I am wondering if removing the shim ring that the bearing carrier rests against would let the bearing carrier sit deeper into the lower unit holding the prop shaft sufficiently tight, but i don't know what other impact that could have. At this point I am getting no force on the taper bearing, so i know something isn't seating right. I am fairly certain I didn't cross thread the bearing carrier, it threaded in smoothly and I lubed the threads with gear oil before hand.

I think it is a long shot but does anyone think that the taper bearing could have moved backwards on the prop shaft? I imagine it rests against a shoulder on the shaft rendering that impossible, but I am really at a loss at the moment.

As always, any help is greatly appreciated.
 
Top