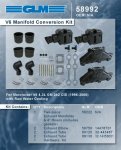
Re: 4.3L - 1 Piece Manifold conversion - Risers??
Ok conversion completed, engines started and run well.
due to really bad weather i had to complete the installation today. and was not able to run boat. thunder showers

Firstly I will say unless you are quite mechanically inclined dont go for this GLM brand. My brother and I had some "fun" sorting out a couple casting flaws, and clearing threads to install water inlet elbow and blanks. There is another company in california that I was told sell much better aftermarkets but i wanted mine in a hurry, and luckily we could handle these defects.
the installation is pretty straight forward, however due to the weight of the manifolds I decided to make a tool to make installation easier.

I took 2 6" X 3/8" bolts that have the same thread as the manifold bolts and cut off the heads leaving them about one inch longer than the manifold bolts. then I put two blades in my hacksaw together, to make a wider cut, and cut a slot across the cut edge of the bolts, so creating 3/8" screw head bolts"

ensure that you have the water inlet elbows in place and any blanking plugs that need to be installed before starting installation. :redface: If like mine, your engine is raw water cooled, you would most likely only need the elbow at the bottom, and all the other holes blanked out. (ensure that you have all the elbows facing the right direction, and install them to suit this.
after ensuring that the gasket face of the head was clean, i installed the two "screws bolts" into the outer holes in the head, running them in just hard hand tight. then i slid the gasket into place over them so that it lined up properly. Then i put the manifold in place over the bolts. then with the bolts supporting the weight in place, i install the 4 bolts in the free holes, just till they are securely in but not tight, next i remove the "screws bolts" the slot is to remove them with a screwdriver if they are tight to remove. some times they will be.
when the screw bolts are removed install the other 2 bolts and torque to speck, starting from the inside out.
next connect the hose to the water inlet on the manifold. if u have 2 engines, this makes work easier on the two outer most manifolds. does not make much difference in the center 2.
next i push the 4 " round bellows over the round end of the intermediate elbows, and installed 2 hose clamps in the groves on that side. (Note I did not remove my oval bellows from the Y piece when removing my manifolds, I just slackened the top 2 hose clamps and manifold bolts and lifted the manifolds out.) Then I rested the elbows oval end, into the oval belows, but did not tighten the clamps. next I pushed 2 hose clamps over the bellows, rested the riser on the manifold and slid it aft rocking it so it entered the round bellows and the elbow, until it reached the ridge in the bellows and lined up with the manifold. then i lifted the riser a little and slid the gasket between the riser and manifold, and then dropped in the bolts and tightened them up, to speck in a criss cross manner. ensuring that the gasket stayed properly in place while initially screwing in the bolts. When lining up the riser ensure that the bolts could be dropped in with the riser in place or you would have to drop them in and then position the riser. :redface:
Next tighten the remaining hose clamps in any order.
If your linkage is like mine, you would see that a screw and nut seem to line up with a raised point for a stud, I just removed the nut and the bolt goes straight into the raised point. the other two studs from the original manifold go back in the holes that they match.
note some kits come with 2 hose clamps for each bellows, get 2 more and ensure that each bellows has 4 hose clamps.
I think that is it basically any more questions just send me a message.
or i forgot, hook up water, test and enjoy your boat

Pernell No Fuss


