Checking coils. OMC Universal magneto

pro-crastinator

Chief Petty Officer
Joined
Dec 12, 2013
Messages
453
I watched all the videos and just want to share what I found.
One video specified that the ohm meter be set on the 1000 ohm resistance scale - which my meter does not have.

REgarding the SECONDARY windings - ground wire and spark plug wire spike.
What I got was as follows: 200 scale - no reading. 2000 scale - no reading. 20k scale - 5.74 and 5.79 from EACH of the two wires, one of which was the ground - (primary windings check out, its the secondary that was a sticking point for me)
Second coil gave a reading of 6.27 and 6.28 from each of the wires from the coil.

Please note that my coils do not have a green or black. They both look the same. One is ground and one is not.
Both show "the flow of electrons" so we can look to the "dual" numbers as verification of the primary winding.

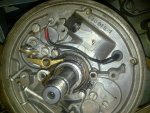
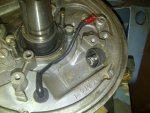
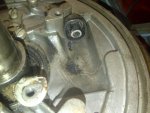
Burn Marks:
I am not alarmed but am more convinced that wire replacement is an imperative.
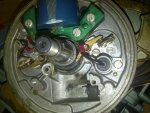
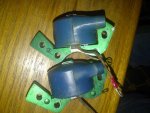
IMG-20131230-00289.jpgIMG-20131230-00290.jpgIMG-20131230-00291.jpgIMG-20131230-00292.jpg
 

racerone

Supreme Mariner
Joined
Dec 28, 2013
Messages
38,578
Re: Checking coils. OMC Universal magneto

The black marking on the magplate tells me that at one time a coil was shorted to the magplate.----Any pictures of the bottom of the coils ?-----Plug wires must be the metal core type.
 

pro-crastinator

Chief Petty Officer
Joined
Dec 12, 2013
Messages
453
Re: Checking coils. OMC Universal magneto

Carbon could have come from prior coils. These are not original.
 

pro-crastinator

Chief Petty Officer
Joined
Dec 12, 2013
Messages
453
Re: Checking coils. OMC Universal magneto

Was just now looking for plug wires. Iboats didnt have em. Any one know where to go to find em?

1956 Evinrude 30hp big twin
 

bonzoscott

Senior Chief Petty Officer
Joined
Jul 26, 2008
Messages
745
Re: Checking coils. OMC Universal magneto

Plug wire 7mm copper core, O'reileys Auto parts. Screw into coil with dielectric grease. Get proper "plug ends" at parts store. Slip boot over wire first. Crimp plug terminal on insulation with copper core bent over insulation.
 

pro-crastinator

Chief Petty Officer
Joined
Dec 12, 2013
Messages
453
Re: Checking coils. OMC Universal magneto

Just left Oreillys, Advance auto parts, Napa and 1 other. No copper core wires.
Talking with uninformed clerks?
 

pro-crastinator

Chief Petty Officer
Joined
Dec 12, 2013
Messages
453
Re: Checking coils. OMC Universal magneto

Thanks! called and wil pick em up tomorrow morning.
Pre - ciate it.
 

boobie

Supreme Mariner
Joined
Nov 5, 2009
Messages
20,826
Re: Checking coils. OMC Universal magneto

The only proper way to check a coil is to take it to a shop that has a coil load tester. Used them for years. You can check the ohm values, load them and check for spark leaks to ground.
 
Last edited:

HighTrim

Supreme Mariner
Joined
Jun 21, 2007
Messages
10,486
Re: Checking coils. OMC Universal magneto

Agree with Boobie. While checking the continuity of the primary and secondary windings will detect a complete break, it will not detect a trouble winding that is say partially broken, which will separate when heated up and fail. I have many Mercotronics and Stevens testers and they are really the only way to test a coil properly.

Some NAPAs will sell by the foot if they have an open box, but most now make you buy the 100' roll, which is how I buy my wire. You get it cheaper in 100' rolls. Need to do a lot of motors to buy that much though!

The good old dealer is often forgotten. They will have metallic core wire by the foot for sure.

Burn marks like that are often from improper installation of the coil onto the wire. Some guys are too lazy to remove the mag plate, feed the plug wire through, to be able to properly twist the coil onto the wire, then pull it back out. Trying to push the coil onto that 1" of wire protruding from the mag plate will end in disaster, and dropped cylinders.
 

boobie

Supreme Mariner
Joined
Nov 5, 2009
Messages
20,826
Re: Checking coils. OMC Universal magneto

Well said HighTrim about the improper installation. You don't know how many times I've see this.
 

pro-crastinator

Chief Petty Officer
Joined
Dec 12, 2013
Messages
453
Re: Checking coils. OMC Universal magneto

Regarding the Improper Installation concerns:
The new coils have a different sort of "spike" for the plug wire.
Its not a spike at all, but a threaded screw. The wire was fed thru the mag plate hole and the coil was screwed onto the wire until it bottomed out. Then, the coil was pushed into place - forcing the plug wire excess thru the mag plate hole.

I am declaring that (with the threaded spike coil) it is impossible to install or remove a coil WITHOUT removing the magneto plate.

note: got em from NAPA
 

jb93

Petty Officer 1st Class
Joined
Feb 21, 2008
Messages
267
Re: Checking coils. OMC Universal magneto

Regarding the Improper Installation concerns:
The new coils have a different sort of "spike" for the plug wire.
Its not a spike at all, but a threaded screw. The wire was fed thru the mag plate hole and the coil was screwed onto the wire until it bottomed out. Then, the coil was pushed into place - forcing the plug wire excess thru the mag plate hole.

I am declaring that (with the threaded spike coil) it is impossible to install or remove a coil WITHOUT removing the magneto plate.

note: got em from NAPA


If you take the coil off and loosen up the clamp holding the spark plug wires you can pull a little wire through the magneto plate - enough to probably be able to unscrew the coil w/o having to pull the mag plate. Not from experience, just thinking that you probably could. Good news is you won't have to worry with that for a decade(S).
 

Joe Reeves

Supreme Mariner
Joined
Feb 24, 2002
Messages
13,262
Re: Checking coils. OMC Universal magneto

I've found that thru the years that the continuity of the coils was more a deciding factor than the actual ohm reading of them. The following may be of some use to you.

- - - - -
(Magneto Capacitance Discharge Coils - Continuity Test))
(J. Reeves)

Check the continuity of the ignition coils. Remove the primary orange wire from whatever it's connected to. It may be connected to a powerpack screw type terminal, a rubber plug connector, or it may simply plug onto a small boss terminal of the coil itself.

Connect the black lead of a ohm meter to the spark plug boot terminal, then with the red ohm meter lead, touch the ground of the coil or the powerhead itself if the coil is still installed.

Then touch (still with the red lead) the orange wire if it's attached to the coil, or if it's not attached, touch the primary stud of the coil. You should get a reading on both touches (contacts). If not, check the spring terminal inside the rubber boots of the spark plug wire. Poor or no continuity of a coil is one reason for s/plug fouling.

- - - - -

(Replacing Regular Spark Plug Wires)
(J. Reeves)

If you also need the spark plug boots and the spring terminals that connect to the spark plugs, purchase them from your local dealership (OMC Part #581027). This includes one boot and one spring connector. Price is about $3.25ea.

Purchase whatever amount of spark plug wire you need. Be sure to purchase the kind that has a steel (or copper) twisted wire leading through the center of it....... not the carbon type plug wire that many automobiles now use.

Using your old plug wire, cut the new wire to a length about 3/4" to 1" longer. If you have no old plug wire, just make sure that the wire is longer than you'll need as you can trim the other end later.

The rubber boot, spark plug end.... With the wire cut to the length required, trim back 1/4" insulation again but do not solder tint the wires. Simply fan out the wires and fold them back against the insulation, cutting the excess off as explained above. Holding the spring wire terminal, estimate where the prong should be inserted so that the spring will be flush against the exposed wire. Hold the spring terminal away from the wires end (sideways) and insert the prong into the insulation and into the center wire, then swing the spring terminal in front of the exposed wire portion (makes a tight fit for continuity purposes). Spraying the inner portion of the boot where the wire will insert with a small amount of WD40 makes the installation of the wire a easy project.

Now, the other end that slides into the magneto coil... Look into the awaiting hole of the coil and you will see a somewhat threaded tapered prong. Double check to make sure that the wire is cut to the length required (better slightly longer than shorter), trim back 1/4" insulation again but do not solder tint the wires. Simply fan out the wires and fold them back against the insulation, cutting the excess off as explained above, then simply slide the wire into the coil so that the inner wire core of the wire is impaled by the tapered prong within the coil. That's it.... you're done.
 
Top