


After ripping off the deck and seeing how this boat was constructed, I'm really surprised at how shady it was built.
This is my first tear down and rebuild and I'm scratching my head wondering a few things and if you guys could throw out some ideas (pictures or a drawing) that would be greatly appreciated. Here are my questions with pics.
1. Deck support braces, they notched out the stringers and just layed in a 3/4 x 3" that just rest to the edge of the hull and supported the main deck on the boat. Would you do this again? Just seems really hard to glass the notch in the stringer? or to glass it all after?
1a. or notch the stringer and then glass the underside of the support and use PB (peanut butter) to glue it into the notch and then glass over?
1b. Make stringers out from the mains to the edge of the hull, maybe double up if this is to support two plywood deck seams
2. This boat has only 4 stringers 2 come off the gas tank area and go to the AFT other two from the top of the tank which forms the ski locker to the bow. Can the two off the back be glassed into the transom? Don't have a picture, the factory build stopped the stringer short and just put in foam. I was thinking of extending the bottom of the transom so I could tie in the stringers and save myself the extra void. Are there any structural issues doing it this way?
3.what is the general consensus to building new stringers. I was thinking of running string lines from bow to aft and across the width and measure down every 1' or every 4" when the shape changes quickly. then transfer these measurements to pink board. Is there an easier way?
4. Since this boat was built in 1995 and they only glassed 1/3 of the way up the stringer and it somehow made it to 2019. Would I get away with just using 1 layer of CSM on the top?
5. which brings me to my next question. Could I not get away with just PL the deck down without screws penetrating the main deck stringers?
6. While removing the Transom I noticed some really hard stuff at the top that feels like bondo, it's grey in color and looks like it's there to join the hull to the cap. What is this stuff? On the exterior they just used silicon.
7. last Pic is my current status. So sick of grinding! I'm almost done...is it absolutely necessary to grind back down to the original hull or is it okay to have most of it out? there are some areas I don't think that needs any crazy sanding, like where there is foam only and nowhere near any joints.
8. Last one. Ski Locker. The old one just has 3/4 ply strips glued and carpet wrapped all the way under the cleat. I was thinking of making a 3/4 frame (one piece) with a 45 bevel on to ease glassing and just glue it with PL and then glass over. What do you think.
Thanks all for reading and looking forward to some feedback.
Attachments
-
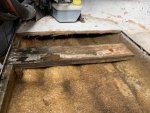 photo313404.jpg175.9 KB · Views: 3
 -
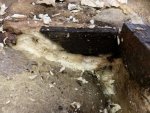 photo313405.jpg164.6 KB · Views: 3
 -
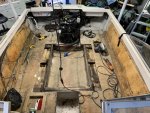 photo313406.jpg190.6 KB · Views: 3
 -
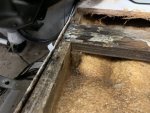 photo313407.jpg134.6 KB · Views: 3
 -
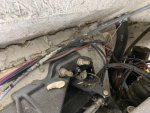 photo313408.jpg140.6 KB · Views: 3
 -
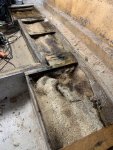 photo313409.jpg218.9 KB · Views: 3
 -
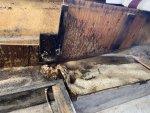 photo313410.jpg190.5 KB · Views: 3
 -
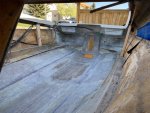 photo313413.jpg167.3 KB · Views: 3
 -
 photo313416.jpg18.2 KB · Views: 3

