Engine Alignment?

76SeaRay

Lieutenant Junior Grade
Joined
Aug 24, 2017
Messages
1,071
So, now that I have the engine bolted to the transom plate I am trying to align it. I haven't been able to get the alignment tool to slide all the way in. I watched a video where the guy used a 1 inch pipe to show what direction the engine needs to move. I don't have a pipe available right now but since I haven't reassembled the upper unit, I decided to see if I could use the driveshaft. Much to my surprise it slides right in and out all the way with the u joints right up to the gimbal bearing without any resistance at all. Why would the actual driveshaft slide all the way into the gimbal bearing and splines whereas the alignment tool won't engage the splines at all? I have used the alignment bar once before and was able to get it to slide into the splines but not this time.
 

achris

More fish than mountain goat
Joined
May 19, 2004
Messages
27,468
There's slightly more slop in the drive shaft than the alignment tool. But if you run like that, you'll chew up the coupler very quickly. You MUST get the alignment tool to slide all the way in smoothly and with very little resistance. Then you check the grease marks... Adjust accordingly.

One reason the alignment tool might be stopping is if there's an excess of grease inside the couple and the tool is 'hydraulicing' on it.

Chris.....
 

76SeaRay

Lieutenant Junior Grade
Joined
Aug 24, 2017
Messages
1,071
Thanks. For now I think it is close enough to figure out the clearances on the stringers at the flywheel housing and to set the landing pad of the front motor mount since I have adjustment of about 1/2 inch up or down in the motor mount itself. I will make sure when I put the engine in for the final time I get the tool to slide correctly.
 

tank1949

Lieutenant Commander
Joined
Apr 4, 2013
Messages
1,911
Thanks. For now I think it is close enough to figure out the clearances on the stringers at the flywheel housing and to set the landing pad of the front motor mount since I have adjustment of about 1/2 inch up or down in the motor mount itself. I will make sure when I put the engine in for the final time I get the tool to slide correctly.
Sometimes the gimbal bearing gets bumped (by accident) and out of alignment. This may cause unbelievable headaches.
 

76SeaRay

Lieutenant Junior Grade
Joined
Aug 24, 2017
Messages
1,071
I did the tap on all sides of the alignment bar to center the bearing recommendation but that didn't help.
 

tank1949

Lieutenant Commander
Joined
Apr 4, 2013
Messages
1,911
I did the tap on all sides of the alignment bar to center the bearing recommendation but that didn't help.
I installed 2 stroker motors inside an 86 SR AJ. My first one took forever to align because we kept screwing up. Nothing aligned! Installing motor, my VERY good friend was in the bilge area, as I lowered motor, and could NOT see that when I was lowering motor, he kept bumping the spring/washer off, via block hitting plate, before I had completely lowered motor onto inner plate. He was really nervous (I don't blame him) as I lowered 6-7 hundred pounds of iron very near him. We finally saw the leather washer and spring in the bilge area and realized our error. The second motor was a breeze! Good luck!
 

76SeaRay

Lieutenant Junior Grade
Joined
Aug 24, 2017
Messages
1,071
I saw a video where a guy used masking tape to hold them in place. In my case, I will be doing the final install with nothing in the boat so I have lots of room to make sure the parts stay in place during assembly. At least I got it close enough to find out I do need to notch my new stringers near the starter and flywheel housing to give more clearance.
 

tank1949

Lieutenant Commander
Joined
Apr 4, 2013
Messages
1,911
I saw a video where a guy used masking tape to hold them in place. In my case, I will be doing the final install with nothing in the boat so I have lots of room to make sure the parts stay in place during assembly. At least I got it close enough to find out I do need to notch my new stringers near the starter and flywheel housing to give more clearance.
Make sure that you seal any wood exposure.
 

76SeaRay

Lieutenant Junior Grade
Joined
Aug 24, 2017
Messages
1,071
Yeah, no problem. I haven't put the deck on yet and still need to fiberglass tops of the stringers. That's why I test fitted the engine again cause I thought I would have to modify them from the factory design. Factory install was an OMC Windsor 351 and my repower is a GM 5.7L Vortec.
 

tank1949

Lieutenant Commander
Joined
Apr 4, 2013
Messages
1,911
Yeah, no problem. I haven't put the deck on yet and still need to fiberglass tops of the stringers. That's why I test fitted the engine again cause I thought I would have to modify them from the factory design. Factory install was an OMC Windsor 351 and my repower is a GM 5.7L Vortec.
OMC?????
 

76SeaRay

Lieutenant Junior Grade
Joined
Aug 24, 2017
Messages
1,071
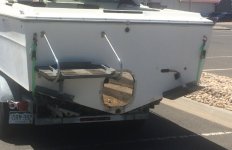
Yup, originally it was an OMC stringer drive with the Windsor 351. I am converting the boat to Alpha One and the 5.7L. Transom is done and stringers are new from the transom to just forward of amidships. Old versus New Transom Pics.

Old Transom.jpg

New Transom.jpg
 
Last edited:

76SeaRay

Lieutenant Junior Grade
Joined
Aug 24, 2017
Messages
1,071
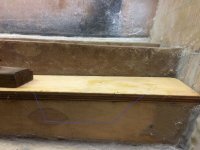
Although not directly an alignment issue but I only have about 1/4 inch clearance between the stringer and the edge of the flywheel housing. So, I am thinking about putting a notch into the stringer so I have better clearance and enough room to change the starter without pulling the engine. Stringers are 3/4 inch marine plywood. If I did this on the port side also, I would have more room to get at the oil drain plug if needed. Any thoughts on this kind of a notch?

Clearance Notch.jpg
 

Searay205

Chief Petty Officer
Joined
May 27, 2018
Messages
468
Aligning with alignment tool real PIA, lol. When you get it close its 1/2 to 1 turn of the adjusting nuts between having the tool slide in smoothly and not at all. If you are aligning a V engine make sure both sides are adjusted identically. Some put grease on the alignment tool. where the grease is wiped clean you go the opposite direction. It was really back asswards to me so after 4 hrs finally got it I feel by luck...

good news is that was 4 years ago and last time I checked it the alignment was still perfect
 

achris

More fish than mountain goat
Joined
May 19, 2004
Messages
27,468
It's about understanding the geometry of the coupler with respect to the rear mounting points and side mounts.

Because the coupler splines are behind the rear mounting points, lifting the front of the engine will LOWER the coupler. Once you get that in your head, it's a really simple adjustment. It takes me no more than 15 minutes to adjust an engine from first insertion of the alignment bar.

1633496989305.png

If more grease is wiped from the bottom of the bar (than the top), the coupler is too tight at the bottom, and need to move DOWN, so RAISE the front of the engine... Easy peasy. :)

Chris.........
 

Scott06

Admiral
Joined
Apr 20, 2014
Messages
6,782
Although not directly an alignment issue but I only have about 1/4 inch clearance between the stringer and the edge of the flywheel housing. So, I am thinking about putting a notch into the stringer so I have better clearance and enough room to change the starter without pulling the engine. Stringers are 3/4 inch marine plywood. If I did this on the port side also, I would have more room to get at the oil drain plug if needed. Any thoughts on this kind of a notch?

View attachment 350894
I think that stringer design is a hold over from having an OMC stringer engine. Newer transom mount enignes like yo are putting in only have a block of wood or built up ply wood tp the left of the area whwer y are thinking of making a notch. I would remove the stringer aft of wher you want the notch for clearance not only for flywheel housing but starter access and room to get your hydraulic lines into the transom housing.

As for the oil drain I would strongly reccomend one of the remote tubes like this https://www.michiganmotorz.com/oil-drain-kit-chevy-metric-1996-current

I hook my vacum extractor up to it and completely sucks dry.
Also If I had to do it over I'd invest in a remote oil filter set up as well. Would have been real easy when I had the engine out and worth the money
 

76SeaRay

Lieutenant Junior Grade
Joined
Aug 24, 2017
Messages
1,071
Hmmm, by hydraulic lines, I assume you mean the trim cylinder lines. I guess I need to look at the diagrams and pictures again as I hadn't thought about those. Thanks for the link to the oil drain line. Much easier to go with that. I will likely go to a remote oil filter once I get the engine installed for the final time. It would have to mount to the transom as my closed cooling system hoses prevent mounting it in front of the port elbow.
 

flashback

Captain
Joined
Jun 28, 2002
Messages
3,988
Just a thought, you may want to mic the alignment tool, according to some threads I have read, they can be out of spec from the manufacturer.

I put an oil drain hose on my last boat and loved it.
 

76SeaRay

Lieutenant Junior Grade
Joined
Aug 24, 2017
Messages
1,071
I did have it aligned enough for the alignment bar to slide easily in and out of the coupler on a previous test fit so I think it has the correct diameter. I have my front mounts adjusted to mid travel. Once I get the clearance issues resolved I will test fit one more time to set the correct height of the stringer wood/fiberglass motor mount with the adjustable engine motor mount set in the middle of its adjustment.
 

tank1949

Lieutenant Commander
Joined
Apr 4, 2013
Messages
1,911
I did have it aligned enough for the alignment bar to slide easily in and out of the coupler on a previous test fit so I think it has the correct diameter. I have my front mounts adjusted to mid travel. Once I get the clearance issues resolved I will test fit one more time to set the correct height of the stringer wood/fiberglass motor mount with the adjustable engine motor mount set in the middle of its adjustment.
It is important that the transom thickness be within specs. and parallel. Example: One side can't be 1.5 inches thick at top and 1" at bottom. I believe that tolerances are +- 1/16" but I may be incorrect. You can consult the Adults section and you may be able to find exact tolerances. LOL
 

76SeaRay

Lieutenant Junior Grade
Joined
Aug 24, 2017
Messages
1,071
The transom was replaced. Two laminated layers of 3/4 inch marine plywood and measures out at 2 inches flat across inside and out.
 
Top