Engine wont turn over or budge. Stator debris

karayj

Chief Petty Officer
Joined
Aug 4, 2002
Messages
468
photo330081.jpg Last year when I was winterizing the engine, I was hearing a clicking noise and I also saw fragments or pieces of plastic flying from the main pulley aka stator. I knew something was up but I kept on going with the winterizing saying I would deal with that later I shut the engine off and stored it. Last week i went to start the engine and it wouldn't budge.
Now I know the battery is very strong so i had some suspicions after doing some research that may be the stator that was causing clicking noise and the pieces of plastic flying out right before the wintertime.
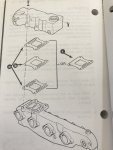
My question to you is I want to pull the main crankshaft pulley off but I need to know what thread size bolts those are to put a wheel puller on ,there are 3 holes for bolts for the puller also has anyone ever experienced this situation I went into complete panic mode thinking the engine was seized removing the spark plugs and checking the engine oil which was not white. I'm praying and hoping that all it was is the stator collapsing falling apart while it was cold and jamming up against the engine block once I remove the pulley remove the shrapnel it should spend and start no problem. By the way i should also mention that I do have the alternator conversion kit so I really don't need a stator.
 

Attachments

  • startor 3 (2).jpg
    startor 3 (2).jpg
    1.4 MB · Views: 0
Last edited:

alldodge

Moderator
Staff member
Joined
Mar 8, 2009
Messages
42,756
Stator debris on a Merc, would this happen to be a 470?

As we always want to know if its a chain saw or weedeater
 

karayj

Chief Petty Officer
Joined
Aug 4, 2002
Messages
468
I'm sorry I forgot to mention that the boat was a 1989 regal 18.5 mercruiser 470 engine I'm almost positive 3.7 Ltr
 
Last edited:

karayj

Chief Petty Officer
Joined
Aug 4, 2002
Messages
468
I need the bolt thread size I should get for the puller. I have added pictures. The wheel puller kit did not have the correct bolts that for the pulley
 

Bt Doctur

Supreme Mariner
Joined
Aug 29, 2004
Messages
19,369
3/8 x 16 coarse or 3/8 x 24 fine but the puller you use has to have a cone shaped end to protect the crank if you dont have this type use the cramk bolt to push on
Considering the motor is FWC, all you had to do was drain the HX. That would not prevent you from turning the motor over unless water entered a cylinder from a leaky elbow
 

karayj

Chief Petty Officer
Joined
Aug 4, 2002
Messages
468
I What does FWC Mean and what is HX? I am sure the stator failing and braking apart has locked up the pulley
 

Bt Doctur

Supreme Mariner
Joined
Aug 29, 2004
Messages
19,369
that engine is fresh water cooled, uses regular auto type A/F, all you drain is the heat exchanger, that tube on the low port side contains the A/F and the salt water/lake water/river water . You have a stator type charging system with magnets glued to the inside of the front pully. That most likely what your seeing
 

karayj

Chief Petty Officer
Joined
Aug 4, 2002
Messages
468
That is correct and I think when I was winterizing it some of those magnets came loose fell apart when I shut the engine off they somehow got stuck inside the pulley and the engine block and I’ve got a pull the pulley off take out all the debris put everything back and I should be OK. Thank you for all your help. I’m wondering if this has something to do with the engine running terribly during the winterizing it felt as if it was only running on three cylinders but actually for I will update this tomorrow thank you
 

karayj

Chief Petty Officer
Joined
Aug 4, 2002
Messages
468
Well get ready for a fun update. First I want to thank everyone for your input I was able with a wheel pulley to take the stator apart what an ugly mess took a lot of work but the pulley finally came off I took the old stator off and put the pulley on.
Now I decided with all the plugs out just to give the engine's spin without any compression and as I feared any freeze shot out of cylinders too three and four And I was worried about that because I notice the antifreeze level being down a little bit.

The oil is not creamy white so I need help with any advice on installing a head gasket. Years ago I owned a seasprite it was a 4.3 liter engine an I replaced the cylinder head simple job not that hard for me. i used to be a car mechanic when I younger, recently I replaced the intake manifold on two of my Mercedes.
If anybody could help me with some tips and tricks that would be greatly appreciated I'm about to start the teardown process

I heard some stories that if you remove the intake manifold you don't have to take the exhaust manifold or is it vice versa um any information would be very very helpful it's a 3.7 merc.
One other question I have is there's another gasket that is between the exhaust manifold and where you add antifreeze I forgot what that part is called i had purchased a gasket already and it was the wrong type if anybody could point me out to the right direction on that that would be great too.
 
Last edited:

tank1949

Lieutenant Commander
Joined
Apr 4, 2013
Messages
1,911
Well get ready for a fun update. First I want to thank everyone for your input I was able with a wheel pulley to take the stator apart what an ugly mess took a lot of work but the pulley finally came off I took the old stator off and put the pulley on.
Now I decided with all the plugs out just to give the engine's spin without any compression and as I feared any freeze shot out of cylinders too three and four And I was worried about that because I notice the antifreeze level being down a little bit.

The oil is not creamy white so I need help with any advice on installing a head gasket. Years ago I owned a seasprite it was a 4.3 liter engine an I replaced the cylinder head simple job not that hard for me. i used to be a car mechanic when I younger, recently I replaced the intake manifold on two of my Mercedes.
If anybody could help me with some tips and tricks that would be greatly appreciated I'm about to start the teardown process

I heard some stories that if you remove the intake manifold you don't have to take the exhaust manifold or is it vice versa um any information would be very very helpful it's a 3.7 merc.
One other question I have is there's another gasket that is between the exhaust manifold and where you add antifreeze I forgot what that part is called i had purchased a gasket already and it was the wrong type if anybody could point me out to the right direction on that that would be great too.

If my memory serves me correctly, I think that there is an external alternator kit for that 470 motor. Back in the day, I had friends who loved to cheap blue water fish using a pair of them in Sea Rays. Excellent on fuel but some how salt water spray or leaks got into alternators eventually. It also seems to me that the 470 transom/bellhousing will fit any Chevy v6/8. 470s may be getting difficult to get parts for, while 4.3 parts are everywhere. If you plan on keeping boat, I'd consider changing motors. Good luck!
 

karayj

Chief Petty Officer
Joined
Aug 4, 2002
Messages
468
I already have the external alternator kit. My new task is head gasket. What gasket kit is best sierra or has to be merc ? and tips and tricks on removing the head gasket. What order intake 1st than exhaust ? any tips ..should I send out the head to get machined of is that not necessary.
 

nola mike

Vice Admiral
Joined
Apr 22, 2009
Messages
5,486
The gasket between the exhaust mani and the coolant reservoir is a common source of leaks. Pressure test the coolant system and see if you can pinpoint the leak. the manual has a good section on properly troubleshooting the HG.
 

karayj

Chief Petty Officer
Joined
Aug 4, 2002
Messages
468
So it looks to be that last year I was inspecting a gasket For the exhaust elbow manifold connection. I did not have the proper gasket so I just put it back together again and tighten the bolts I know this is a big nono. Recently while repairing the stator and moving the engine back and forth i notice some antifreeze being low in elbow.

I started to panic thinking what if that gasket failed well when I cleared out the stator and spun the engine antifreeze shot out of the spark plug holes cylinder three and four I assumed it was a head gasket but now I'm thinking that that gasket on the elbow failed causing antifreeze to leak into the cylinders and I'm doing this head gasket for nothing.

So I need help on torque specifications on the head gaskets and the exhaust manifold and on the lifters if anybody can give me the torqueing specs on those items that would be great head gasket bolts lifters exhaust manifold.
 

karayj

Chief Petty Officer
Joined
Aug 4, 2002
Messages
468
Hey guys I’m almost done rebuilding my head gasket and I’m putting things together and I noticed a picture of my manual and it looks as if I have to put two gaskets instead of just one and this is very confusing I’ve never heard of such a thing am I wrong is it one gasket or two I will put a picture on the post. I would also like to add is this true because I found out the hard way whenI took this apart by not draining the reservoir fully it allowed water to go onto my exhaust and in my cylinder heads. The elbow reservoir it should be drained before removing.
 

Attachments

  • photo330757.jpg
    photo330757.jpg
    2.2 MB · Views: 0

nola mike

Vice Admiral
Joined
Apr 22, 2009
Messages
5,486
A/b OR C in that diagram. Old style had 3 piece gasket, new ones are just the single. Make sure you're using a graphite shiny gasket and not the green paper if you don't want to do this again soon.
 

karayj

Chief Petty Officer
Joined
Aug 4, 2002
Messages
468
Thank you so much for replying to me yes I read about that green gasket is terrible I put the single gasket and I put it in the correct direction now it’s time to fill the boat up with any freeze started up and pray
 

karayj

Chief Petty Officer
Joined
Aug 4, 2002
Messages
468
First of all I'd like to say thank you to everyone that helped me out in this thread. well the update is after tightening everything up and figuring out that the points had to be cleaned from sitting over the winter the boat started right up after I poured some gasoline into the carburetor.
So the best part of this whole deal was that I was able to go through the entire engine you see I purchased this boat last year in the fall and was only able to take it on the Lake one time which it stalled and I had to paddle back in. When i went to store it the stator started going on me I continued winterizing and said I deal with it in the spring. Well this is where this story began after taking the stator off I pulled all the plugs out and saw antifreeze shoot out of cylinders three and four so I decided time to do a head gasket mud as well since these engines are famous for having problems.

After I did the head gaskets I investigated filters such as the filter in the fuel pump that looked like it was probably the original one that came with the boat the fuel filter inside the carburetor which was also terrible. After seeing this it probably explains why I stalled on the Lake last year and it started up the next day fine one more thing I found out during this head gasket replacement and stator repair was that the engine running rough was due to a cracked spark plug on cylinder 1.

So the one lesson I learned is whenever you buy a boat go through the whole thing as if it's been sitting for 10 years because I'm telling you from what I saw in the filters this bowl was sitting minimum eight years.
When I ran the boat today for about 10 minutes it was amazing to see how much power and how smooth it is compared to last year so $150 in parts 150.00 to mill the head was well worth it .
 

karayj

Chief Petty Officer
Joined
Aug 4, 2002
Messages
468
Well I’m finally done the boat started after having to pour some gasoline into the carburetor it ran a little rough for about 20 seconds and then straightened out and was it beautiful what a perfectly running engine. What’s interesting is that I didn’t mention this last year was we stalled on the lake and when I did this top end rebuild I looked at the fuel systems band screen in the carburetor all kinds of crud and dust.
The filter in the fuel pump had to have been the original and I’m not joking I’ve never seen a fuel filter look like this there was a 5/16 of an inch of crud in the bowl itself. I put an in-line fuel filter I put a filter in the fuel pump and I clean the screen in the carburetor so I can’t see why I would ever stall again from a fuel problem on the lake
The stator area is nice and clean and the best part is I change the head gasket so I don’t have to worry about that for a few years. The end result and lesson learned is when you’re buying a boat that’s been sitting around for three or four years change all the top and gaskets thermostat all the fuel filters car plug wires points it’ll be worth it
 

karayj

Chief Petty Officer
Joined
Aug 4, 2002
Messages
468
First of all I'd like to say thank you to everyone that helped me out in this thread. I am going to be starting a new thread for my out drive.
I have a new problem last year I changed my impeller and after I put everything back together again there's some type of brass shaft it's more like a shifting rod that lines up with this silver thing sorry for the improper verbiage of items but it seems to be short about 1/2 an inch if I pick up the brass thing then it lines up perfectly why is it that the brass piece is not high enough to catch this silver bracket that is probably connected to the shifter cable what did I do wrong when changing the impeller
 
Last edited:
Top