Help modifying older trim setup

absentx

Cadet
Joined
Apr 17, 2013
Messages
17
Hello!

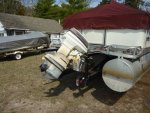
We have a beautiful 1988 TMC that is 29 feet long and we love it. The only problem is the trim on the 1988 Johnson is completely trashed. Engine model number is J50TLCCS. So what we did is buy one of the CMC aftermarket trim units and we are going to mount the engine to that. There are a few things I want to accomplish when installing the trim:

1. Remove all old trim parts. In doing this I think I would have to fashion something from keeping the engine from shooting up when we go in reverse because obviously the new CMC unit doesn't have any bearing on that...but I hate the idea of keeping broken trim pistons and extra weight on the engine just to keep it from swinging up in reverse...we can figure something out for that.

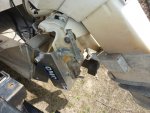
2. In the attached picture, has anyone ever seen that weird metal piece that I have pointed out with the arrows? The boat manufacturer says they didn't put it there...is the only purpose of that to protect the now broken trim motor from water? If it serves no other purpose then I really want to do some reworking to that and take it off with the angle grinder!

If anyone could have a look at the attached picture and just give me some thoughts or if you have dealt with a similar setup that would be great!
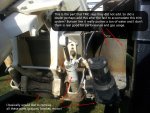
trim_questions.jpg
 

mpilot

Seaman
Joined
Feb 1, 2010
Messages
65
Re: Help modifying older trim setup

First I want to say that I am running on the assumption that the white thing on the side is the cylinder and the thing on the right is the hydraulic trim cylinder, solenoids, etc. With that in mind why not do the trim motor remote similar to what is on a I/O motor? You could put it under the seat or whatever is right at the back and run hydraulic lines. Any good hydraulic shop should be able to help with the hoses. Then you could get any hydraulic cylinder of the right length (again a hydraulic shop can help or Northern Tools, etc) or have that one rebuilt which is pretty easy for a hydraulic guy. To me that would keep the current functionality but with new/rebuilt components. Just a thought on what I would do but that's just me.
 

absentx

Cadet
Joined
Apr 17, 2013
Messages
17
Re: Help modifying older trim setup

Yes the white thing is one of two cylinders, you can see there is another one on the other side. You will also notice that the cylinder on the right side of the motor is not connected to the motor. That is because a stainless steel bolt is broken off in the bracket. I have ruined so many drill bits trying to get it out and get the hole re tapped that I am simply done with it. The black part is the hydraulic trim cylinder.

We initially played around with the idea of mounting it remotely but with the other broken parts and when the actual hydraulic unit quit working, we decided to completely abandon trying to rebuild this trim system. A few dealers I have talked to said it was a poorly designed system that always has the same problem and is impossible to get parts for etc.

SO, fixing the current trim is no longer an option, we have the CMC unit and it is going on come hell or high water, I just need to figure out if my other modifications are a good idea.

trim.jpg
 

mpilot

Seaman
Joined
Feb 1, 2010
Messages
65
Re: Help modifying older trim setup

I wasn't sure what a cmc setup was but I read up on it really quick. The best I can tell is that your motor will be like my old Johnson that would kick up a little in reverse. The "good" news is that the motor won't kick up unless you give it a good bit of throttle and when you put it in back in neutral it will go down fairly quickly. The other good news is that, God forbid, you hit something while underway the motor will kick up instead of sheering off something. The bad news with that is that a Law Enforcement guy here that didn't know the lake almost died in a center console when the motor ended up in the boat with him when the motor kicked up. You shouldn't have that problem cause I doubt your toon will run that fast.

Is there a way you can drill a couple of holes and put that pin through it instead of the motor just resting on it. As for the Stainless Screw you were removing a Left hand drill bit, an extractor set, a torch, and PB Blast would have gotten it out for sure. Haven't found something yet those four won't take care of. If there is a way to attach it you can also get Stainless bars to replace that piston to hold the motor down. I know a guy that has a houseboat and put a static stainless rod where his trim piston was to lock the motors in a down position.
 

belairbrian

Petty Officer 1st Class
Joined
Aug 21, 2009
Messages
360
Re: Help modifying older trim setup

I looked at the CMC system for my 89 Johnson and IIRC it takes care of providing release if the lower unit hits something submerged ( Your tilt cylinders allow this now). So the only remaining issue is securing the motor once you remove the old tilt/trim system.

One possibility is installing the tilt assist cylinder OMC used for motors without power trim OMC part number 0172908. But a new one of those will run you at least $400 with mounting hardware. Odds are there ar esome used ones around from power trim conversions.

When I boughtmy CC with the Johnson the PO had removed the tilt assist but did not install power tilt/trim. Instead he put a wood block between the motor and the transom to set a permanent trim angle. Then secured the swivel bracket with some heavy duty zip ties. Sounds pretty cheesy but it did work. IT did all three things it needed to do. Kept the motor trimmed (fixed position) prevented kick up in reverse and allowed for break away if needed.

Not advocating a wood block and tie straps but mention it to give an idea of what you need to do.

Looking at your motor, I would:

1) remove old system entirely

2) Mount engine on CMC bracket

3) Set the thrust rod to the Zero tilt holes

4) install a strap probably aluminum over the swivel bracket securing it in two of the unused thrust rod holes with stainless hardware.
 

RRitt

Captain
Joined
Mar 30, 2006
Messages
3,319
Re: Help modifying older trim setup

why don't you just spring the $20-$30 for cylinder rebuild kit? you could probably even rebuild them while they are still on boat. The trim motor looks fairly new. If it's the pump then check ebay. You can get them rebuilt for under $100. I guess I'm just super lazy. Last time I took an engine off my boat, it turned out to be a major effort.
 

belairbrian

Petty Officer 1st Class
Joined
Aug 21, 2009
Messages
360
Re: Help modifying older trim setup

why don't you just spring the $20-$30 for cylinder rebuild kit? you could probably even rebuild them while they are still on boat. The trim motor looks fairly new. If it's the pump then check ebay. You can get them rebuilt for under $100. I guess I'm just super lazy. Last time I took an engine off my boat, it turned out to be a major effort.

Not a bad course but I think the OP is past that pont. Already has the CMC bracket and a broke of cyliner mount bolt.
 

absentx

Cadet
Joined
Apr 17, 2013
Messages
17
Re: Help modifying older trim setup

Yeah frankly I have just spent so much time and effort on the current system already that myself and the four other owners decided to just move on. See that is the other part too, myself and three friends own this and it stays at a vacation property we own which is an hour and a half away and kind of in the middle of nowhere...so the best strategy is to gather all the parts and tools we need while at home and take them there. Plus the boat is thirty feet long and an absolute bear to trailer around so we don't want to move it anymore than we have to. And yes, the CMC trim is bought and paid for and that is the method.

The other problem is if you look in the first picture, the trim motor is broken off the engine mount and just dangling there...so reworking hydraulic lines and taking pumps and cylidners to hydraulic shops that are non existent where this boat is..well, that's a lot of hassle.

Additionally, the cylinders (the two white parts) are just fine...the actuator is dead and not doing anything...but again, this is all for not. Its getting taken off the boat.

Re Mpilot: I already have broken off one cobalt left handed drill bit in the stainless steel screw...so any suggestions on getting it out with that in there now greatly appreciated. Needless to say I found it nearly impossible to drill into a stainless steel screw with a cobalt drill bit broken off in it.

Re belairbrian: Yeah that is basically what we are looking at, although I am going to see if I can use the bracket that received the trim cylinders to secure something to so we can keep the engine in place in reverse, but we may revert to zip ties if necessary!

I am curious if anyone has seen the wierd metal deflector thing seen in the first picture though. I cannot describe the drag that thing creates on the boat at speed. I mean we basically don't go full throttle because it pushes so much water up in the back at that part.
 

ONaPONTOON

Recruit
Joined
Apr 17, 2013
Messages
1
Re: Help modifying older trim setup

It appears that that piece infrom of the motor is to protect it from splashes. Should not be an issue to remove it all .
 

absentx

Cadet
Joined
Apr 17, 2013
Messages
17
Re: Help modifying older trim setup

I agree. It also makes trailering the boat really hard because there is very little clearence between that piece and one of the beams of the trailer. As long as there doesn't appear to be any super important purpose to it when I get up there and have a closer look, it is getting removed in the cleanest way possible.
 

absentx

Cadet
Joined
Apr 17, 2013
Messages
17
Re: Help modifying older trim setup

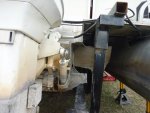
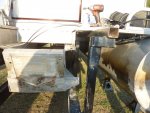
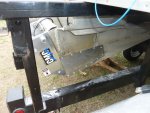
Well, all I can say is the modification/removal of the old trim system went fantastic. We were able to completely refab the transom modification, completely remove the old trim parts and install the new trim system. Plus some angle iron and a jam bracket to prevent any issues when we go in reverse.

Absolutely can't wait to see how much better this boat performs without a big stupid metal flap protruding out from the transom anymore and with working trim!

before_1.jpgbefore_2.jpgafter_1.jpgafter_3.jpgafter_2.jpg
 
Top