wildk
Cadet
- Joined
- Mar 5, 2020
- Messages
- 18
Hi everyone, so I am having more overheating problems with my boat. Sorry for the long post, but I would like to give as much detail as possible.
----------------Here's the background info about the boat/motor.-----------------------------
I have a 1997 Eastern downeast "lobster style" boat. The boat has a 2004 Merc 383 scorpion raw water cooled engine that I installed last year, keeping the 1997 Bravo 2 drive that was original to the boat. In 2018, the outdrive was serviced by the previous owner, replacing bellows, gimbal bearing, and all seals. From what I can tell, the drive is in great condition for a salt water boat. The motor has <100 hours on it since new, read by the ECU on the motor. Before installing the motor, I inspected the manifolds/risers for signs of deterioration, and they were fine. I also installed new exhaust flappers. The motor had never been used in salt water before I installed it.
This spring, I replaced the water pump impeller and housing as preventative maintenance, as the brass housing was rough and corroded. The old water pump sometimes had trouble priming itself when first started. Just launched the boat this weekend, and the pump primes itself great, but I am now having high-RPM overheating problems. I have done research into the symptoms, and I think it's a commonly described "Bravoitis" problem, but I am seeking other opinions before I haul the boat out to fix (no trailer so this costs me money)
-------------------------------------Here's the symptoms.-----------------------------------------------
Boat runs/cools great up to about 2000-2500RPM as measured by Tach on boat. It can idle/slow cruise all day without overheating. Increasing throttle past that point, and the temperature starts to rise. Once the temperature starts rising, the exhaust manifolds get hot, indicating no/limited water flow from the raw water pump.
Once overheating starts, bringing the boat back to idle will slowly cool the motor down - over a period of 5-10 minutes, but turning off the motor and starting it again will cool the motor very rapidly, in a matter of 15-30 seconds, returning the manifolds to cool to the touch.
I checked the thermostat, just in case, and it was not corroded, and seemed to be open at high temperatures. I didn't expect this to be the problem, but it is easy to check.
-------------------------------Here's What I did to test and diagnose------------------------------
I then pulled the hoses from the water pump to try to observe the flow of water. I first pulled the hose that goes from the pump to the engine. The pump has good flow at idle, but increasing the motor RPM does not increase the flow rate of the pump. If anything, the flow decreases as RPM increases. I would describe the flow as "less than a garden hose" at any rpm.
I then pulled the water inlet hose from the back of the pump and attached a spare hose to the end of it, routed over the stern and straight into the water, bypassing the water inlet on the outdrive. I still had the water pump outlet hose off the motor to observe the flow. Big difference this time. as RPM increased, the flow increased, to a point where it was probably flowing 10x what it was while drawing water through the outdrive. I would describe the flow as a "Fire Hose". I also inspected the hose that goes from the transom fitting to the raw water pump for obstructions and found none. I tried flushing the drive backwards with the dock water supply while the boat was still in the water, and the drive didn't appear to obstruct the flow of water excessively, although the raw water pump can move substantially more water than the dock water supply. With the outdrive water inlet bypassed, the motor was able to run high RPM without overheating.
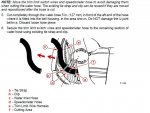
It seems like my new, better flowing raw water pump is collapsing the water inlet hose in the outdrive, or it is full of obstructions, and these are symptoms of the "bravoitis" problem. A little research makes it seem that this kit is what is used to repair this issue:
https://store8666.americommerce.com/...epair-kit.aspx
I just don't have a good feel for what I have to do with this kit once I have the boat out of the water. Is there anything else I should check for or replace while the boat is out? Anything I can do first, without hauling the boat out? Either to fix it, or to confirm the diagnosis? I was also going to replace the seals between the outdrive and bell housing, in case there is any air leak there. Should I skip this kit alltogether and install a through hull water pickup? I don't like the thought of cutting additional holes in the boat. If you made it this far, thanks for reading!


