OMC Cobra freshen up

Don't Panic!

Seaman
Joined
Oct 3, 2019
Messages
57
Hi all,

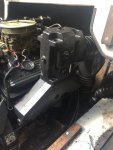
I've done a ton of reading here and elsewhere, and feel ready to dive in to this 18' SeaRay Seville bowrider with an OMC 4.3 Cobra. I'm not sure of the year, but it's around 1987 +/- a year. With 380 hrs on it and presumably stored dry, it looks to be in great shape. No damage to the interior, no soft spots, ski locker is dry and clean. I am gathering that most of these era SeaRay's are rotten messes, I'm hoping I've got the exception lol.

I don't have a ton of history on it, but the fuel separator and oil filter are marked 2018, and the distributor cap 2001 (sharpie on the sides of all). Still has points ignition :eek:. It seems to run very well.

Here is my plan of attack:
- replace all rubber fuel and coolant lines (I see visible cracking on the fuel tank vent line)
- new cap/rotor/points/condenser
- replace belts
- change oil and filter
- pull batwings (yes it still has them, and I assume they are the originals) and do acetone test.
- pull outdrive and inspect bellows/o-rings.
- replace waterpump in outdrive
- separate lower unit and check shifter height
- set shift cable adjustment (already ordered the tools for that)
- inspect everything, replace as needed, and reassemble.

I know I'll need an alignment tool to check/set alignment of the outdrive, but I am going to wait on ordering that to see if I need a gimble bearing and bellows too. I figure I'll do all disassembly then order everything at once. Except the shift cable adjustment tool, that I ordered already cause I got a little excited. :D

I got it in my garage (no small feat!) and plan to dive in tomorrow.
 

Lou C

Supreme Mariner
Joined
Nov 10, 2002
Messages
13,063
Sounds like you got a good list there, to which I'd add, carefully inspect the drive shaft bellows, even if there is no water in there, if you see small cracks starting in the folds, it may be wise to replace it.
If you are going to adjust the transom shift cable pick up a fish scale so you can measure the cable drag (should be less than 2.5 lbs). If the cable moves smoothly with low drag and the casing is not cracked where it goes into the pivot housing you don't have to replace it.

When you have the drive off, check the shifter bell crank in the pivot housing, make sure it moves easily back and forth, if the drive to pivot housing gasket leaks you can get water deposit build up back there which can restrict the movement of the shift cable and cause hard shifting. Also there is a drain plug in the side of the pivot housing in the area of the bell crank. This is to drain that area for winterizing if the owner does not pull the drive. So if water got in, the drain allows you to drain it so the housing does not crack, however, if the plug leaks it can let in water. So make sure that plug still has the o-ring on it, I like to use OMC gasket sealer on the plugs in the pivot housing (there are 2 on the starboard side and one on the port side).

Also when reinstalling the drive:
grease the shifter bell crank with OMC triple guard grease and fill the pocket behind it with that same grease, that will keep water out if it gets in.
coat the pivot to drive gasket generously on both sides with OMC gasket sealer and also put it on the mating surfaces of the upper gear housing and pivot housing, this helps it to seal. Doing it this way I have never had water in that spot and my boat is moored in salt water for the season.
Grease the gimble bearing and u joints with trailer wheel bearing grease, check the gimble for smooth movement and the u joints for looseness or stiffness. If the grease comes out rust colored or milky then water has gotten in and you need to replace them.
Coat the driveshaft splines with OMC triple guard grease, the 2 o rings on the shaft, get only motor oil.
The 6 studs that hold on the drive should have the threads coated in OMC gasket sealer.

when changing the oil in the drive you must do it the OMC way and get 2 qts in. You can use Merc High Performance gear lube if you can't find OMC Hi/Vis.

If you replace the points...I use a dwell meter and a remote starter switch to make it easier and faster. I grew up with cars with points so no big deal to me. I also put a few drops of oil in the felt wick in the dist shaft that is visible when you pull the rotor off. That lubes the advance weights under the points plate (these use full mechanical advance).
Timing is 6*BTDC at idle speed (600 rpm).

These have an ESA system to help the drive shift out of gear to test, when the boat is on the water hose...trigger the interrupt switch and it should slow the engine down to approx. 450 rpm. It should not engage if you shift the drive on the water hose, but in the water, it should engage and lower the idle when you shift from in-gear to neutral, then the idle should come back up to 600.

https://www.crowleymarine.com/suppor...-articles.html

this has articles on draining and refilling the drive with oil, with R+R'ing of the drive etc.

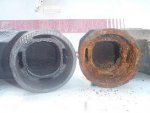
if you are in freshwater and the bat wings pass the acetone test, look in the elbow portion, and see if you have flaking rust up in there. If so there is a risk that it can fall down and get into one of the rear cyls, so just check that. If they look good, you can still use them. I have to replace the exhaust here every 5-7 years so had 3 sets of batwings on my engine. None of them ever leaked but the last set started getting that flaking rust so I had to change over to the two piece Volvo Penta style exhaust. Not a hard job, but some of the V/P parts you need are pricey. It all fit like factory though....
 
Last edited:

southkogs

Moderator
Staff member
Joined
Jul 7, 2010
Messages
14,977
You sound like a guy who really knows where his towel is. :thumb:
 

Lou C

Supreme Mariner
Joined
Nov 10, 2002
Messages
13,063
batwings after 5.5 seasons and new center riser V/P style exhaust....
 

Attachments

  • photo285631.jpg
    photo285631.jpg
    12.4 KB · Views: 1
  • photo308043.jpg
    photo308043.jpg
    2 MB · Views: 2

Don't Panic!

Seaman
Joined
Oct 3, 2019
Messages
57
Wow, thanks for the tips Lou! I'll re-read this a few times I'm sure. And yes, I always have my towel at the ready.
 

PITBoat

Petty Officer 1st Class
Joined
Jul 26, 2018
Messages
286
Here is my plan of attack:
- replace all rubber fuel and coolant lines

Good luck finding all that; I haven't tried, but I'm not sure all the water hoses are available.

- separate lower unit and check shifter height.

You may be able to do that without separating it, with a little creative measuring and a straightedge.

Have a look for the exhaust flappers in the u-pipe behind the manifolds too. They can get into part of the drive through the exhaust bellows if they come apart. Mine are gone, and while looking for the pieces after a left side exhaust overheat (batwings), I ended up replacing the bellows with a single flapper on the exhaust opening. So far so good for my application, but I don't know how recommendable that is.

And don't get that liquid gasket sealer all over your bare hands... it really is resistant to washing off, lol.
 

Don't Panic!

Seaman
Joined
Oct 3, 2019
Messages
57
I pulled the outdrive off today, it went more or less ok. It was a little hard to pull the splines out even after the gasket let go, so I think the alignment may be a bit off. I don't have an alignment tool yet, so I can't check till I get one.

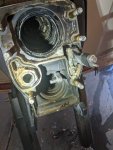
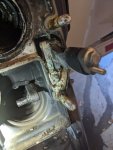
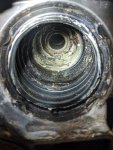
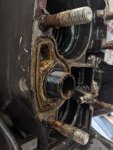
Overall I think it looks decent, but there's definite water in the u-joint area. And quite a bit of build up in the water passage and where the shift cable is. I'm going to try and attach a few pics in the next post, will see if I can figure it out. I'm assuming the presence of water in the u-joint bellows means it needs to be replaced. From my reading, it seems like that's pretty much the only way that happens. The bellow looks ok, but it's most likely at least 20 years old, and perhaps original.

The exhaust bellow is clearly blown, cracked all the way around. Does this matter at all though? I see the new exhaust bellows come with holes in them already. Is it important to change this one too?

The good news is the gimbal bearing spins nice and smooth, the splines have a nice coating of grease, and the u-joints themselves seem fine. Everything is still greased and tight, just a bit moist...

I confirmed btw, that it is a 1987 SeaRay Seville 19 Bowrider.
 

PITBoat

Petty Officer 1st Class
Joined
Jul 26, 2018
Messages
286
Pics not showing up for me. I had a similar situation w/o the water ingress. There was some cracking in the u-joint bellows folds, but nothing all the way through. Exhaust was split completely and rotten. And it was a little hard to get the shaft out (alignment check showed front of engine to be a little low). The upper and maybe both bellows had '87' on them as one of the numbers, so I think mine may have been original; could've been NOS put on at some point though.

PO told me he asked his mechanic about replacing the broken exhaust bellows, and he said "Why?" I ran it from July to the end of the last season like that.

There was cracking in the casing(?) of my shift cable also (the red part, of the already recall-replaced ones), with some fine sand in that enclosed area of the pivot housing.
 

Lou C

Supreme Mariner
Joined
Nov 10, 2002
Messages
13,063
bellows is trashed, replace both the d/s bellows and the exhaust bellows and clean all the crap out of the recess behind the bell crank in the pivot housing. Shift the remote control so the shift cable guide sticks out so you can clean behind it. Then use motor oil to lube the bellcrank shaft then pack that recess with OMC triple guard grease. Clean the mating surfaces well before installing the drive, coat both sides of the gasket with OMC gasket sealer and the mating surfaces too. Make sure the drain plug right outside of the bell crank area seals well.
 

Don't Panic!

Seaman
Joined
Oct 3, 2019
Messages
57
Quick question, is the cavity that the shift cable terminates in a closed cavity in the outdrive leg? I can't see if it goes anywhere. I'm just wondering how careful I have to be with blasting cleaner up into that cavity. I was quite cautious on the water side since I assume it feeds directly into the back of the water pump and I didn't want to push a bunch of gunk up that way.
 

Lou C

Supreme Mariner
Joined
Nov 10, 2002
Messages
13,063
It is closed, basically the only holes in it are where the shift cable comes through and the drain plug on the side.
The idea is to keep water out of that area, keep the bellcrank lubed and that will help it shift better.
 
Last edited:

Don't Panic!

Seaman
Joined
Oct 3, 2019
Messages
57
I'm getting a little garage time this weekend, and am pulling off the pivot housing. Quick question, I removed the nut on the water hose nipple, but the fitting is not pushing back. I whacked it with a 2x4, but not too hard yet. I'd there anything else that is holding that during in from the backside? I've got a manual, it just says remove the nut and push the nipple through the housing as far as possible.

IMG_20191012_3685.jpg
 

Lou C

Supreme Mariner
Joined
Nov 10, 2002
Messages
13,063
The back side of it has an o ring to keep cooling water in so you might have to get a wood block, put that against the fitting and tap gently.
 

Don't Panic!

Seaman
Joined
Oct 3, 2019
Messages
57
Thanks again Lou. gently didn't do it. But a BFH did! I'm waiting an a few parts so I can't finish anything, but I've got a lot of things started lol. I gotta make one more run to the hardware store now to grab a crowfoot to remove the shift cable from the housing. Too tight for an open ended wrench.
 

Don't Panic!

Seaman
Joined
Oct 3, 2019
Messages
57
Turns out removing the cable from the pivot housing was a mistake, but that's ok. It did give me the opportunity to fully remove the housing and really clean everything up. Cable looks in fine shape, I did remove the inner wire, shoot some WD40 through the housing and clean it all up. Will use a little grease on the cable when reinstalling into the sheath. Could have easily done this without unscrewing the cable from the pivot housing though...

I did not forsee that the cable end does not swivel, meaning the pivot housing needs to act as the nut and rotate when removing/installing the cable end (since the cable housing is pretty set in it's ways, and will not be rotating).

I got the new bellows and a bunch of parts, but am waiting on a few o-rings, and the bellows adhesive (I'm sure there's a locally available substitute, but I've already ordered the real stuff so I'm just going to wait.).

Topside, I replaced the belts and inspected a few cooling hoses. They are all good and firm, and look real clean inside. They appear to have been replaced at some point in time, I cannot believe they are original based on how they look/feel. The fuel lines, not so much. Visible cracks, I'll be replacing all those (fill, vent and feed). Ordered hoses, boy are they expensive!!!
 

Lou C

Supreme Mariner
Joined
Nov 10, 2002
Messages
13,063
Next time get a fish scale and measure cable drag fwd and rev full travel. If its 2.5 lbs and under and the cable jacket is not cracking where it goes into the pivot housing (from storing it tilted up) its fine....
 

Don't Panic!

Seaman
Joined
Oct 3, 2019
Messages
57
I'm beyond frustrated. Everything went well, new bellows, new orings all around, I used the Midnight Wolf tool to set the shift cable, checked alignment (did have to lower the front of the engine a bit to even it up), and the outdrive slid on no problem.

But I cannot get the cables adjusted correctly. I've read several variants of the correct way to do it, and for the life of me I just can't get it. I'm done for the weekend, not sure what to even try next.

http://www.midnight-wolf.com/OMC_Cobra_Shift_Cable_Adjustment2.pdf -- this one seemed the best for me, but I cannot get the cables set in such a way that the ESA detent returns to center in all three positions of neutral, forward, and reverse at the same setting. I can manipulate it to get 2 of 3, but I just don't know. I need to sleep on it or something, maybe set it on fire.
 

Lou C

Supreme Mariner
Joined
Nov 10, 2002
Messages
13,063
Describe the steps you followed when setting up the cables....
 

Don't Panic!

Seaman
Joined
Oct 3, 2019
Messages
57
Roughly speaking, it was:

1. with drive off I set the outdrive shift cable with the Midnight Wolf tools. I don't think there's any room for mistake here, it was pretty simple. I did not measure drag, but it was very low. The cable is easy to slide, and it did not bind when tightening up the retainer screw.

2. with drive on, I removed the throttle cable from the carb. Also removed the remote shift cable from it's housing (where the adjuster is clamped) but left the front of the cable pinned on.

3. Installed transom shift cable at the carb bracket. No adjustments available here, the end goes over the pin, and the trunnion fits in it's slot.

4. Installed the remote shift cable as per the above linked document. Which is: pull out all slack from the cables by pulling the shift cable housing aft while both shifter and outdrive are in neutral, adjust the ball-trunion on the remote shift cable until it lines up with it's 'pocket', then turn it out 6 turns. Clamp ball into pocket.

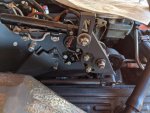
When doing the full forward and full reverse checks, the interrupter ball stayed high in both forward and reverse. The directions on that page say to adjust the trunnion holder for the transom cable up toward the pivot point, but my bracket does not allow that. It is fixed, the only adjustment is at the end of the remote shift cable so I adjusted there. Here's a pic of my cable block assy:

Click image for larger version  Name:	cable.jpg Views:	1 Size:	108.5 KB ID:	10809943

I experimented with raising the remote cable (top right of pic, the end of the remote cable is on an adjustable pin), but couldn't get it to a place where all was right.

I played around with the location of the trunnion ball on the remote shift cable and could get it to do various things, but never got it right. I ran out of time and patience, and felt like I was just being random at this point, and called it a day.
 
Top