Replacing Shorting switch

Putzaroni1

Petty Officer 2nd Class
Joined
Oct 20, 2012
Messages
108
The button for the shorting switch on my '74 9.9 is broken and I have one on a donor motor I'd like to replace it with. It should be just a matter of swapping them across but I cannot remove them because the housing (clip) that clip into the wires going to the ignition are too big to fit through the hole where the switch mounts.

Is there a way to pull 2 the housings off ? I see on Shop2.evinrude.com that the housing is a separate part but I don't want to break them taking them out and putting them back together.

Any suggestions on the trick to get them out ?
 

boobie

Supreme Mariner
Joined
Nov 5, 2009
Messages
20,826
Re: Replacing Shorting switch

Take a small screw driver or pick and release the tab inside the housing on the metal terminal that is attached to the wire. The metal terminal and wire should then just pull out.
 
Last edited:

Putzaroni1

Petty Officer 2nd Class
Joined
Oct 20, 2012
Messages
108
Re: Replacing Shorting switch

Do you go in from the wire side or the end ? I'm working it from the end where I can see it and from any of the 4 sides it won't release. If it's from the wire side it's blind so do I do it from the top side or bottom ?
 

boobie

Supreme Mariner
Joined
Nov 5, 2009
Messages
20,826
Re: Replacing Shorting switch

I can't answer that on here because I don't have it in front of me as there are many different types of terminals. It's usually just a small tab on the terminal itself holding it into the plastic. Maybe somebody else will chime in.
 

dazk14

Ensign
Joined
Jul 22, 2008
Messages
966
Re: Replacing Shorting switch

Just as boobie said...

There are 2 small tabs in this case. To pull wire out, you attack them from the open end, not wire end.

The two tabs/wings are centered on the side of the connector, calling the inside main connection/tang the top (bullet shaped).

The slot - viewable from the open end - is only about an 1/8" wide slot and the slot goes about 1/4" deep. The tang/wings protrudes ~1/16"+

Nothing wrong with distorting the connector/tang/wing a bit. Once out, you can bend the tang/wing out. So when you insert the tool for each side, it's ok move the tool so it bends the tang/wing into the center.

If you have a tool on both sides at once it can be tight trying to pull the wire out - although the connector/wire connection is fairly robust.

Tool... A small pick, a #14 solid wire, needle nose tweezers, ect..

A lot of folks just slice the wire loom open, cut and butt connect the wires. For the 73-76 either wire can mate with either coil connector.

If needed, I'm sure we've got a coil with connector kicking around that I could pull apart and post a photo.

Hope that helps.
 
Last edited:

dazk14

Ensign
Joined
Jul 22, 2008
Messages
966
Re: Replacing Shorting switch

deleted - double post
 
Last edited:

Putzaroni1

Petty Officer 2nd Class
Joined
Oct 20, 2012
Messages
108
Re: Replacing Shorting switch

This board is awesome !!! Thank you all !

I took a very small screwdriver and just followed the instructions from you guys and voila !
It turns out there are 3 tabs. There is one on either side and one on the bottom. Once I pushed the screwdriver in far enough to bend them inward on each of the 3 tabs, the terminal popped right off. Without seeing one of those I never would have figured it out but thanks to ya'all, it is one more thing I know how to do now ! I contemplated cutting the wires and solder and shrinkwrapping it but I would rather do it right !
 

dazk14

Ensign
Joined
Jul 22, 2008
Messages
966
Re: Replacing Shorting switch

This board is awesome !!! Thank you all !

I took a very small screwdriver and just followed the instructions from you guys and voila !
It turns out there are 3 tabs. There is one on either side and one on the bottom. Once I pushed the screwdriver in far enough to bend them inward on each of the 3 tabs, the terminal popped right off. Without seeing one of those I never would have figured it out but thanks to ya'all, it is one more thing I know how to do now ! I contemplated cutting the wires and solder and shrinkwrapping it but I would rather do it right !

Nice job.

I didn't mention the "3rd" tab, because that prevents the metal terminal from pushing forward through the front of the plastic connector and that wouldn't help you, it would just slid down the wire - although you would see the 2 side wings that needed to be
bent inward.
 

Putzaroni1

Petty Officer 2nd Class
Joined
Oct 20, 2012
Messages
108
Re: Replacing Shorting switch

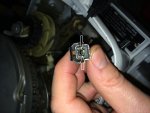
In an effort to help out the next guy, I've marked up an photo with where to pry to flatten out the tabs that hold the housing to the terminals. Being a very visual person, a picture is worth a 1000 words........

ShortingSwitch(Arrows).jpg
 

Putzaroni1

Petty Officer 2nd Class
Joined
Oct 20, 2012
Messages
108
Re: Replacing Shorting switch

One more update. So I fired up the motor yesterday and it's running pretty well overall. I however was unable to shut the motor off with the replacement shorting switch. I decided this afternoon to test it and sure enough it was not working. I pulled the front rubber button off the switch and disovered that the 2 copper contacts and the button itself were very oxidized or even slightly corroded. I took contact cleaner, a Qtip and a screwdriver and worked on get the brass clean on both the contacts as well as the button that bridges the 2 contact points. This was the ticket and when I put it back together and tested it it would close the circuit when I pushed the button.

I thought I'd mention this just in case someone comes across this.
 
Top