Starting restoration on a 1987 Winner Alpha II

Faustus

Seaman Apprentice
Joined
Aug 13, 2019
Messages
37
Hi Everyone,

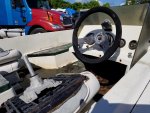
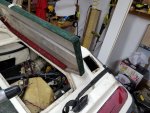
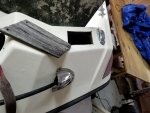
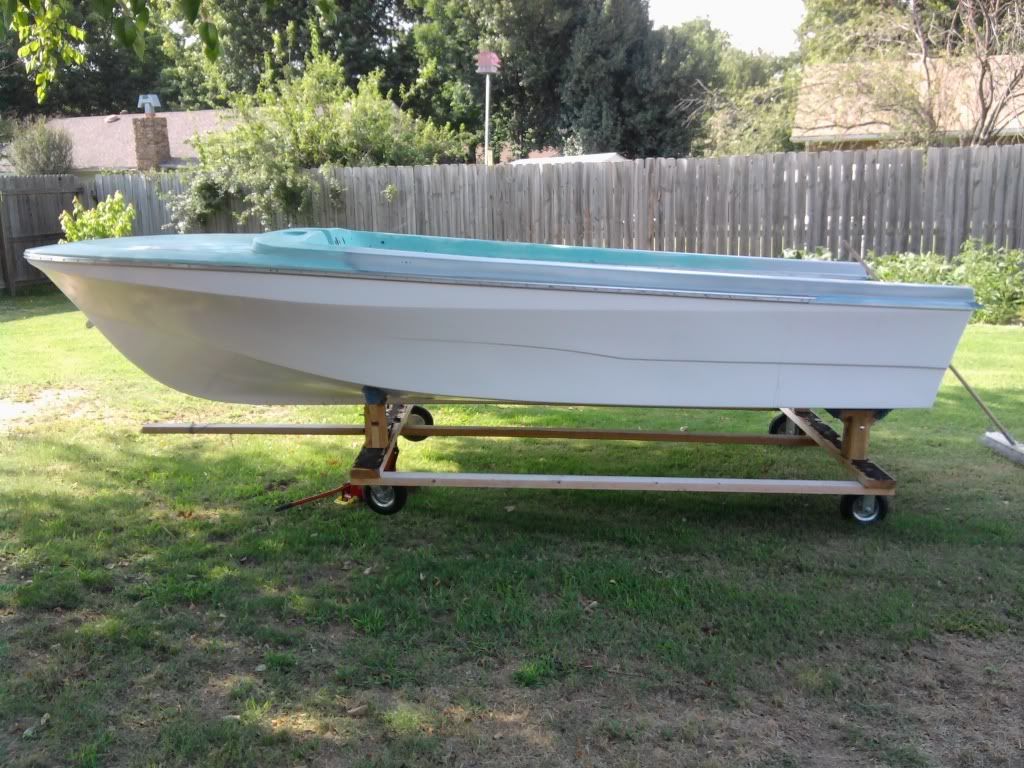
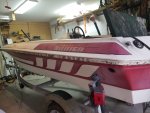
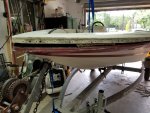
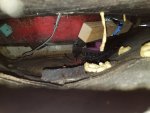
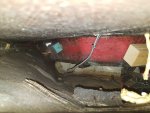
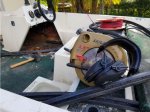
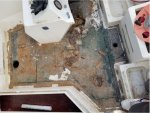
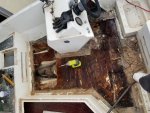
I just bought a very used Winner Alpha II and a trailer for $275, and the starboard side floor by the console is just a piece of very wet plywood. Is the entire floor under the fiberglass plywood? I am just wondering how much of the floor I am going to have to remove to replace the rotten plywood.

As I understand it from researching, the Winner boats had fiberglass stringers. Those should be safe from any rotting wood correct?

20190809_163932.jpg20190809_163857.jpg20190809_163850.jpg20190809_163906.jpg20190809_163840.jpg
 

Attachments

  • 20190809_163932.jpg
    20190809_163932.jpg
    237.5 KB · Views: 0
  • 20190809_163901.jpg
    20190809_163901.jpg
    237.6 KB · Views: 0
  • 20190809_163901.jpg
    20190809_163901.jpg
    237.6 KB · Views: 0
  • 20190809_163901.jpg
    20190809_163901.jpg
    237.6 KB · Views: 0
  • 20190809_163901.jpg
    20190809_163901.jpg
    237.6 KB · Views: 0

52FordF2

Petty Officer 1st Class
Joined
May 31, 2013
Messages
372
Welcome Aboard

Hopefully your stringers are fiberglass, but you transom was wood. You'll have to explore to find out.

Keep at it.
 

Chris1956

Supreme Mariner
Joined
Mar 25, 2004
Messages
28,327
Your stringers are likely wood, but maybe they are sealed with FG cloth. Start with the rotten plywood deck and work in all directions testing for rotten plywood as you go. I expect it will all be bad, as the carpet is in shreds.
 

matt167

Rear Admiral
Joined
Sep 27, 2012
Messages
4,203
you bought a free boat, but at least you didn't pay a terrible amount. Trailer looks pretty nice,. Looks like that boat was pretty common
 

Faustus

Seaman Apprentice
Joined
Aug 13, 2019
Messages
37
Definitely seeing this as a free boat. This is the first boat I've ever owned, so thank God for Youtube! lol

I started some disassembly last night. The first picture is the open plywood. I could tear it apart with my hands. No surprise there. The stringer seems to be super solid though.

The bow drain hole is also squishy.

The 2nd and 3rd pics are holes in the cap that were just covered with teak. No seal or anything, so the wood underneath is also rotten. I was able to open the bolt holes in the transom and poked with a screwdriver. It seems solid, but there is really only one way to know.

I want to do this the right way and I am planning on just pulling off the cap. That way I can fix everything that needs it and not worry about it anymore. Any advice for a first timer doing this?
 

Attachments

  • photo318769.jpg
    photo318769.jpg
    361.7 KB · Views: 0
  • photo318770.jpg
    photo318770.jpg
    254.3 KB · Views: 0
  • photo318771.jpg
    photo318771.jpg
    212.1 KB · Views: 0

matt167

Rear Admiral
Joined
Sep 27, 2012
Messages
4,203
If the stringers are wood, assume you need to replace them, as well as the transom.. Before you pull the cap, build a support cradle for the hull
 

Faustus

Seaman Apprentice
Joined
Aug 13, 2019
Messages
37
If the stringers are wood, assume you need to replace them, as well as the transom.. Before you pull the cap, build a support cradle for the hull

Matt,

Can you point me to a video that shows this? I didn't think it would be necessary because it is such a small boat. I'm assuming I just need to screw some wood together so that the bottom holds its' shape, right?
 

Woodonglass

Supreme Mariner
Joined
Dec 29, 2009
Messages
25,930
This is how I made mine...$75 Also take a LOT of measurements in every conceivable direction before removing the cap. They must be exactly the same after repairs if you want the cap to fit back on.

Photo0252.jpg
 

Faustus

Seaman Apprentice
Joined
Aug 13, 2019
Messages
37
Is that the picture you meant to post? I don't see any supports except the bottom.
 

Woodonglass

Supreme Mariner
Joined
Dec 29, 2009
Messages
25,930
The bottom needs support the most and then you can add some side supports too or just use nylon straps to keep em from spreading. I did NOT decapitate so I didn't need side support. I'll look for another example
 

Faustus

Seaman Apprentice
Joined
Aug 13, 2019
Messages
37
Oh, I see. Do I need to take it off the trailer? Doesn't the trailer provide the bottom support?
 

Scott Danforth

Grumpy Vintage Moderator still playing with boats
Staff member
Joined
Jul 23, 2011
Messages
50,927
no, the trailer does not supply enough support

there are stickies at the top of the forum. suggest you go thru every DIY sticky, starting with links, 14, 15, 18, then links 2, 3, 4a and 4b

in that order..... in their entirety.

all the answers you need and those you didnt know you needed are in those links in the stickies.
 

Faustus

Seaman Apprentice
Joined
Aug 13, 2019
Messages
37
So here's the plan:

1. Measure the distance between the sides of the hull at 12" intervals
2. Lift the cap off
3. Roll the hull out from underneath the cap on the trailer
4. Lower the cap onto a rolling workbench and roll it out of the way
5. Build a support for the hull
6. Put the hull on the support and measure the distances between the hull sides again to make sure they are the same as the original and adjust as necessary.
7. Clean and paint trailer, get new lights, redo wiring, replace the winch
8. Start working on the hull

Am I missing anything?

I did take some of the bumper rail off yesterday just to have a look. All of the screws came out easily and the cap is secured to the hull with silicone, so I think I should be able to separate the two with a razor knife. Going to continue to remove screws and the bumper rail tonight.

Stopping by Harbor Freight tonight to pick up a remote controlled winch. I have to attach that to the rafters in the ceiling so I have something to lift off the cap on Saturday.

What could possibly go wrong? lol
 

Faustus

Seaman Apprentice
Joined
Aug 13, 2019
Messages
37
I was able to get the bumper rail off last night and used a razor knife to cut the silicone between the cap and the hull. I still am not able to get the cap to pull up. Has anyone else had this issue? I can't see anywhere else that it could be attached.

I am going to bolt my winch to the ceiling and strap a couple of the cleats and gently put pulling pressure on it to see if I can coax the cap off of the hull.

I vacuumed the inside of the boat as well just to get all of the crap cleaned up. It's still terrible, but at least there aren't any more leaves and sticks in it.
 

Attachments

  • photo318890.jpg
    photo318890.jpg
    654 KB · Views: 0
  • photo318891.jpg
    photo318891.jpg
    235.7 KB · Views: 0

Timr71

Petty Officer 1st Class
Joined
Jul 19, 2012
Messages
329
I'll follow along. Winner boats - built in Dickson, TN. My family's hometown.
 

Faustus

Seaman Apprentice
Joined
Aug 13, 2019
Messages
37
Nice! I'm curious to see if they are as solid as I've read about...especially the stringers. I should know that this weekend.
 

Faustus

Seaman Apprentice
Joined
Aug 13, 2019
Messages
37
My brother and I spent about 5 hours attaching the winch to the ceiling and trying to get the cap off of the hull. We can't figure out where it is attached still. Obviously the transom is still glued in, but we can't get the bow to lift more than an inch. I was able to get some pictures of what's under there and it looks like the live well in the bow is attached to the hull and the cap just sits on top of it. If anyone has any ideas I would be very grateful.

Do I need to cut out the floor? I have no idea what to do next.
 

Attachments

  • photo318970.jpg
    photo318970.jpg
    801.5 KB · Views: 0
  • photo318971.jpg
    photo318971.jpg
    1.3 MB · Views: 0
  • photo318972.jpg
    photo318972.jpg
    1.5 MB · Views: 0

Faustus

Seaman Apprentice
Joined
Aug 13, 2019
Messages
37
I'm going to cut out the floor and see what it looks like underneath. The rest of the boat is pretty solid, so as long as it doesn't take on water, I may be able get away with just replacing the floor. I'll know as soon as the floor is off.
 

Faustus

Seaman Apprentice
Joined
Aug 13, 2019
Messages
37
I cut the floor out last night. There were some screws holding it down as well as epoxy holding it to the not completely rotten plywood underneath. I'm going to cleanup the rest of the wood and see where I'm at. Hopefully I'll have a better view of what is keeping the cap on.

Then I'll cut the cap off of the transom and try to ply that away. After that the cap should come off easy peasy.
 

Attachments

  • photo319202.jpg
    photo319202.jpg
    91.1 KB · Views: 0
  • photo319203.jpg
    photo319203.jpg
    120.2 KB · Views: 0
  • photo319204.jpg
    photo319204.jpg
    111.7 KB · Views: 0
Top