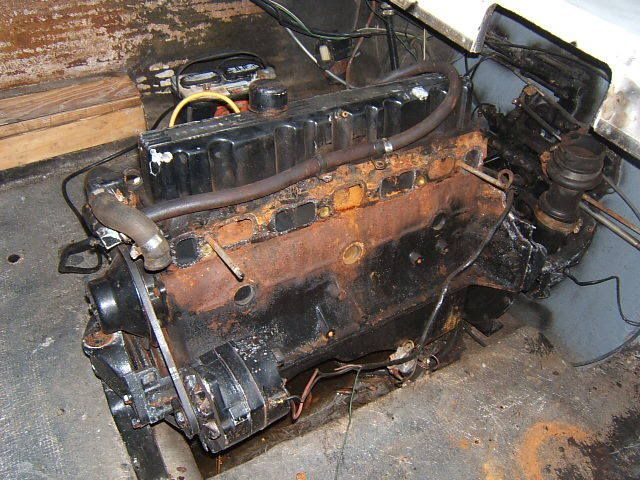
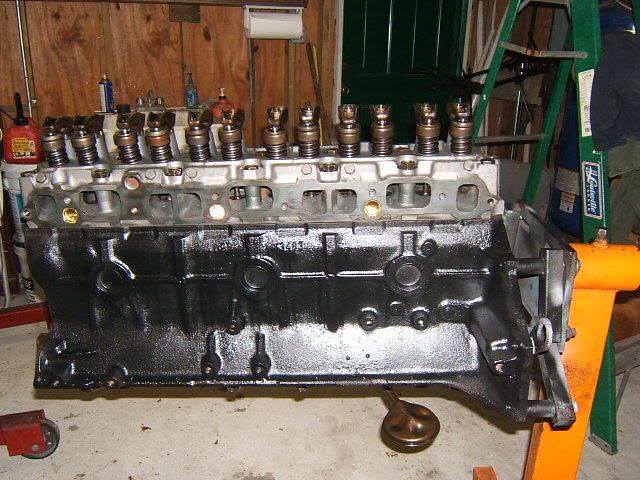
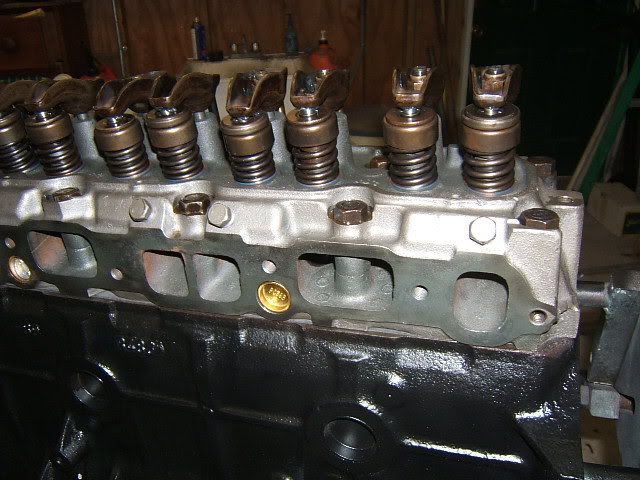
Re: pics and progress on engine rebuild
hello,
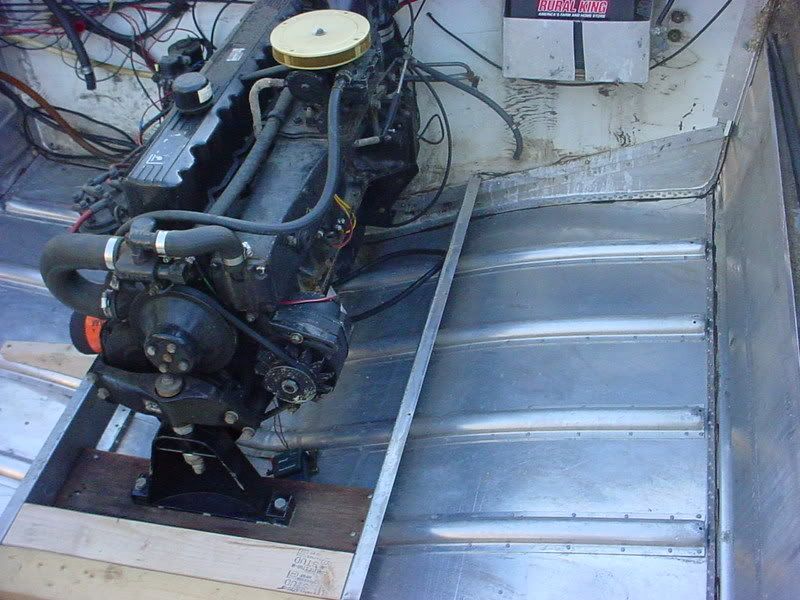
looks great! i am an ol chevy six enthusiast from way back.
")
used to design custom kits for them
even write magazine articles on the inline six, history, performance and mods, etc. [blush]
achris sed:
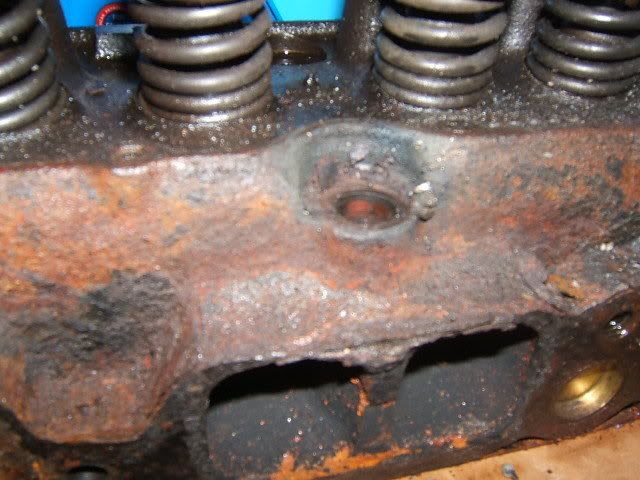
"Also, did you reface the rockers? If you don't they tend to slide off the valves and damage their posts. Had it happen to me... Not nice...."
good tip, but actually... you dont have to reface them all as a rule... but u should inspect each one for a U-shaped marring that the valve tip creates on rocker tip after many miles of use. well, hrs in this case. or the wear pattern can be a cupped area favoring one side. in any case. i would not use any rocker with any valve stem tip marring.
for me personally, i would also not reface them. reason is because if the rocker tip is that worn, usually so is the rocker to ball base in middle of the rocker where it tips back n forth as the cam pushes on it.
these are the same rockers as any chevy dealer sells. so if u havent, replace any marred. if it were me, i would toss old one and replace all 12 rockers.and... all new rocker balls.
also, if it were mine i would only use brass components in ignition system: cap n rotor. i would not use the old marine plug wires, as i would without a doubt run the Magnecore KV8.5s... racing wires that r super efficient and... i would also run the MSD electronic coil. and a GM plug. i would also run the MSD 6A ignition module. and a tach. if dist is HEI u can get an updated coil from MSD
i run a 250 chevy six in my 83 van. it has ported heads, back cut valves, rv cam, KV 8.5 wires, MSD HEI, tach, etc. runs super nice! starts within about 1/4 revolution off starter. my other 250 is a solid lifter 300 hp six with windage screen, and crankshaft scraper. studs hold head on. and piston comes above the deck ".035 [past gasket] for an 11:1 CR! sweet sounding, guys have mistaken it for a V8. it does has 'the sound!" runs a 600 holley 4-bbl and pulls real...nice. i designed and built the windage screen, crank scraper, and the 4 bbl set up.
and another thing... i would get some cam lube and put some under rocker tips, and on valve stem for start up. also be sure to put some on the rocker ball and the ball seat. and the push rod tip area, too. then pour some engine oil on each valve rocker set up prior to start. then put on valve cover. i would also pre-oil the entire engine before i cranked it one revolution. and i would be sure to use a new fuel pump. ac-delco would serve me fine. even if with water sep too. and i would have the timing spot on. perfectly timed. ez to do. set it all off of #1 cyl and have crank set a BTC point, then set distributor. and after break in oil out, then use light to fine tune timing.
as if this wasnt enuff to think about... if it was mine... i would have plastiguaged the the new rod and main bearings to crank. the outside evelope is .0025 max, or it may be .0035 max on the big side [loose]. but while u have added new bearings u didnt mention u reground the crank. so i would want to tighten the rods n mains up to about .0015 - .002" and that will give up both a quiet engine, and a long rod life. if rods at .0035 now, u will have talking rods soon.
oic, u still have pan off, so best bet is to ck these running clearances. and DOUBLE. then triple check your timing gear alignment pin marks to align properly. be sure u put oil into the oil pump, too. if u didn't rotate the long block there, and un bolt the oil pump cover and pour in some oil. it will prime it. it needs to be primed prior to start up or u can and prob will score some bearings... [ouch!]
also: on all of my inlines i crank them first with no ignition. this lets oil pump ensure all bearings wet with oil. 6-10 revs. 2-3 revs at a time. crank, stop, crank, stop, crank, stop. igniton ON, then crank it to fire. then i add fire. the inline 6 cranks is LONG. and they will be dry and running before oil gets there. this will kiss the metal parts of bearing and crank journal and a premature wearing will take place... ie short rod life. [been there done that!!]
the engine should be set up to go right to 2000 rpms within first revolution or two. if not u can eat cam lobes. none of the err, err, err, wont start... err err... wont start... heck u cant tow a boat. lol ~ run engine at 2000-2500 for first 30 mins or so, so as the heat soak it all; on 1st start up unless cam is OE. and i would also install cam lifter dry. this way u can set each valve and get it to sit in the middle of the piddle valve travel. then when u start it up all valves will be perfectly adjusted. i never adjust hydraulic valves after first fire up... they are always adjusted dry... and they run perfectly.
otherwise TOO messy.
be sure u have cam lube on cam lobes, fuel pump rod lobes and end, and... bottoms of lifters. u cant mix hydraulic lifters on use cam lobes. so if old cam u have to have same lifters in each boss... or new ones. they will eat the lobe otherwise... almost everytime.
then drain ur break in oil, change oil filter and put in fresh oil. u r set then to head to ramp.
well, u may have already done this stuff or most of it. if u need any help, u can contact me. hope she runs like she looks.
these are things to consider for ur marine 6. and all bolts on. good tech, too.
regards,
lakester