oil, water and the outdrive

achris

More fish than mountain goat
Joined
May 19, 2004
Messages
27,468
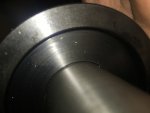
That driver tool has a rebate so you're driving the carrier, not the bearing, yes?
 

iknowalttl

Seaman Apprentice
Joined
Jun 1, 2020
Messages
35
That driver tool has a rebate so you're driving the carrier, not the bearing, yes?

yes it does.... back side pictured is flat, other side the contact area is along the outer edge...
 

Attachments

  • photo334996.jpg
    photo334996.jpg
    185.9 KB · Views: 0

iknowalttl

Seaman Apprentice
Joined
Jun 1, 2020
Messages
35

also, just to confirm because I didn't get any instruction, to get the position of the hole that needs drilling for the bearing driver... I should insert the alignment tool fully then pull out close to 1/2 inch and position the driver face even with the lip where the gimbal bearing inserts and mark the hole... is this correct?
 

achris

More fish than mountain goat
Joined
May 19, 2004
Messages
27,468
also, just to confirm because I didn't get any instruction, to get the position of the hole that needs drilling for the bearing driver... I should insert the alignment tool fully then pull out close to 1/2 inch and position the driver face even with the lip where the gimbal bearing inserts and mark the hole... is this correct?

:noidea: I made my own tool, complete with handle, so I have no idea how it's set up to use the alignment tool..

Bondo , Fun Times

Chris.....
 

iknowalttl

Seaman Apprentice
Joined
Jun 1, 2020
Messages
35
:noidea: I made my own tool, complete with handle, so I have no idea how it's set up to use the alignment tool..

Bondo , Fun Times

Chris.....

gotcha.... the way this is set up is the bearing driver needs to be pinned in position on the alignment tool,,, the hole for the pin needs to be determined and drilled... my thought is the bearing will go in past the lip a little when fully seated and 1/2 inch withdraw on the alignment tool from fully inserted into the coupler will allow room to fully seat the bearing but not put force on the coupler when driving the bearing in...
 

Fun Times

Moderator
Staff member
Joined
May 16, 2009
Messages
9,240
Yes some of the (not all anymore) mercruiser alignment tool kits found on EBay and other websites now offer many versions of mercruiser's alignment tool kits that would need a hole drilled out through the bar after measurements are taken of "your" boats engine/drive model combination.

These alignment bar type kits also offer other tools that help the do it yourselfers work on the transom assembly area anywhere from just basic engine alignment to full on transom assembly rebuild at affordable prices over OEM stuff.

Here's a quick view of what comes in some of the kits,
https://www.ebay.com/sch/i.html?_fro...+bar+tool+kits

This kit claims no drilling hole required while install gimbal bearing,
https://www.ebay.com/itm/Mercruiser-...-/184116661657

Here's a video of how this guy went about getting his measurements and though I don't think it was mentioned in the video, the instructions I have right in front of me from one of these kits says after bottoming into the engine coupler, remove the 2 tools and push the bearing driver head tool forward 1/4'' inch and drill...The measurements taken before drilling needs to be done with the old bearing still in place.


iknowalttl

Seaman Apprentice
Joined
Jun 1, 2020
Messages
35
Well, I drilled the tool and installed the gimbal bearing but now the tool is stuck in the hole... it turns pretty easily but will not pull out... maybe I should have pre-aligned the engine before installing the bearing... I tried lowering the engine a couple turns and no difference, then lowered several more turns and still no luck and no difference in appearance... so I went up with the engine and still no luck.... probably a good 1/2 inch or so high to low is how much I moved the engine.... the tool will turn and I did notice it was a little tighter when I had it raised at its highest level.... I guess I will try adjusting down again and keep checking the resistance turning the tool to get a feel which way I really need to go... I am doing this solo so no eyes on things while I adjust... based on the picture I would of thought it needed to go down and I'm a bit surprised that I haven't been able to tell a difference in appearance... how do I tell if there is equal weight on both mounts?
 

iknowalttl

Seaman Apprentice
Joined
Jun 1, 2020
Messages
35
went back out and got my 10 yo grandson to turn back and forth while I adjusted... was able to adjust enough to get the tool out with a good hard yank... now to get it aligned... I need to find something smaller to get close enough to be able to insert the alignment tool again and I see that a 1 inch dowel or pipe should do the job...
 

Fun Times

Moderator
Staff member
Joined
May 16, 2009
Messages
9,240
It's a little unorthodoxed but if at all possible on your boat, Try cleaning out the old dried up grease inside the coupler the best you can as it may be a part of the holding power you're feeling plus just packing the old inwards...You'll be putting more fresh grease inside during the alignment process for smother feel.

Also as it often get's tight until you find the right spot it would be a good idea to drill another hole at the handle side of the bar so you can use a cross bar to help move/get the bar out a bit easier.

Also you have to align the new gimbal bearing by tapping the bar from side to side & up and down.
 

iknowalttl

Seaman Apprentice
Joined
Jun 1, 2020
Messages
35
It's a little unorthodoxed but if at all possible on your boat, Try cleaning out the old dried up grease inside the coupler the best you can as it may be a part of the holding power you're feeling plus just packing the old inwards...You'll be putting more fresh grease inside during the alignment process for smother feel.

Also as it often get's tight until you find the right spot it would be a good idea to drill another hole at the handle side of the bar so you can use a cross bar to help move/get the bar out a bit easier.

Also you have to align the new gimbal bearing by tapping the bar from side to side & up and down.

well I had a chance to work on the boat a little... I had a tooth brush style wire brush with a extended handle I had rigged up years ago for something... cleaned down the splines best I could with that... found a piece of pipe that a layer of electrical tape made it fit tight in the coupler spline and adjusted with that... have gotten to a point where I have equal space top and bottom but not side to side and still not able to insert the proper alignment tool... it's not off much... basically I used a drill bit the check the clearance between the inner gimbal bearing and the pipe I had inserted in to the coupler... drill bits seemed like an easy way to get a proper sized gauge... the one grabbed happened to be a masonry bit with the teeth that stick out a little... using that, it barely will slide in top and bottom however side to side, the starboard side is to tight to insert the drill bit... it almost sticks a little trying to go in so it's not far off... on the port side it goes in loosely but not so much that I can turn the bit with the teeth sticking out... just had a thought while typing I realize I haven't rotated the engine and checked to see if anything changes... nice call on the cross handle for the alignment tool....
 

Rick Stephens

Admiral
Joined
Aug 13, 2013
Messages
6,118
May need to unbolt or pull the lag screws holding the motor mounts to the stringers and see if the motor will shift a bit to straighten out the side to side problem.
 

iknowalttl

Seaman Apprentice
Joined
Jun 1, 2020
Messages
35
May need to unbolt or pull the lag screws holding the motor mounts to the stringers and see if the motor will shift a bit to straighten out the side to side problem.

after a little more checking, the clearance noted rotates as the engine turns... I seem to have adjusted centered as much as possible... everything seems the same as I rotate the engine with exception the the position of the clearance which follows the engine rotation... I can install the alignment tool with a few good bumps of the palm of my hand and it takes a good yank or 2 to get it back out.... I would guess things are within 1/16 without measuring... I'm thinking about putting it all together and run it like it is....
 

Rick Stephens

Admiral
Joined
Aug 13, 2013
Messages
6,118
after a little more checking, the clearance noted rotates as the engine turns... I seem to have adjusted centered as much as possible... everything seems the same as I rotate the engine with exception the the position of the clearance which follows the engine rotation... I can install the alignment tool with a few good bumps of the palm of my hand and it takes a good yank or 2 to get it back out.... I would guess things are within 1/16 without measuring... I'm thinking about putting it all together and run it like it is....

Problem being of course, wear and tear on coupler, which appears already shot.
 

iknowalttl

Seaman Apprentice
Joined
Jun 1, 2020
Messages
35
Problem being of course, wear and tear on coupler, which appears already shot.

yep... that's what I figure too... I have 2 choices that I can think of.... I can replace the coupler or I can run it till I get all the goody out of it then replace the coupler....
 

Rick Stephens

Admiral
Joined
Aug 13, 2013
Messages
6,118
yep... that's what I figure too... I have 2 choices that I can think of.... I can replace the coupler or I can run it till I get all the goody out of it then replace the coupler....

Just don't end up somewhere inconvenient to walk back from.
 

iknowalttl

Seaman Apprentice
Joined
Jun 1, 2020
Messages
35
Just don't end up somewhere inconvenient to walk back from.

I'll have to make sure my Boat US is up to date... there is a spot I like to visit about 50 miles out in the gulf... I am a couple miles from the Suwannee river so that's where I do most of my boating... I'll just have to play it by ear with a few trips on the river and scalloping isn't very far so I will see how it all goes... I still need to see how this drive acts once I put it on... it hasn't been run for a few years... and I have to see if I need to do anything about a prop since I am installing a drive with a different gear...
 
Top