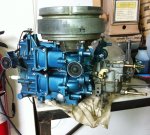
1956 Evinrude Fleetwin freshen-up

RogersJetboat454

Commander
Joined
Jul 9, 2010
Messages
2,964
Re: 1956 Evinrude Fleetwin freshen-up

I would also reccomend not using oil on the head bolts. They get overtorqued that way, and you could snap them, especially if you are using the original bolts. OMC Gasket Sealing Compound is what is reccomended, I have had good success with it.

Whoops...:D
I guess no harm, no foul here, everything went together with no problems, but makes sense though. I have to admit, I'm more familiar dealing with much larger head bolts, and most of the time you have throw the old ones in the trash. Have to keep this in mind for the future. Curious about the sealer too... Is that to protect the threads from corrosion? I know at least in the case of my engine all the threads on the deck are either blind, or open to the outside (no water jacket intrusion to cause a leak).


Cant wait to see how she runs.
Yeah, me too.
Despite all that I found wrong with it, it still ran half decent before it was put away. This little motor won't know what to do with it self once I'm all done.
 

RogersJetboat454

Commander
Joined
Jul 9, 2010
Messages
2,964
Re: 1956 Evinrude Fleetwin freshen-up

More work done today. I did take a bunch of photo's, but don't have the time right now to upload them and splain my self.

The condensed nutshell...

Carburetor day. Stripped down and cleaned up, all back together. Last of the stuff I ordered showed up. Both the new parts from BRP (O-rings for fuel connector, O-ring and brass sleeve for the shift rod), and the used parts from ebay (lower pinion shaft, water pump housing).

Installed the new O-rings in the fuel connector using the pick method. Went in real easy, and has a beautiful feeling when connected to the male side on the base of the tiller.

Part's from ebay was both hit and miss. The 20 dollar pinion shaft looks nearly brand new, which is a very good thing. The water pump housing looks like crap. It's pitted and in worse shape then mine. I suppose if I really needed it that bad and none were available, it would work OK, but for the time being it will be shelved as a spare. I'm not going to argue with the seller over the shape of it, for what I paid for it, it's just not worth the aggravation. Mine will go back into service.

So now I'm all set up to put the lower together, with one sticking point... I've been milking ordering the 3M 847. In desperation, I jumped on Google yet again to do a search for it. Grainger popped up, and they are now carrying tubes of it rather then the just pints that they had before. The hitch, no store currently has it according to the website. I played dumb, and called the local Grainger in town. The gentlemen said it's a 1 day lead time to get it, so he would have it on the counter for me at 8 AM tomorrow (or today depending on when you're reading this). Fine by me.

Hopefully I will be able to update this with photo's soon...
 

oldybutagoody

Petty Officer 1st Class
Joined
Dec 30, 2011
Messages
207
Re: 1956 Evinrude Fleetwin freshen-up

I don't have a ton of experience (I've worked on 4 50's OMCs - a 5.5hp, two 7.5hp and an 18hp) My friends 5.5 hp '55 Johnson runs very well and it only has 30 PSI compression in both cylinders. I think there are a lot of variables taking compression readings so the most important thing is that they are even. I don't think you can say a 50's 7.5hp evinrude outboard will not run at all on 40psi of compression.
Duckland,
Just for the sake of clarity:
Your motor does not have 40psi of compression and is running very well--or at all. Your motor never did have low compression and you almost positively re-ringed it needlessly--as everyone tried to tell you. You had a spark problem.
Either way, I'm glad your motor is running good.
But if anyone reads this thread when it's archived, a 50's 7.5hp evinrude outboard will not run at all on 40psi of compression.
Rogers,
Nice job on your 7.5. I look forward to some pics of the finished motor.
JBJ
 

Chinewalker

Fleet Admiral
Joined
Aug 19, 2001
Messages
8,902
Re: 1956 Evinrude Fleetwin freshen-up

I can assure you that if accurate, those motors will NOT run on 30 or 40 psi. Simply not enough squeeze at that low a number. Either the gauge is off or the method of testing is incorrect.

For some reason RJB's pics aren't showing up for me??

I've gotten my 3M 847 at NAPA.

I don't have a ton of experience (I've worked on 4 50's OMCs - a 5.5hp, two 7.5hp and an 18hp) My friends 5.5 hp '55 Johnson runs very well and it only has 30 PSI compression in both cylinders. I think there are a lot of variables taking compression readings so the most important thing is that they are even. I don't think you can say a 50's 7.5hp evinrude outboard will not run at all on 40psi of compression.
 

RogersJetboat454

Commander
Joined
Jul 9, 2010
Messages
2,964
Re: 1956 Evinrude Fleetwin freshen-up

Full update with photo's

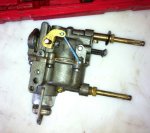
So here's the guy who got rebuilt yesterday;
IMG_0384.JPG

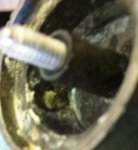
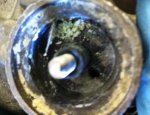
First glaring indications it was desperate need of a clean out;
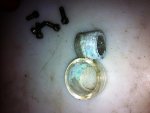
IMG_0385.jpgIMG_0387.jpg

That nice blue residue was from the OMC branded 2 stroke oil that the motor was last run on several years ago. Not only did that stuff smell nasty (burnt plastic smell), but as you can see left a fair amount of crap behind. Guess this could be the norm for old oil though, considering how long it sat crap in the carb. The carb will now be drained via the brass drain screw on the bottom of the bowl when it gets laid up.

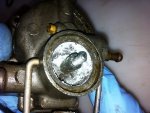
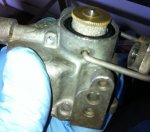
Next shot, removed the needle packing. Pretty spent looking;
IMG_0392.JPG

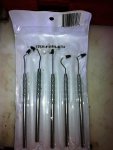
I had bought a dental like pick set, and a standard pick set from Harbor Freight. They were indispensable tools during this whole process. I fully endorse the purchase of them if someone doesn't own something similar already.
IMG_0421.jpg

Next...
 

RogersJetboat454

Commander
Joined
Jul 9, 2010
Messages
2,964
Re: 1956 Evinrude Fleetwin freshen-up

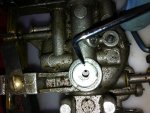
To anybody following this who may be doing a rebuild, and may be tackling a carb rebuild for the first time, get the biggest screw driver that will possibly fit the float seat when you're removing it;
IMG_0393.jpg

Brass is a soft brittle metal that is very unforgiving. It will mar and/or crack if you try to use an undersized screw driver with this job, especially if the seat has been in there for a long time.

Ugly looking shot at my old low speed needle;
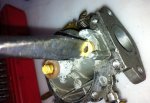
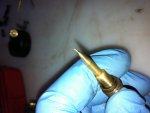
IMG_0395.jpg

I think I bent the tip when it was floating around in the box-o-parts, but it was marked up and shot before that anyway. High speed needle didn't look too bad at all. Probably because it's far more robust, and less likely to get chewed up if a gorilla decides lightly seated means crank it down.

Removal of the welch plug;
IMG_0396.jpg

Who ever the clown was who rebuilt the carb before hand, they did a p**s poor job of installing that plug. Half of it was sticking up above the casting. I wouldn't be surprised if there was a bit of a vacuum leak there. As you can see in the photo, a hole big enough for one of my picks was drilled into it, and the plug was gently rocked out by inserting the pick in the hole, and prying back and forth.

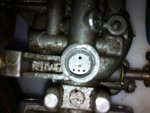
Under that plug;
IMG_0397.jpg

Surprisingly clean. I think most of the trash in that carb was strictly in the areas where fuel had dried out. All the areas above the float bowl were very clean. I didn't remove the shot plugs for a good reason... I didn't have any shot to replace them with :p. Honestly all those passages I cleaned as best I could with the dental picks and paper clips, then were hosed out well with carb clean, and compressed air. If I do have any troubles with the carb, I will pull the shot out, but my gut feeling is all should be OK.

Cleaning up the float bowl, I decided to stick my air gun up to the fuel feed for the bowl just for nice clean out. I had around 100 Psi in the compressor, and what ever was stuck in the feed was stopping that pressure dead in it's tracks;
IMG_0402.JPG

Next...
 

nwcove

Admiral
Joined
May 16, 2011
Messages
6,293
Re: 1956 Evinrude Fleetwin freshen-up

I don't have a ton of experience (I've worked on 4 50's OMCs - a 5.5hp, two 7.5hp and an 18hp) My friends 5.5 hp '55 Johnson runs very well and it only has 30 PSI compression in both cylinders. I think there are a lot of variables taking compression readings so the most important thing is that they are even. I don't think you can say a 50's 7.5hp evinrude outboard will not run at all on 40psi of compression.

i too cannot see " runs very well" at 30psi. you'd be lucky to get a sputter for a few seconds ! as mentioned above, its important for anyone reading these posts to know not to throw hard earned $$$ into ignition components/carb kit etc if they see low comp numbers. maybe spend a few bucks on a headgasket, but dont expect a runner with much less than 60 psi per hole....with both being within 15% of each other.

now back to the op! lol what do you use the dental picks for? looks like an inexpensive set of tools to add to the box!
 

RogersJetboat454

Commander
Joined
Jul 9, 2010
Messages
2,964
Re: 1956 Evinrude Fleetwin freshen-up

So with a little help from a new friend, I was able to clear the blockage of some nasty looking crap;
IMG_0404.jpg

With the help of some old friends, the stone filter, float bowl, and main body cleaned up nicely;
IMG_0405.jpg IMG_0406.jpg

One thing I wish that the rebuild kit included was a new filter bowl gasket;
IMG_0407.jpg

Mine is still supple, and in serviceable condition. But if it does leak, I'm going to have to track down a new one, or at least a square cut O-ring that's ethanol resistant. IMHO, this should be included with the kit though.

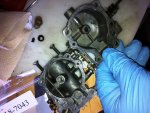
Everything starting to go back together;
IMG_0408.jpg

Next...
 

RogersJetboat454

Commander
Joined
Jul 9, 2010
Messages
2,964
Re: 1956 Evinrude Fleetwin freshen-up

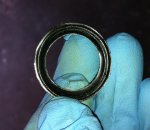
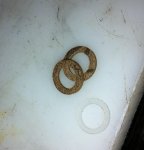
This are the fiber packing washers, and the white plastic ring is the retainer for the high and low speed needles;
IMG_0412.jpg

I installed 2 fiber washers per needle (back to back) with the white retainer topping it all off;
IMG_0413.jpgIMG_0414.jpg

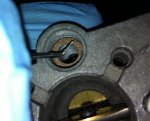
Then tightened them down snuggly until there was a fair bit of resistance while turning the needle valves;
IMG_0415.jpg

The needles were then from lightly seated set at 3/4 of a turn out for the high speed, 1 1/2 turns out for the low speed.
For anybody reading this that is unfamiliar with the roll of the needle packing, they basically work on the same principle that compression fittings used in plumbing (and illegally on brake lines) utilize. The packing (fiber washers) get squeezed around the shaft of the needles buy the pressure against them from the needle valve nuts, making a seal, and also stopping them from spinning out of setting while the engine is vibrating away.

Here's a nice picture of her belly all cleaned up with new parts;
IMG_0416.jpg
 

RogersJetboat454

Commander
Joined
Jul 9, 2010
Messages
2,964
Re: 1956 Evinrude Fleetwin freshen-up

New welch plug was installed next. Mine had a bit of a burr from being stamped out. I dressed this lightly with a file, and tapped it into it's new home. I mixed up a little bit of epoxy, and sealed the new plug to the rim of the main body casting;
IMG_0418.jpg

The carb was all done at this point, and re-installed on the power head. Doesn't he look handsome!
IMG_0419.jpg

***********************

OK, so this brings me up to speed to today. I stopped by Grainger, and picked up my tube of 847. Man that stuff is like gorilla snot. :D

I decided I had a quick minute to replace the O-ring for the shifter rod, so my way was as follows;

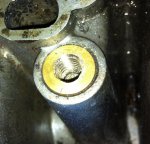
The old retainer bushing was tapped with a 5/16-16 tap (no drilling required);
IMG_0423.jpg

I found a 5/16 bolt, and threaded it into the fresh threads. Once in there, the bushing was easily pulled out with a set of vice grips;
IMG_0424.jpg

I know most of the guys on here save their bushings, and don't replace them. If I'm not mistaken F_R (mentioned above) crafts a tool just for this purpose. My bushing how-ever was a bit oblong in business hole. For 7 bucks, I had a fresh new bushing from BRP;
IMG_0420.jpg

Next...
 

RogersJetboat454

Commander
Joined
Jul 9, 2010
Messages
2,964
Re: 1956 Evinrude Fleetwin freshen-up

A photo of the new shift shaft O-ring (top) VS the old;
IMG_0425.jpg

As you can see, this was sorely needed, and one of the reasons my lower was still leaking. I remember when I did the first re-seal, I really didn't have the means (tools) to get the old one out. So I just crossed my fingers, and hoped the old one was still OK. It wasn't..... ;)

So with that all done, I had turned my attention to putting together the lower.
This is my $20 ebay pinion shaft;
IMG_0422.JPG

Not too shabby eh?

I really wanted to get this lower together. If I got this lower together, and dropped the power head back on the midsection, hey.... I'd be done!!! I could bring this motor back up to it's home in Maine for my vacation next week, but that SOB Murphy struck....

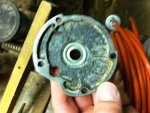
While attempting to remove the seal in the lower water pump/ bearing housing, there was an oops;
IMG_0427.jpg

Yes... that's a cracked housing....:(

I went through the back side of that seal, and attempted to punch it out. It was placed on a block of wood while doing this, but unfortunately this poor old casting didn't have enough support in it's hollow cavity, and buckled with the blows.

I'm still hauling this motor back to it's home with all my tools. I have my fingers crossed that I may have a spare bearing housing that I had gotten with one of my spare lowers. If not, I'm bumming until I find a new one.

No actual new ones out there to speak of. I did a Goole search of both the old (376074), and new (382796) OMC part numbers, but they're NLA, and were ridiculous money when available anyway. I will need to hit up ebay, or perhaps a salvage site and see what's available if I don't have one waiting for me in Maine.
 

RogersJetboat454

Commander
Joined
Jul 9, 2010
Messages
2,964
Re: 1956 Evinrude Fleetwin freshen-up

now back to the op! lol what do you use the dental picks for? looks like an inexpensive set of tools to add to the box!

The picks were used kinda like your dental hygienist uses them, to scrape the fine crap off the castings. :)
They also came in handy for removing/installing the packing, and clearing out passages in the carb, although a cautionary note;
They were not, and I would not use them anywhere near jets or metered openings. It would be very easy to inadvertently change the size of a brass jet by poking it with a steel pick. ;)
 

RogersJetboat454

Commander
Joined
Jul 9, 2010
Messages
2,964
Re: 1956 Evinrude Fleetwin freshen-up

Heading to Maine in a few short hours for vacation. Truck all loaded up with the bit's and pieces just itching to be re-united as one again. We shall see...
Hopefully there is a lonely spare part up there in my cousins basement, just waiting for a second chance at life.

If there is, I will continue posting the progress from the West Shore of Sebago Lake.

If not,
To those in the states, I hope you and the fam have a happy, fun, and safe 4th of July.
To those not in the states, I hope you and the fam have a happy, fun, and safe Wednesday. :p:D;)
....and I'll catch you on the flip side.:)
 

RogersJetboat454

Commander
Joined
Jul 9, 2010
Messages
2,964
Re: 1956 Evinrude Fleetwin freshen-up *conclusion*

Re: 1956 Evinrude Fleetwin freshen-up *conclusion*

Gentlemen... and perhaps the rare Lady...

I must apologize that I haven't updated this thread for a while. I'm here now, so I'll give you the multi-post scoop.

First and foremost, Ta-da!
IMG_0431.jpg

I had a spare bearing plate up in Maine, found it attached to one of the additional lowers I have OH. This one seemed like a heavier casting too. More about that in a bit.

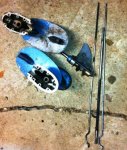
Actually, I had a good amount of other lower unit parts too;
IMG_0437.jpg
Including another pinion shaft (not in the last picture) in fine shape. Guess I didn't need to buy that other pinion shaft :facepalm:, but I suppose it's not a bad thing to have a spare.

A nice illustration as to what happens to these buggers, the shaft in the middle of this next picture was the shaft that had been in lower before I pulled it apart this time.
IMG_0438.jpg

As you may have seen, that middle shaft had sprung. It's physically longer then it's brothers on either side. It also completed the trinity of all the crap wrong with this motor. She was hard to pull over with this shaft in place. Since the spring had sprung, and the tip of the shaft was junk, I tossed her.

Back to that bearing plate.
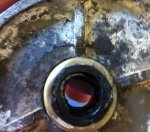
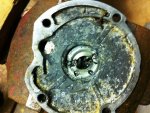
I needed a sane way to remove drive shaft seal. No hammers this time. I decided to drill the shell of the seal out to weaken it so it could be collapsed, and gently removed. Here's what that looked like;
IMG_0434.jpg
 

RogersJetboat454

Commander
Joined
Jul 9, 2010
Messages
2,964
Re: 1956 Evinrude Fleetwin freshen-up *conclusion*

Re: 1956 Evinrude Fleetwin freshen-up *conclusion*

The seal was easily crushed, and pulled out after this.
Just a note for anybody trying this method to remove their seal; Go very shallow when you're drilling. The shell of this seal gets pierced in no time with a good sharp drill bit. You may not even know you're completely through the seal and into the housing. I had a couple of spots where I actually drilled into the housing, but the damage was more or less superficial.

So with the old seal removed, time to pop in my new seal, right?
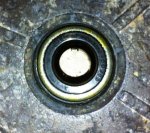
IMG_0436.jpg

Wrong!!! As you will notice, there is a gap between my new seal and that housing. WTH? Then it dawned on me... Remember how I said this casting was heavier then the one I had before? This must be the superseded bearing housing that I had found out about when I was in search for a replacement bearing housing (OMC P/N 382796).

For grins, I went on shop.evinrude.com, clicked on the 1968 motors (oldest that BRP lists), and looked at the lower gear case section for a 6HP engine (I figured this would be the engine that may be closest to mine). Sure enough, that bearing housing was the same part number as my new friend. And my new friend used a different part number seal for the drive shaft.
For the record, '68 was a split year for that bearing housing. Some of the 6 horses used the older housing, others used the newer style with the different seal. Keep this in mind when looking stuff up, as the Sierra catalog has notations. For a safe way to locate this, if you have a newer style housing, you need a shaft seal that would be used from '69 on. Or you can just use the part numbers I give ya below... ;)

OMC part number 314167 (or Sierra 18-2024) is the shaft seal that matches with the newer 382796 housing.
If you have the old housing number 376074, the seal you want was originally OMC 300599, but has been superseded to BRP 327031, or Sierra 18-2035.

OK, so now I know that newer style housing uses a different seal, where do I find one? First stop was NAPA with the Sierra part number for that seal. The parts dude looked up the availability of it, and said the nearest one was in Illinois, and would take a week to get. Since I wasn't going to be still in Maine in a week, and I wanted to get this motor together, I decided to locate a few Evinrude dealers. First place I went to was in the back woods. Nice folks there, but didn't seem too interested in ordering my seal, and gave me the same line about how long it would take for them to get a Sierra seal, or an entire seal kit for that newer style lower. I looked up more dealers at Evinrudes website, and got a number for one in Portland ME. I called them, and rattled off the OMC/BRP part number for the seal I needed. The nice lady said she didn't have it, but could have it for my by Friday. Perfect, order it up honey!

This is the new seal;
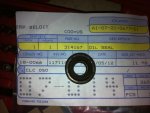
IMG_0448.jpg

Just so you can see the difference, here is the old (smaller) seal compared to the new seal;
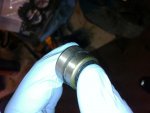
IMG_0449.jpg

So with the seal in hand, my Maine neighbor/friend helping out where additional hands were needed, and pleanty of 847, we got the lower all back together. Ain't she sweet;
IMG_0451.jpg

Best of all, she doesn't leak a drop of oil either!
 

RogersJetboat454

Commander
Joined
Jul 9, 2010
Messages
2,964
Re: 1956 Evinrude Fleetwin freshen-up *conclusion*

Re: 1956 Evinrude Fleetwin freshen-up *conclusion*

So now that all the fixin was done, it was time for assembling. I didn't take any photos of this, but it was just simply bolting the lower to the midsection, dropping the powerhead on, and attaching anything that needed to be attached.

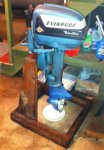
So... this is the finished product;
IMG_0454.jpg

I think the paint I chose for the lower is a pretty stinking close match.

Oh.. I also took video of her running for the first time since she was stowed 8 years ago;
[video]http://s188.photobucket.com/albums/z105/Rogersjetboat454/?action=view&current=IMG_0452.mp4[/video]


Shes got a bit of a miss while transitioning in the throttle, but I still need to fine tune the carb, and she was loaded up with 2 stroke oil (I pickled it before packing it up to head to Maine). I did try tossing it on the back of my neighbors leaky, beat up, little aluminum boat. But with my fat a** in there, it was all I could do not to flip it while moving around to adjust the carb settings. When I head back up to Maine for my vacation in August, I will drop it on the back of the boat she belongs on. My cousins 14' Starcraft that's far more stable, and far less leaky.

This was a fun project. I find my self wishing I was still working on it during the slow times at work. On the other hand, it's nice to have that completed. In all I spent more on this then I would like to think about, but she was worth it. After all, with all the memories I had from her, I owed it to her. :)
 
Last edited:

RogersJetboat454

Commander
Joined
Jul 9, 2010
Messages
2,964
Re: 1956 Evinrude Fleetwin freshen-up *conclusion*

Re: 1956 Evinrude Fleetwin freshen-up *conclusion*

Hmm... For some reason the video isn't embedding in my last post...
 
Top