1969 Johnson 9.5 Rebuild

racerone

Supreme Mariner
Joined
Dec 28, 2013
Messages
38,881
Yes , absolutely.---In a modern factory they could put in a really fine finish.---Yet they establish that crosshatch pattern.---Must be a reason for that I would say !!!!
 

HighTrim

Supreme Mariner
Joined
Jun 21, 2007
Messages
10,486
Tape a piece of your emory to plate glass, marble, something absolutely straight. Then do figure 8s with the head on the paper, until you see that is sanding evenly. Usually between the cylinders gets done last, as it is a low spot.

Be sure to use proper torque, especially on crank halves, rod caps, etc.. Be sure to assemble rod caps properly. They are matched, and CANNOT be swapped, or even flipped. They must go back together exactly as taken apart. If you need more info on assembly tricks, or torque values, please let us know.

Something to note when measuring the ring end gap. Before inserting into the cylinder, and measuring, you first have to measure the bore. I have seen many times someone insert perfectly good rings into a worn or out of round bore, and assume the rings were worn. New rings will not cure this, so first measure bore, if good, then measure ring end gap, in said good bore.
 

Calcasieu

Seaman
Joined
Aug 27, 2015
Messages
54
Just got the new rings in the mail. All bore measurements are within spec. The cylinders are deglazed as seen in the pictures above. I checked piston ring gap on all six new rings and they are all right smack in the middle of spec! WEEHOO

I can't imagine the compression reading going down after deglazing and new rings. If anything I think the new rings will make it jump up a little. (my old rings were just out of spec)

I actually resurfaced the head with said method above using 150 220 320 emery cloth on plate glass in a figure 8 last night. It looks great.

I need to buy an inch per pound torque wrench for assembly. I will be borrowing the foot per pound torque wrench. (I have the manual with all torque values)

I will install pistons rings tonight after lubing with 2 cycle oil (I made sure that both pistons were put together exactly as they were before removal).

I am soaking the old left over gasket material with gasket remover and painstakingly scraping them off with my trusty plastic tools...this part sucks...

Questions about applying 3m #847. When to use it when not to use it? Please correct me if I am wrong. YES means using sealer NO means NO.
  • Thermostat Housing: YES
  • Head Gasket: NO
  • Crankcase to Block (metal to metal): YES (but making sure none oozes inside crankcase)
  • Exhaust Manifolds: YES
  • All Intake Manifold Gaskets Including Carb: NO
  • Middle Exhaust to bottom of Block and Lower Unit: YES
  • Fuel Pump: NO
  • Gearcase with spaghetti gasket: YES
Thank you all! I see the light!
 

Calcasieu

Seaman
Joined
Aug 27, 2015
Messages
54
Do I just put an even thin layer of the 3m 847 on both sides of the gaskets? Or a thin bead on the metal gasket surfaces?

As for the gaskets that don't require sealant should I put some sort of oil on them? Or just install them dry?
 

HighTrim

Supreme Mariner
Joined
Jun 21, 2007
Messages
10,486
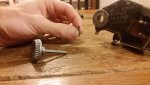
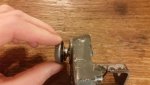
For the crank halves, I put a bead around, then spread it evenly with a small painters paint brush for an even, consistent coat. Dry fit first to ensure everything closes as it should, then add the sealer. Then drive in the pins to set after mating the two halves, before installing the bolts and torqueing. They are tapered, so they go in one way, and drive them in from the front of motor towards the rear, aft. Put 3M847 on the crank halve bolts as well.

For gaskets that require sealer, to tell you the truth I use OMC Gasket Sealing Compound, is a can with a brush built in the lid. To coat the gasket evenly, spread it on the gasket, then use on of your wifes old magazines, with the shiny pages. Close the magazine with gasket in it coated, then open it and pull it out. WIll come out with the compound perfectly spread on it. NOTE: Don't use one of her new magazines, bad things will happen! ;)

The dry gaskets I install dry such as carb, etc...

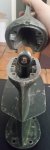
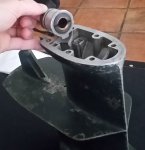
For resealing the gearcase, cut the spaghetti seal a bit long to start, put it in groove then push it outwards towards the outer edge of groove, then trim it so that it has a 1/16" overhang at the prop shaft seal housing. This ensures that it cannot shrink in the groove, causing a spot where water can get in. Don't want the overhand too long though, or it will buckle, and again allow water in. Once you have the length, take the seal out, and put a bead of 3M847 in the groove. Re install the spaghetti seal, allow it a couple mins to get tacky. Helps hold it in while you assemble. Put a bead around the skeg piece, and drop it on the other half. Put 3M847 on the skeg bolts as well.

If you have never done it before, do it dry a couple times to practise lining up the skeg half, shift rod bolt, etc... without buckling the spaghetti seal. Once confident, add sealer and complete the job.
 

Calcasieu

Seaman
Joined
Aug 27, 2015
Messages
54
No Title

I am in the final stages of the rebuild...Taking my time I know...Does anyone know the correct orientation of the bow washer in the slow idle adjustment knob attached to the tiller handle? I can't tell from the schematic which way it goes. I want to make sure it's correct because these pieces are a pain in the butt to get too with the stubborn fuel hose and all the bolts.
 

Attachments

  • photo235620.jpg
    photo235620.jpg
    40.5 KB · Views: 1
  • photo235621.jpg
    photo235621.jpg
    41.9 KB · Views: 1

Chinewalker

Fleet Admiral
Joined
Aug 19, 2001
Messages
8,902
I generally bow them away from whatever it is I'm threading into place. In your case, I'd bow it away from the knob (high points on the knob side).
 

Calcasieu

Seaman
Joined
Aug 27, 2015
Messages
54
No Title

I am rebuilding the lower unit now. Ran into one slight hangup. I can't remember the orientation of the gearcase head. Does the metal lip face up into the lower unit or down into the skeg?
 

Attachments

  • photo238850.jpg
    photo238850.jpg
    288.5 KB · Views: 0
  • photo238851.jpg
    photo238851.jpg
    167.6 KB · Views: 0

Calcasieu

Seaman
Joined
Aug 27, 2015
Messages
54
I ended up going with the lip on the gearcase head pointing down into the skeg. Slapped the lower unit back on after an impeller and impeller housing change.

For those curious I finally finished assembling the motor! YEEHEEE. I put the lower unit in a bucket of water and cranked it a few times. I was able to get about a 2.5 second putter. Too late to really diagnose.

The plug gaps were a little off. I regapped those at .030. I am going to test the spark tomorrow.
I also turned the Rich/Lean Adjustment knob 1.5 turns out from closed. Hoping these little tweaks will make a difference tomorrow.

I will chime back in with my results. Any tips from there on are greatly appreciated. You guys got me 90% of the way there. Now if I can get the dang thing to run!
 

Chrisravosa36

Chief Petty Officer
Joined
Aug 16, 2015
Messages
622
Very interesting post! Read it all today and you've really took your time on this one! Lets hear those compression numbers!
 

Calcasieu

Seaman
Joined
Aug 27, 2015
Messages
54
After lots of trial and error. I was finally able to get it cranked up in a small bucket. I can consistently get it to run in no more than 5 pulls (it runs but not well). It has a pretty bad lean sneeze which I am chalking up to not enough back pressure on the exhaust due to my small bucket and the lack of water. I am happy with where I am for now until I can get it on the back of my jon boat and try to tune it correctly. The only problem is the boat is 5 hours away in Louisiana. I am trying to track one down for cheap here in Austin.

I got a loaner compression tester from pep boys and got 61/62ish psi on both cylinders. I have read in multiple places this is low for most motors but for these 9.5's is fine. So I am happy with that.

I will come back with more updates hopefully when I have it running like a top!
 

Calcasieu

Seaman
Joined
Aug 27, 2015
Messages
54
No Title

The day finally came today. I put the outboard on the back of an old 12 foot flat bottom and took her for a spin. After all of the hard work and help from you guys she ran like a dream! Everything works. Idled just fine. Topped out just fine. Forward and rear gears work. It starts after the first or second pull when warm. So excited! Tops out at 18 mph.

I will recheck the compression when I get it back home for a final update.
 

Attachments

  • photo247266.png
    photo247266.png
    173.5 KB · Views: 3
  • photo247267.jpg
    photo247267.jpg
    47.7 KB · Views: 2
Top