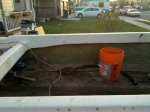
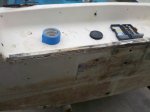
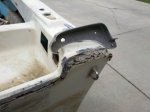
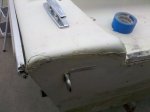
1969 Larson - Big Project

Status
Not open for further replies.

avpaulb

Petty Officer 1st Class
Joined
Jun 19, 2011
Messages
298
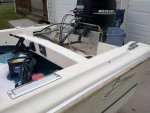
Well, I've been monitoring this site for about a year after I bought my little junker. I always wanted a good project boat to start with just to see what I could do. And as it turns out on this 43 year old boat, nothing has ever really been done to it! She needs a bunch of work! Should be fun, or highly irritating, we'll see.

Battle Plan:

1. Transom replacement desperately needed!
2. Deck and stringers... toast.
3. Interior... grossly outdated.
4. Interior fiberglass... poorly done originally, needs bolstering.
5. Gelcoat and paint... 43 year old sunburn. (Just a bit oxidized)
6. Electrical a bit funky... some gauges would be cool.
7. Needs new glass.
8. Trailer repairs, paint and bolstering probably needed.

NOW... none of you can laugh at my upcoming pictures (or feel free, everyone else does), but this boat is just right for my current needs. It's small and easy to handle, I don't pull anything, and for one season it was able to withstand any type of water I was in be it big or small. And besides that, I'm not going to spend piles of money on a project boat, just so I can spend piles more fixing it up, and potentially not being able to finish it.

Here we go...
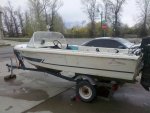
1969 Larson.jpg
 

avpaulb

Petty Officer 1st Class
Joined
Jun 19, 2011
Messages
298
Re: 1969 Larson - Big Project

And for my first thread update (strangely quickly after I began it) here is my first update! Hooray.

I actually started two days ago and managed to accomplish quite a bit:

1. Remove engine and it's funky mounting system...

Larson Rear.jpg

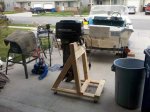
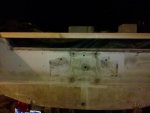
2. Built new engine stand, which should look strangely familiar to most of you:

Stand 2.jpg

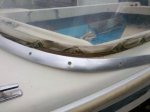
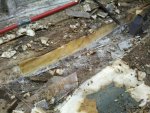
3. Remove anything in the way... glass, carpet, tie-downs, etc.:
Glass 1.jpg
IMG_20120429_164208.jpg

4. Oh... and the mouse nest had to go:
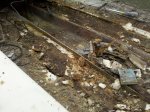
Mice.jpg

More shortly...
 

avpaulb

Petty Officer 1st Class
Joined
Jun 19, 2011
Messages
298
Re: 1969 Larson - Big Project

Wow another quick reply, still on day one.

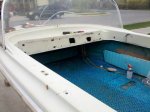
As we can see, the deck is in LOVELY condition:

Deck 1.jpg

Deck Rot.jpg

Deck Rot 2.jpg

And for good measure I started removing the deck. At this point I was limited to my circular saw, which for larger sections proved to be very effective.

Bilge 1.jpg

IMG_20120429_202124.jpg

And yes... the ICE CREAM man lives two houses down from me. Creepy, no?
 

avpaulb

Petty Officer 1st Class
Joined
Jun 19, 2011
Messages
298
Re: 1969 Larson - Big Project

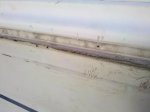
Which brings us to some real fun. Below are some pics of the exterior side of the transom. As you can see from the pictures it is clearly separating from the gelcoat and no longer sealed. Years of stress cracks, holes, etc. Oh, and some really funky "repair" attempts.

Transom 1.jpg

Transom 2.jpg

Transom 3.jpg

A good question at this point would be aimed at some of the resident experts. If you look carefully at these next two pictures, getting to the transom is going to be interesting. The deck and the hull are attached to one another by essentially a glued together clamp. Also, just above the transom there is some sort of "wet well" just in front of the motor (I don't know what it is called). The back of this "well" is attached to the transom on the inside. I'll attempt pictures when I get to that point.

Clamp 1.jpg

Larson Rear.jpg

The good question is this... how to get to the transom? I figure I have one of two options:

1. Try to remove the entire deck by grinding off the clamp (all the way around the boat) and prying or cutting through the glue.

2. Cut off only the stern portion of the deck with the "wet well" part to reach the transom, reattach later.

Long first day (Sunday)!
 

yabuoy

Seaman
Joined
Jun 21, 2011
Messages
68
Re: 1969 Larson - Big Project

I can't give too much advice, as I am doing my first restoration myself, but the area you are talking about is typically called a 'splash well'. Also, the transom separating from the fiberglass the way it is might be a blessing, as it may easily come out intact enough to be a good stencil for the new transom. The hardest part might be trying to find a replacement windshield.

Best of luck, that's one hell of a good looking boat
 

Woodonglass

Supreme Mariner
Joined
Dec 29, 2009
Messages
25,929
Re: 1969 Larson - Big Project

Really no need to start a new thread on your boat. You might want to ask a MOD to combine them. As I stated in your other thread you can remove the entire cap or cut just in front of the spalshwell to gain access to the transom. It appears that you may have glass stringers. That could be a GREAT thing. Drill into the sides of them and see if you get wood, or foam or nothing. They appear to be 4 - 6 inches wide and this could indicate that they are all glass or foam formed glass stringers. If so would make for a quick and easy reuild. Basically do the transom and deck and interior. Time will tell. If the cap is glued all the way around then a Sawzall with a stiff blade will be your best bet. The corner of the transom will require some glass work but we can get you through that with no issues.
 

Pmccraney

Lieutenant Commander
Joined
Jul 26, 2011
Messages
1,734
Re: 1969 Larson - Big Project

Very cool boat... Does the motor work? The reason I ask: It appears that the funky mounting bracket for the o/b was placed there to accommodate a long-shaft motor... I'll defer to the o/b guys, but that doesn't look like a text book method. So, as you plan your transom repair, you may want to think about either: (a) adding some permanent height to have proper height for your current motor (if its a runner); or (b) re-powering with something that has a shorter shaft.

Just thought; The more you dig into this think, you will find that it is somewhat like a chess game in that you always need to be thinking ahead because one step potentially impacts the next.

Have fun and be safe (make sure you have the safety "gears" before you starting grinding or tearing apart any fiberglass).

~rpm
 

avpaulb

Petty Officer 1st Class
Joined
Jun 19, 2011
Messages
298
Re: 1969 Larson - Big Project

Really no need to start a new thread on your boat. You might want to ask a MOD to combine them. As I stated in your other thread you can remove the entire cap or cut just in front of the spalshwell to gain access to the transom. It appears that you may have glass stringers. That could be a GREAT thing. Drill into the sides of them and see if you get wood, or foam or nothing. They appear to be 4 - 6 inches wide and this could indicate that they are all glass or foam formed glass stringers. If so would make for a quick and easy reuild. Basically do the transom and deck and interior. Time will tell. If the cap is glued all the way around then a Sawzall with a stiff blade will be your best bet. The corner of the transom will require some glass work but we can get you through that with no issues.

Yeah I forgot about my other thread. I'll be sending a message to the MODs.

I did notice that the stringers are quite wide. Hopefully tonight I will be able to investigate further. Are you implying that if they are in fact all glass... I should leave them in place? (If so I need to start being a bit more careful with the ole saw to avoid further repairs...

SPLASHWELL was the word I was looking for! I am leaning towards the option of removing only that portion of the cap.
 

avpaulb

Petty Officer 1st Class
Joined
Jun 19, 2011
Messages
298
Re: 1969 Larson - Big Project

Very cool boat... Does the motor work? The reason I ask: It appears that the funky mounting bracket for the o/b was placed there to accommodate a long-shaft motor... I'll defer to the o/b guys, but that doesn't look like a text book method. So, as you plan your transom repair, you may want to think about either: (a) adding some permanent height to have proper height for your current motor (if its a runner); or (b) re-powering with something that has a shorter shaft.

Just thought; The more you dig into this think, you will find that it is somewhat like a chess game in that you always need to be thinking ahead because one step potentially impacts the next.

Have fun and be safe (make sure you have the safety "gears" before you starting grinding or tearing apart any fiberglass).

The motor runs like a top! I made sure of that last summer. And I think you are correct on the weird mount part. I have a depth of 20" from top of transom to bottom of the "V". I agree, not textbook on the long shaft or the mount. My intent is to probably try to sell this motor in favor of a shorter shaft... and a bit more HP.

I love the chess game. I'm a project freak! (I probably have too many). And... I always practice safe fiberglass! Well stocked on suits, glasses, breathers, gloves, beer, etc!
 

Woodonglass

Supreme Mariner
Joined
Dec 29, 2009
Messages
25,929
Re: 1969 Larson - Big Project

Yep, if those stringers are like I think you will NOT need to replace them unless they are delaming from the hull and even then you may be able to just glass over those. Try not to cut into them if you can help it.

This may be of interest to you...
http://forums.iboats.com/showthread.php?t=177596&page=2&highlight=1969+larson
It realy looks like your stringers are foam filled. If they are not totally waterlogged you may be good to go.
 

Yacht Dr.

Vice Admiral
Joined
Feb 26, 2005
Messages
5,581
Re: 1969 Larson - Big Project

It might be just me.. but I have no clue what is going on in the bilge of that boat.

In the ONE semi decent pic you have..it just shows that the ply deck is cut out..and add in some other cutouts below that seems to be just to be a glassed in subfloor with chips of wood chunky mess.

I see no reason to believe you have 4" form fitted stringers of any kind. I could be wrong.

Get that sucker dug out and cleaned up :) ..

I Dont like to speculate too much on them ol' Larsons ..

YD.
 

avpaulb

Petty Officer 1st Class
Joined
Jun 19, 2011
Messages
298
Re: 1969 Larson - Big Project

I'm with you Yacht... I think there is something really interesting going on below deck in this ole' boat. BUT, I'm not done tearing down quite yet so I don't have all of the necessary info.

Please pardon the thumbnail picture quality. My digital is on the fritz... all I have is the Droid at the moment.

More gunk to rip out... right now!
 

avpaulb

Petty Officer 1st Class
Joined
Jun 19, 2011
Messages
298
Re: 1969 Larson - Big Project

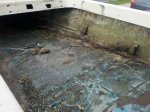
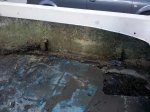
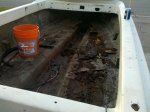
If I had to rename this thread I would probably call it "No Stringers Attached". That's right... I tore out a major portion tonight only to discover my boat actually did not have any stringers! It looks to me like at some point someone must have attempted a home deck repair and was quite ill informed.

It is really hard to explain, I drew out a quick picture to attempt to show what I found:

Cross.jpg

No stringers to be found. It was totally rigged. It's a bit tough to see from these next pics, but you get the jist.

Tear Out 2.jpg

Tear Out 1.jpg

Regardless, I was able to remove most of the "stringer" system, and made it so far as to get things mostly cleaned out. Too dark for pics. I'll post later.

Needless to say, EVERY piece of wood, glass, or foam that I tore out are completely soaked! I didn't find a single dry spot. Amazing. But I did learn a HIGHLY effective method of removing old foam: a small spade shovel. Took it out easily and in large chunks!

I think I've also decided what to ultimately do with the transom. If you check some of my previous pictures, I have a longer shaft Merc which was mounted on some sort of metal plate in order to lift it higher off the transom. As mentioned in a previous reply, an idea was brought up to try to raise the transom during my rebuild. If you reference the pic below, I am going to raise the transom to the height of the 2x4 in the picture, gaining an extra 3.5 inches of height. This would bring the height from the top of my new transom to the bottom of the "V" to about 23.5".

Deep enough for a longer shaft engine???

Transom Rear View.jpg

I'll defer that though to some experts in here... let me hear your thoughts on this idea PLEASE! Otherwise, I'll fix the transom as is, and sell the motor in favor of a short shaft.

Goal for the next day or two, weather permitting, will be to remove what remains of the fake stringers and foam, and cut off the cap portion of the wetbay and transom. I should be able to start laying out real repairs after that!

And for good measure... here is the moose I came across today:

Moose.jpg
 

Woodonglass

Supreme Mariner
Joined
Dec 29, 2009
Messages
25,929
Re: 1969 Larson - Big Project

Here's how to know how to fit a motor to your boats transom. Take the measurements and post em so we can see what you got.

shaft_measure.gif
 

Willyclay

Captain
Joined
Sep 8, 2006
Messages
3,264
Re: 1969 Larson - Big Project

I'll defer that though to some experts in here... let me hear your thoughts on this idea PLEASE! Otherwise, I'll fix the transom as is, and sell the motor in favor of a short shaft.

I vote for the raised height transom. IMHO, several positives and no negatives associated with that move. Good luck!
 

avpaulb

Petty Officer 1st Class
Joined
Jun 19, 2011
Messages
298
Re: 1969 Larson - Big Project

Good pic. I will post those measurements this evening. Thanks guys!
 

Luhrs28

Chief Petty Officer
Joined
Jul 14, 2010
Messages
423
Re: 1969 Larson - Big Project

You're slogging away at the worst phase of the resto, but it's going to be worth it. With a paint job and new windshield that boat is going to look NICE!
 

Yacht Dr.

Vice Admiral
Joined
Feb 26, 2005
Messages
5,581
Re: 1969 Larson - Big Project

If I had to rename this thread I would probably call it "No Stringers Attached". That's right... I tore out a major portion tonight only to discover my boat actually did not have any stringers! It looks to me like at some point someone must have attempted a home deck repair and was quite ill informed.

It is really hard to explain, I drew out a quick picture to attempt to show what I found:

View attachment 144485

No stringers to be found. It was totally rigged. It's a bit tough to see from these next pics, but you get the jist.

Actually .. thats probably how it was made ;) .. them ol' larsons I tells ya ;) ..

Im gonna take it that the center 'bilge/tub' thing did not have any foam in it..just a center open tub right ?

They wanted both sides of the sub floor to be foam filled and encapsulated. Then they had to over deck it ( leaving two foam filled compartments underneath ).

In honesty..its not a bad solution that they came up with at the time.

Go ahead and clean up all the damaged crapola in there..show a few more pics and we can go from there :)

Can I get a close-up pic of the fiberglass Tub thickness please ( I call them sub-stringers ).

YD.
 

ZenFerret

Cadet
Joined
May 3, 2012
Messages
25
Re: 1969 Larson - Big Project

The hardest part might be trying to find a replacement windshield.

Looks like plexiglass/perspex. As long as the frame is solid, plexi is fairly easy to work with. The melting point is around 260 degrees (f), so you can bend and form it relatively easily with a heat gun. The windshield might be the easiest part!
 
Status
Not open for further replies.
Top