1969 Sea Ray SRX Pachanga Build Thread

Propellerhead

Petty Officer 3rd Class
Joined
Nov 15, 2013
Messages
94
Re: 1969 Sea Ray SRX Pachanga Build Thread

2C350388-E3AF-48C6-8603-8AA77E234078.jpg


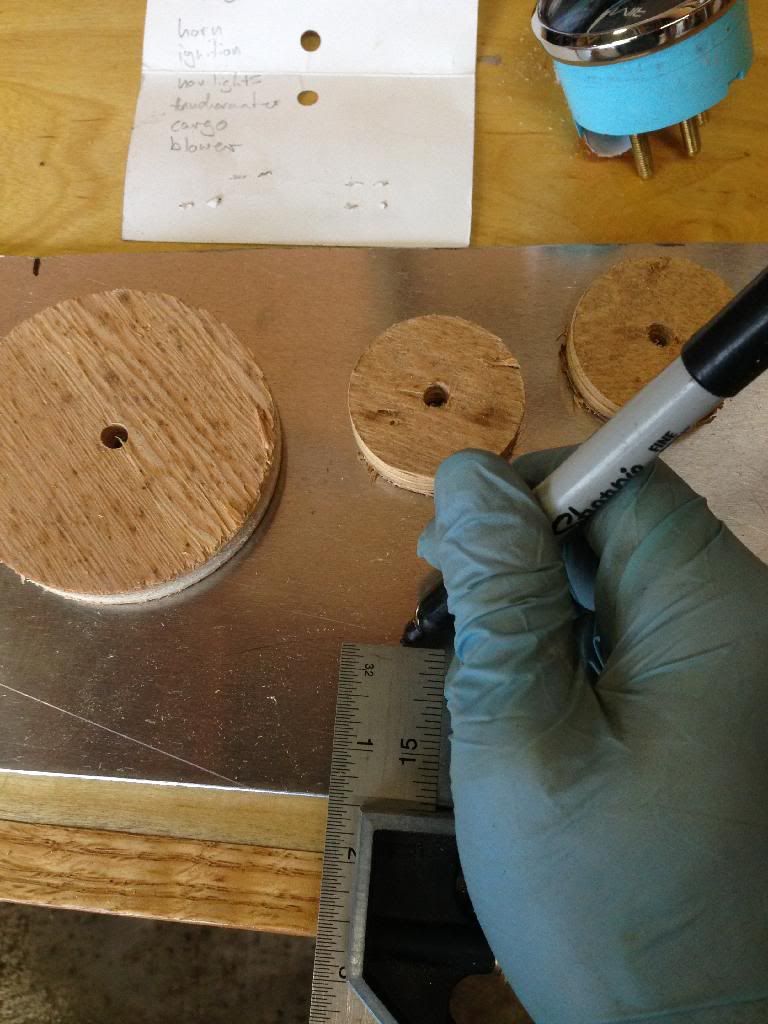
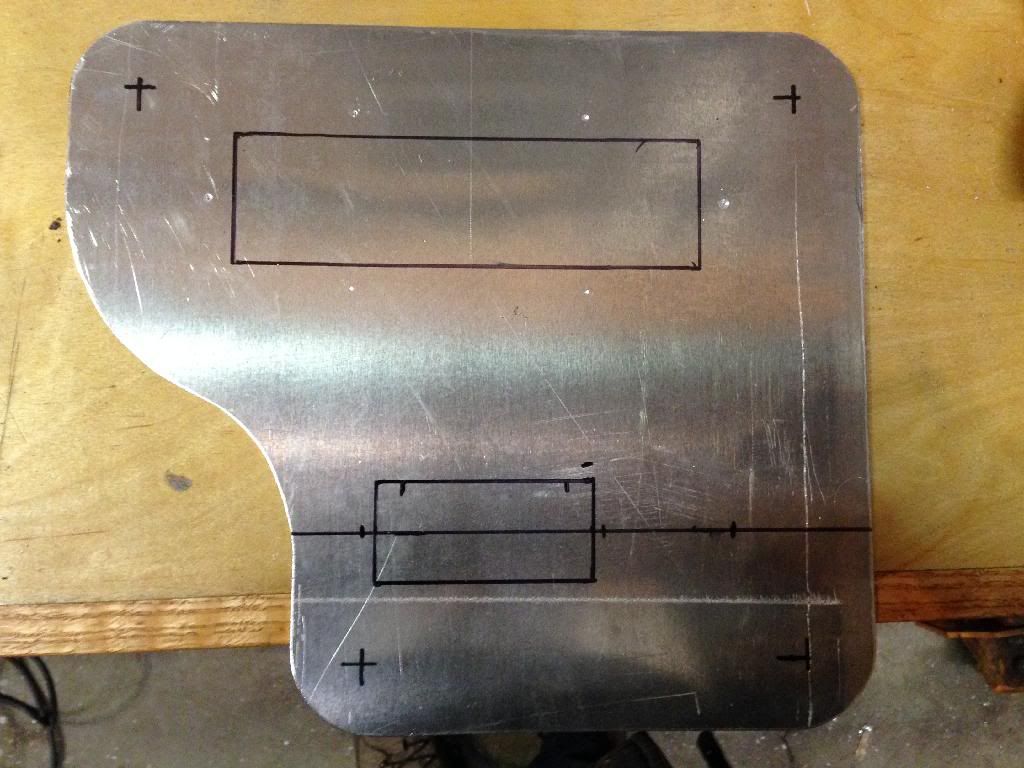
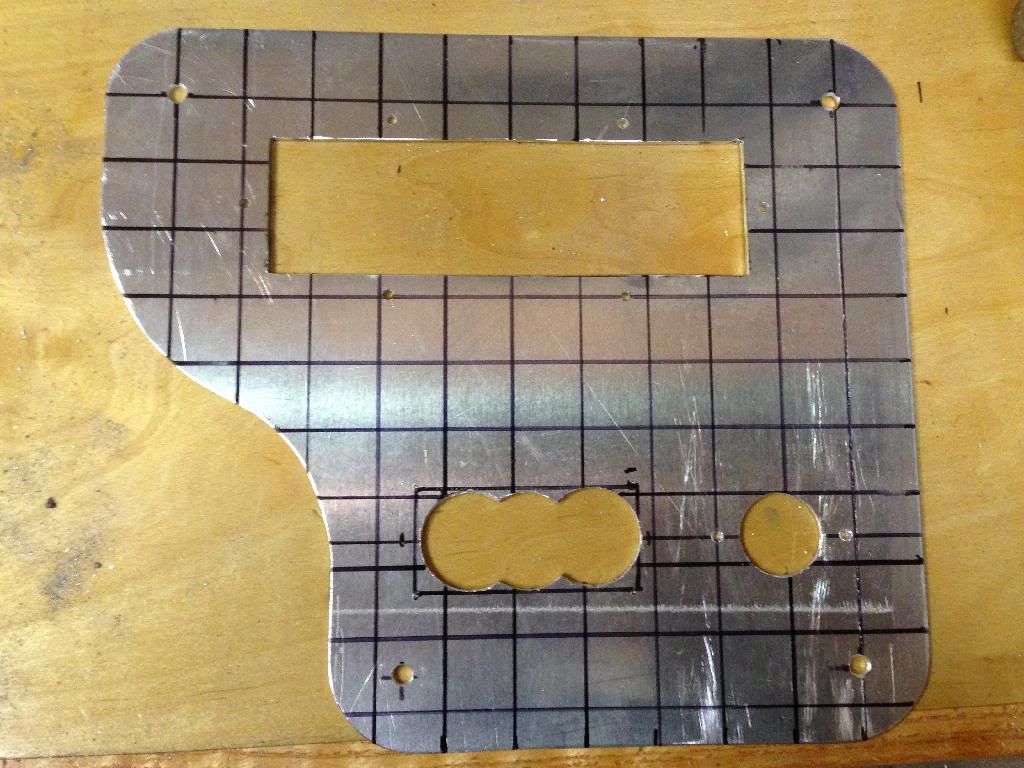
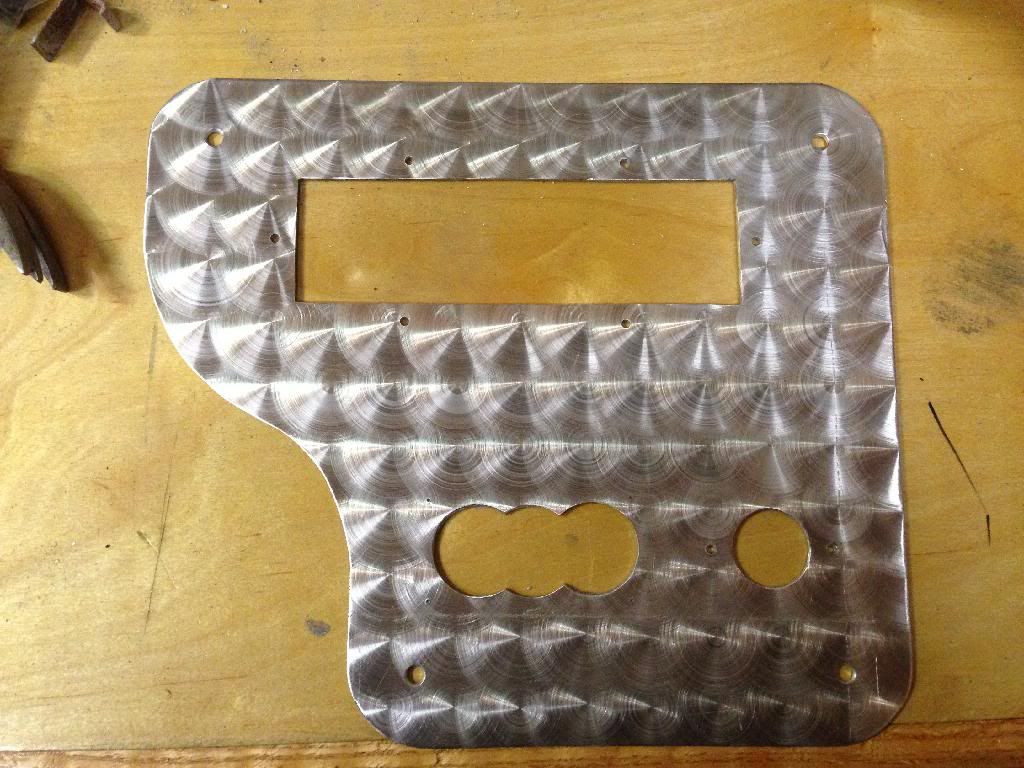
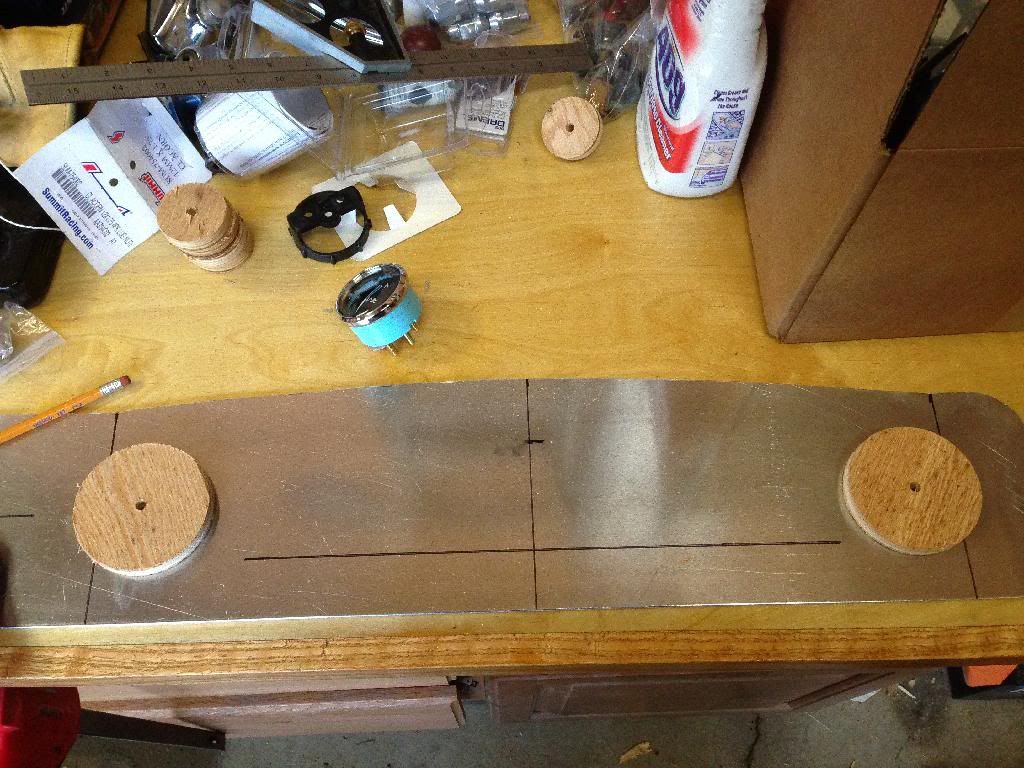
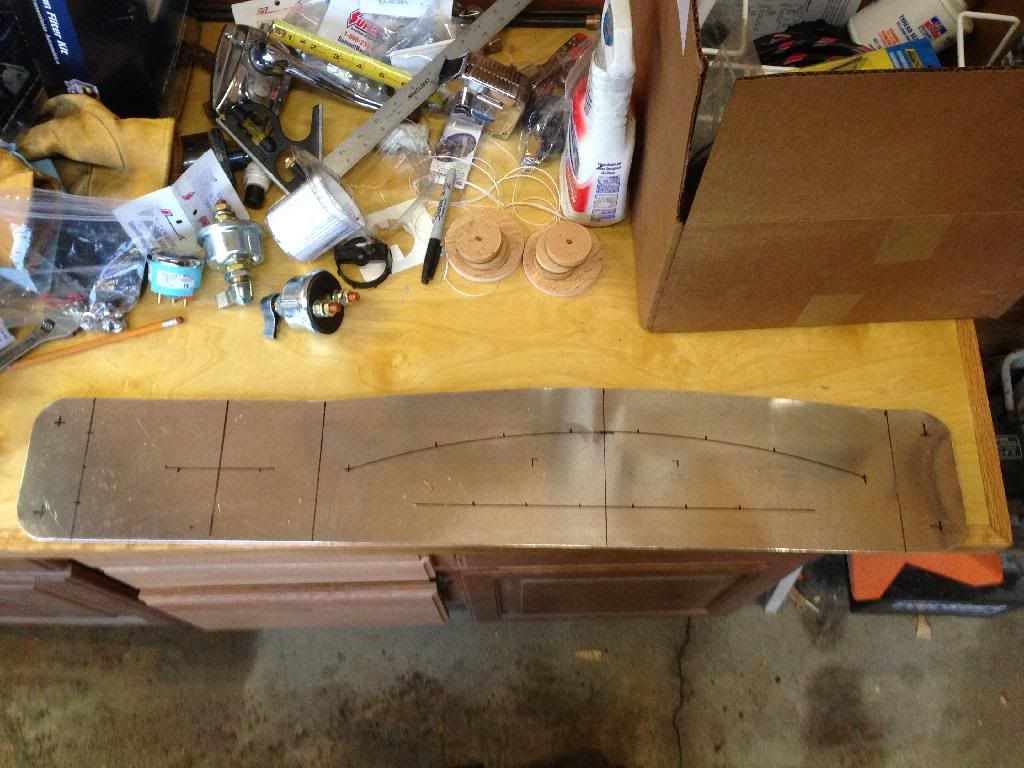
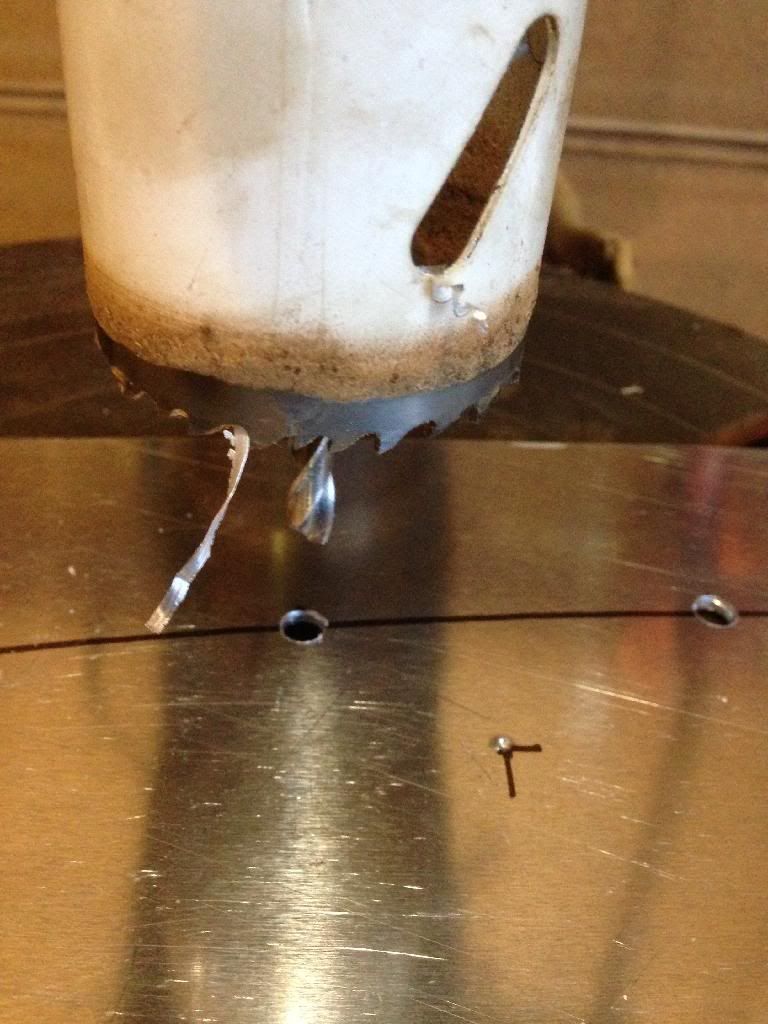
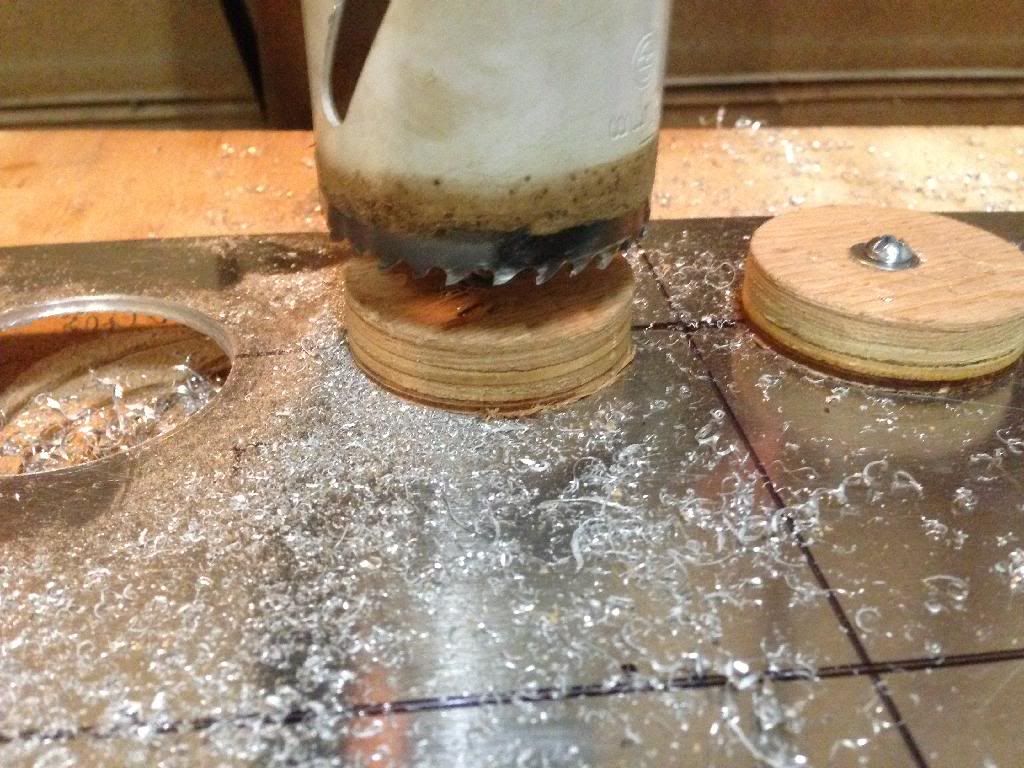
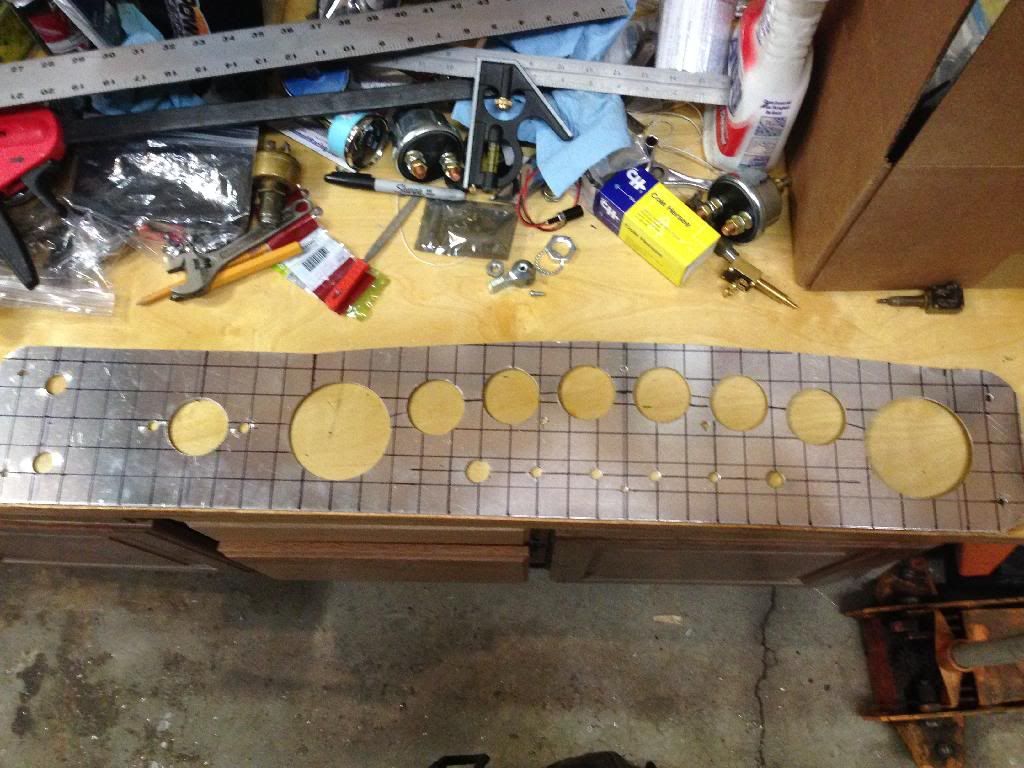
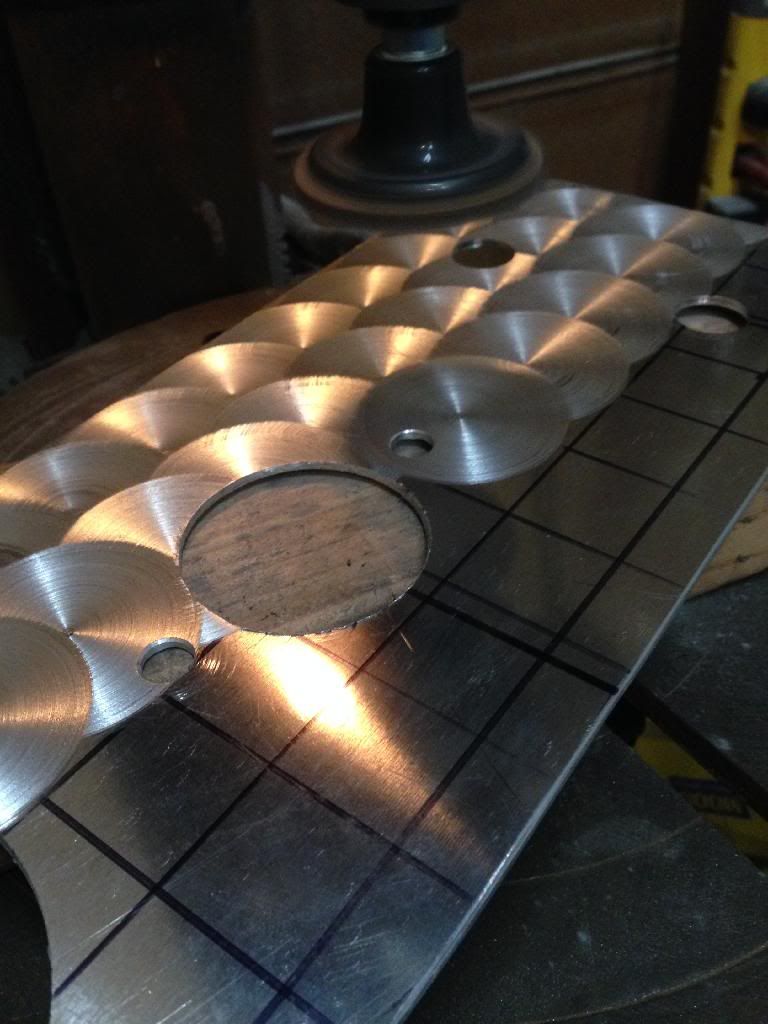
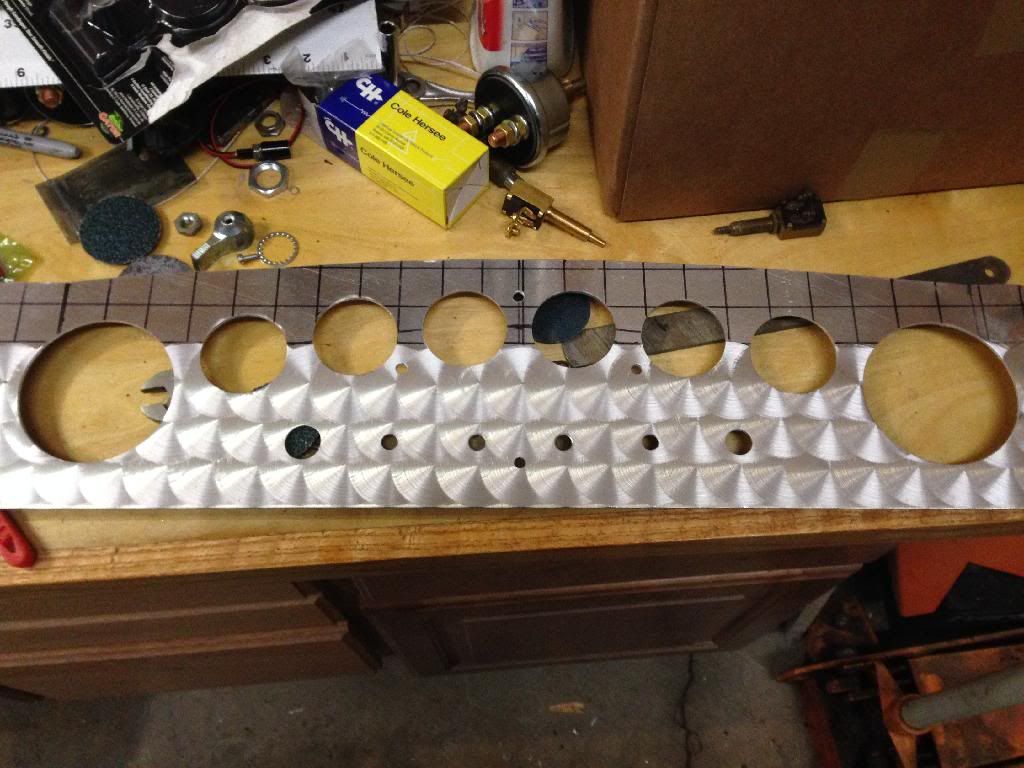
Ok, now to start drawing reference lines so I can cut accurately. I started with the easy one. I used a square to draw the centerline for the switches an inch and a half from the bottom.

27FC2F0E-A03F-495B-A57C-42900A3F2B75.jpg


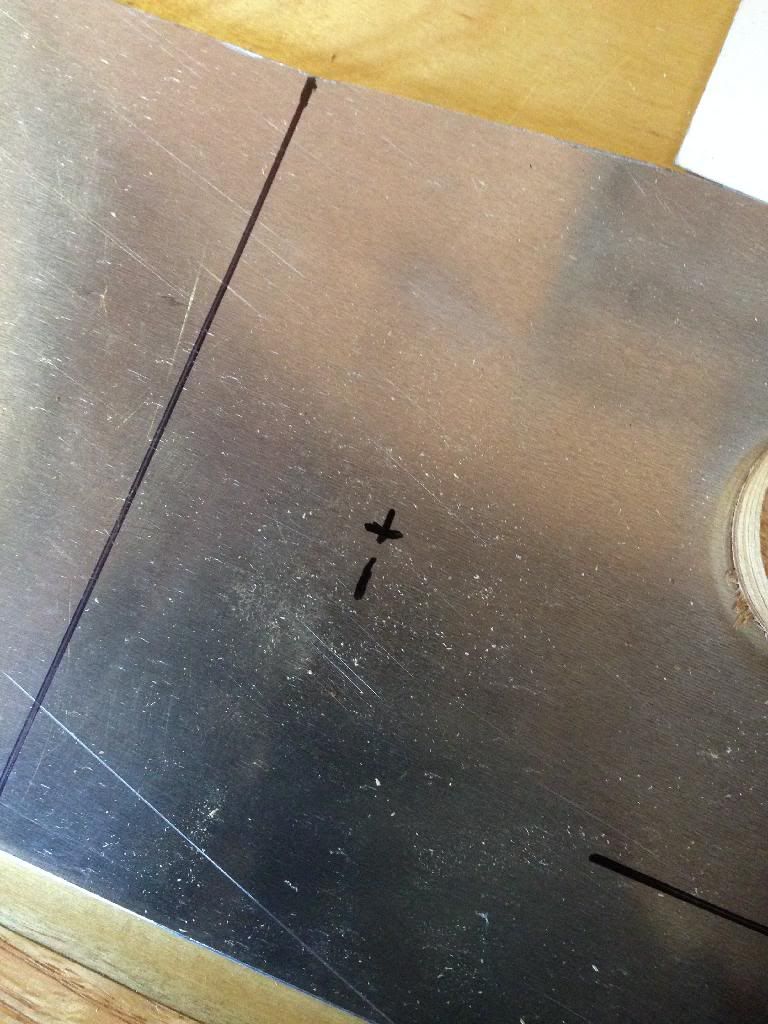
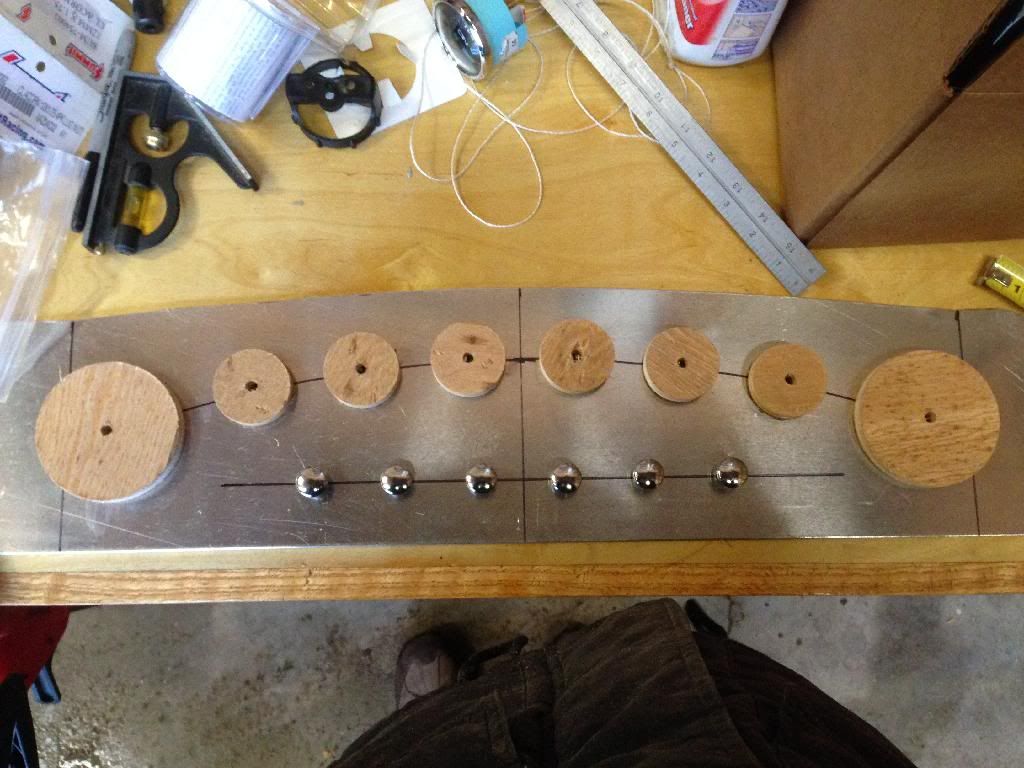
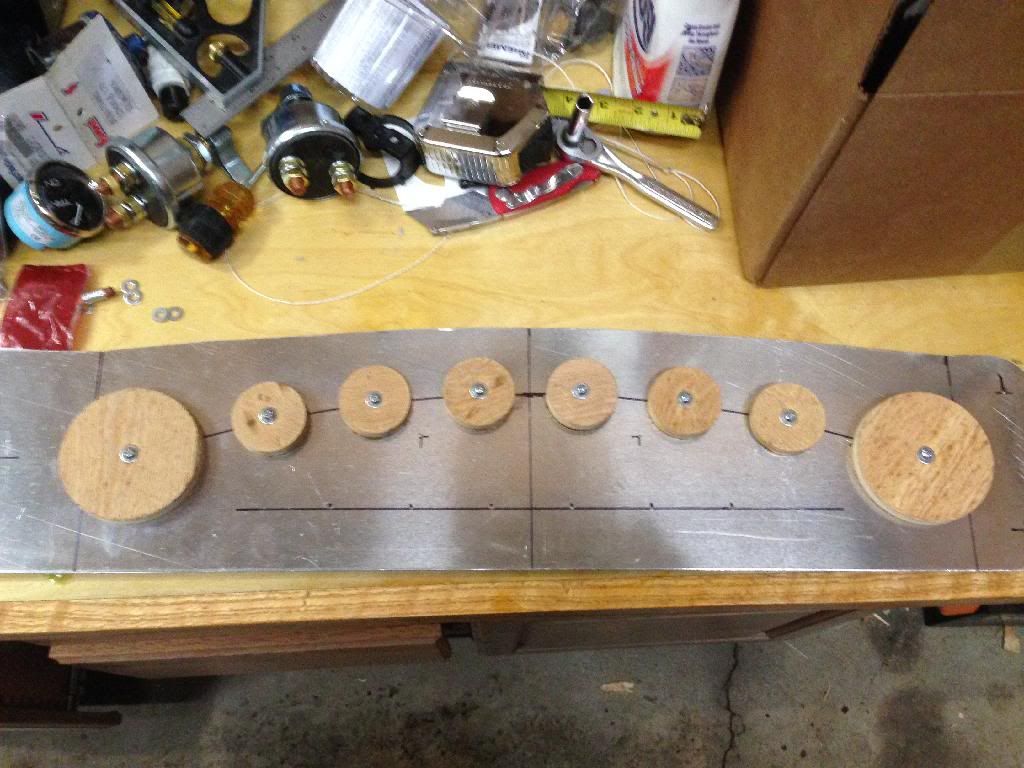
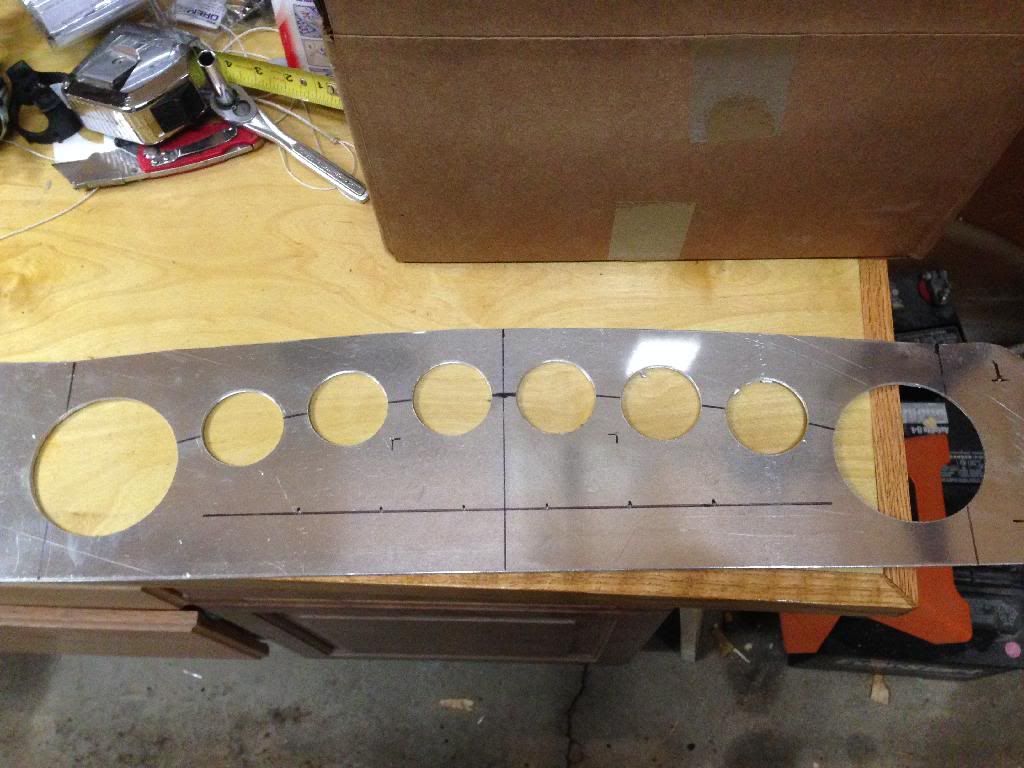
Then I started on the gauges by measuring for the center of the big gauges to be in the center of the panel. (It doesn't look like it, but the big ones are centered up and down.)

C44B6CC0-DCC2-4B64-B292-3D643780F3FC.jpg


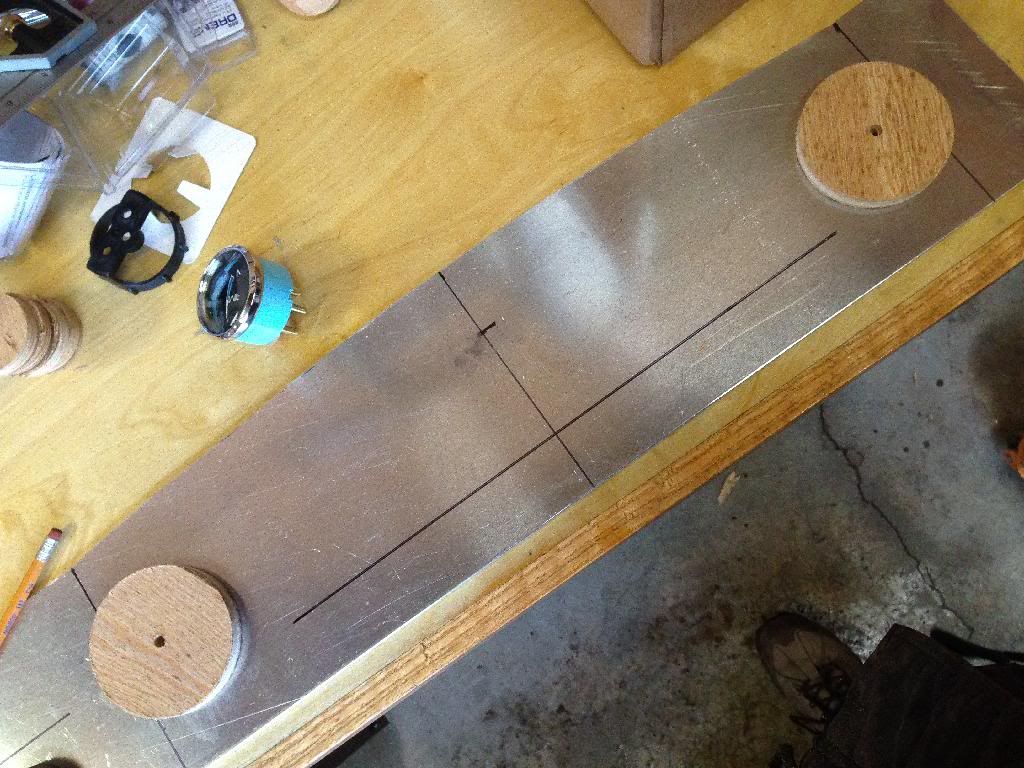
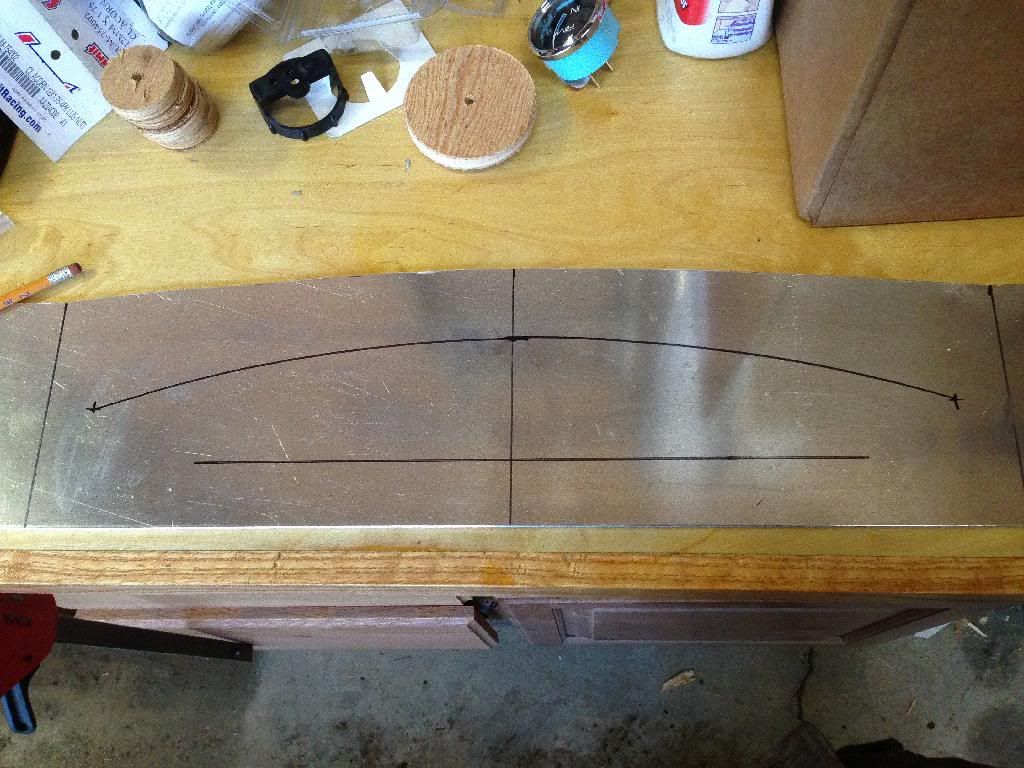
Then I marked the center of the highest point of the arc that I was planning on aligning the gauges with.

B96282CF-7FA5-4391-A010-164028E9EAC4.jpg


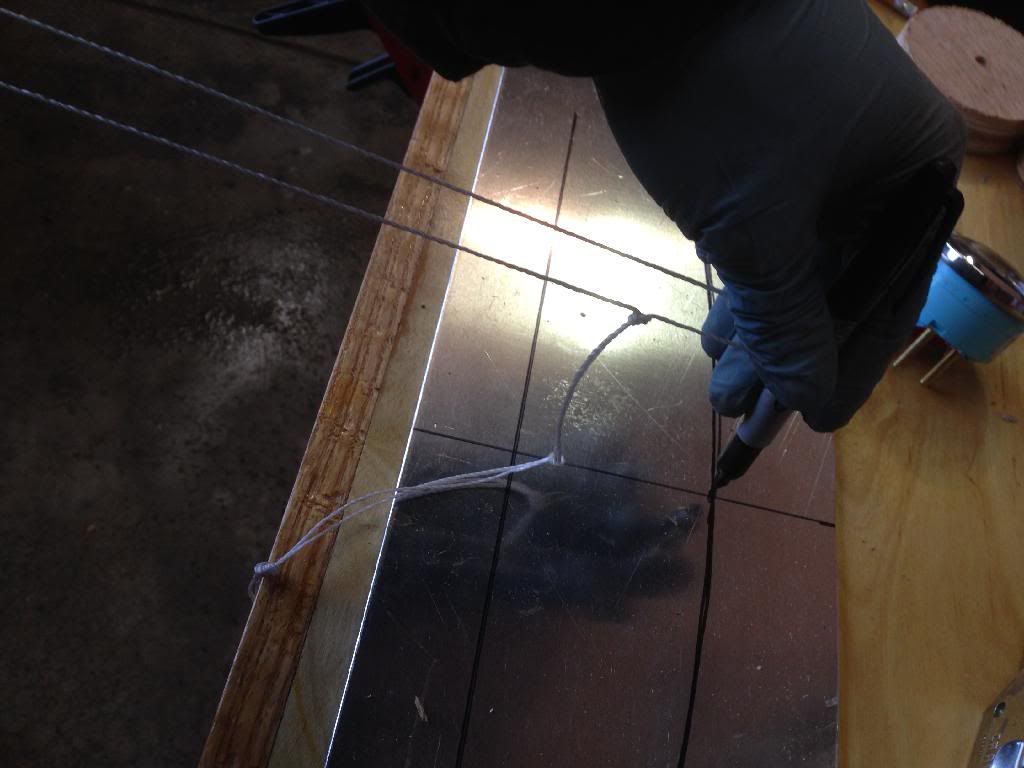
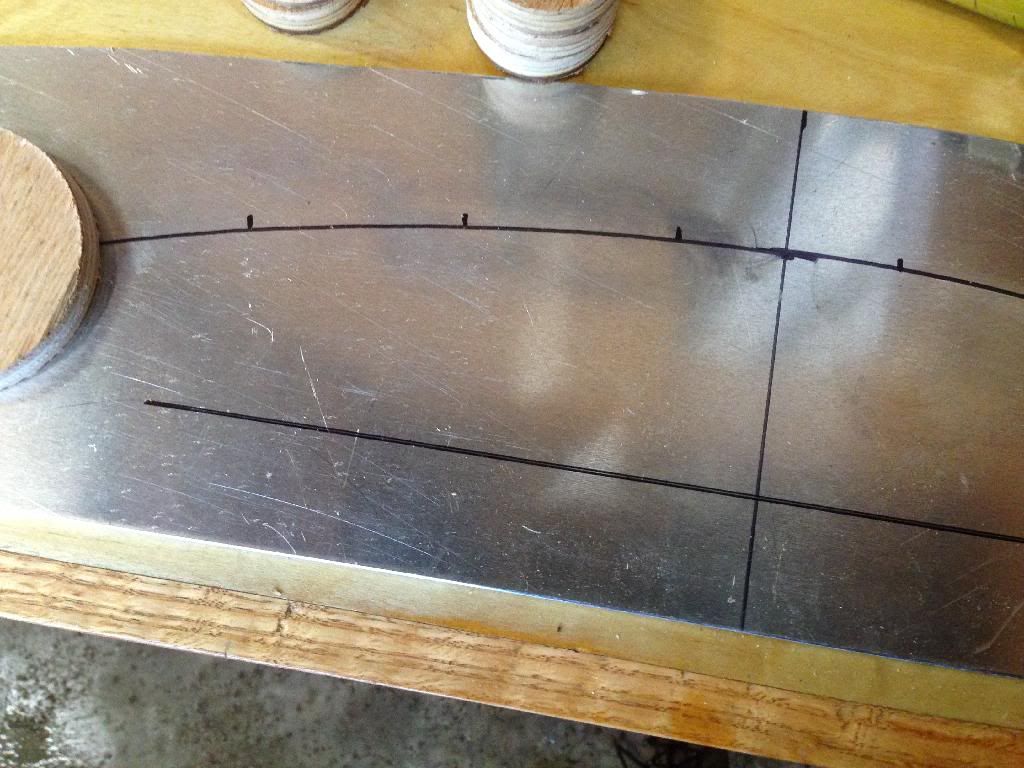
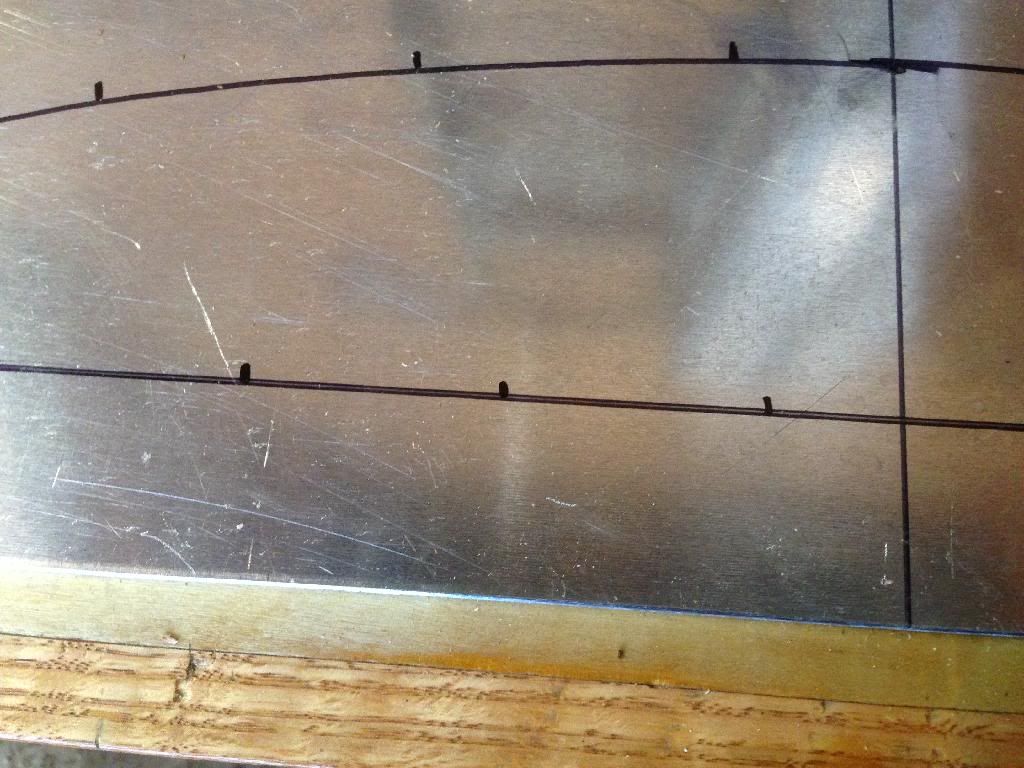
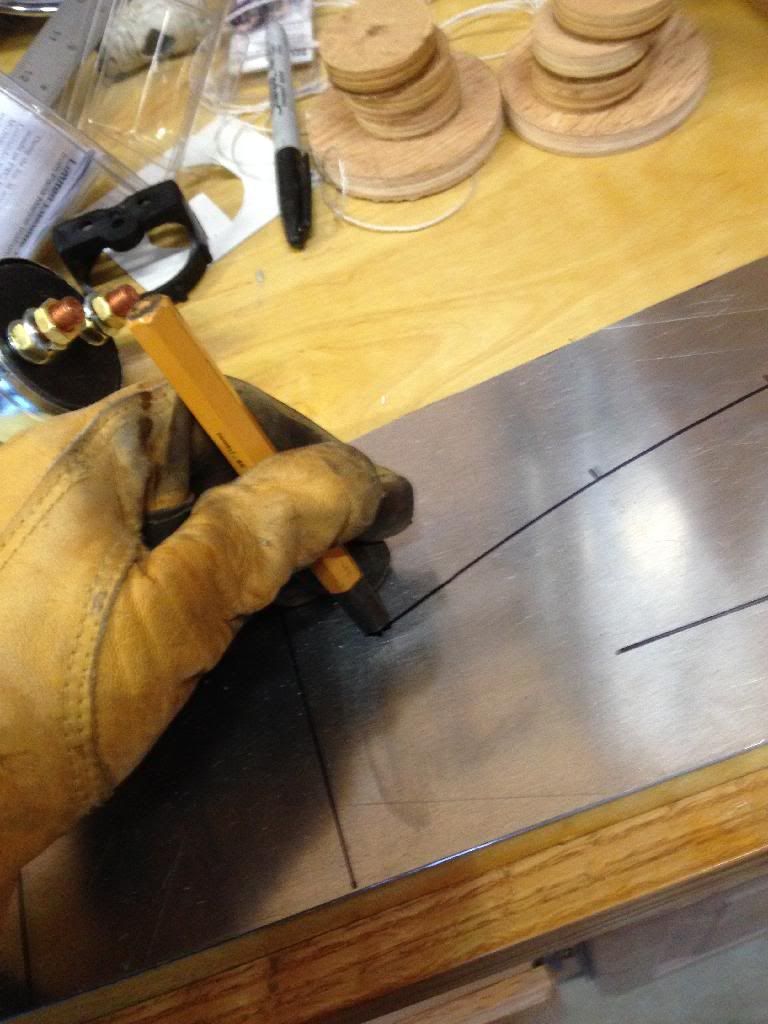
I used the string method (anchored to a stationary object, in this case the upright handle of my floor jack) to draw the arc. And I actually screwed it up the first time.

65455A10-4440-4528-BF59-93D8C58581CF.jpg


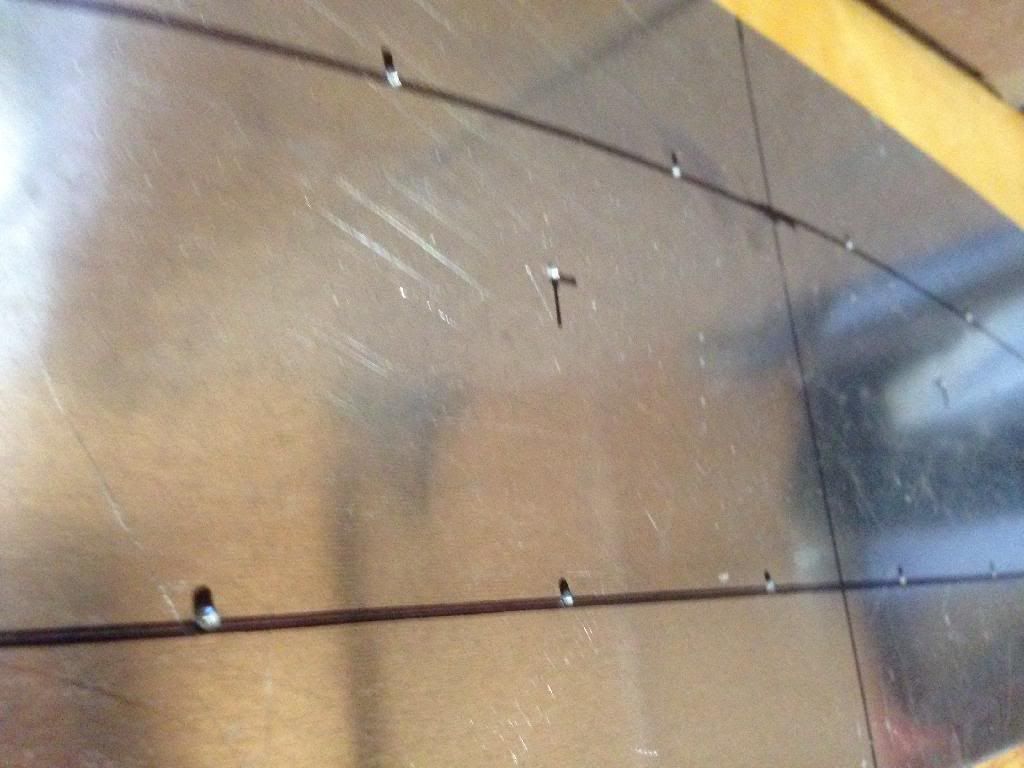
Some acetone on a rag and the line was erased.

10139519-64FC-48A7-B5A3-401535A2812F.jpg


I tied another knot in the string to adjust the arc and tried it again.
 

Propellerhead

Petty Officer 3rd Class
Joined
Nov 15, 2013
Messages
94
Re: 1969 Sea Ray SRX Pachanga Build Thread

28E22360-6F58-4ECA-98F3-3B85BEDA4E86.jpg


Second time was a success.

2F238645-4400-48BA-B95B-EEB561C5CD30.jpg


With the big plywood gauges in place, I marked out even spaces for the centers of the small gauges.

8AA45C94-D50F-4334-924C-8D0125D47951.jpg


Then I marked out the switches.

8EFBF460-5B0A-4323-B988-D357F4CBE815.jpg


I put everything in place to see how it looks as final check before the cutting starts. I like!

EE4F2A60-9623-4B5D-99BF-EDAD9BFCFCB0.jpg


Finally, I mark out the remainder of components, the helm, the battery switches, the post lights, and the points where the panel will be bolted to the boat.

8DDBDD4C-ABCC-488E-9180-D36F347D3C20.jpg


With everything marked, I started center-punching all the points.
 

Propellerhead

Petty Officer 3rd Class
Joined
Nov 15, 2013
Messages
94
Re: 1969 Sea Ray SRX Pachanga Build Thread

1762EC07-2193-43F3-814D-178BEE80F42E.jpg


With everything carefully center-punched, we were ready to start drilling.

BA6BAB21-A0C4-4A71-8B55-35D5A0490F3B.jpg


This is the trick I learned from an airplane mechanic to getting perfectly lined up gauges. The problem is that no matter how diligent you are about measuring, marking, and punching, there's always some room in there for the bit to walk around a little bit. So here's the technique. I started drilling the holes for the gauges by JUST drilling the pilot bit of the hole saw. No holes yet.

A0015A88-777A-4881-B15C-16DB6944DA04.jpg


Then I used #8 machine screws to bolt the plywood circles to the panel. The screws are a little smaller than the pilot holes, so there's some play in there. You can move the circles around a little bit and position them in just the right place. It doesn't matter if the pilot holes are off slightly. Just tighten up the screws when they're perfect.

5E59F593-D1F0-4784-940B-A86AE3092EE1.jpg


Once the gauges were in exactly the right position, I took the pilot bit out of the hole saw and used the plywood circles to center it. Since it's the same hole saw that cut the circles, it fits perfectly.

5CA86540-DB3A-49F5-A80C-EB7D84EED99E.jpg


And we end up with a bunch of holes.

0071271A-9CAE-45AD-8D10-519754AA71C0.jpg


For the switches, I set up a fence in the drill press and used a step bit.
 
Last edited:

Propellerhead

Petty Officer 3rd Class
Joined
Nov 15, 2013
Messages
94
Re: 1969 Sea Ray SRX Pachanga Build Thread

4F79B9C2-B075-4BCD-87E8-523567697449.jpg


And here's the panel with all the holes cut, almost. I forgot the cut the big hole for the helm, but I did right after I took the picture.

B16A59EA-76D6-4B79-9DAF-0A4BFF5BAC51.jpg


At this point I drew a grid on the panel. Why, you ask? Well I was thinking of different ways to finish it (paint, etc.) and I decided that I was going to engine turn it. It's kind of a cool, 1960's hot rod look, and I think this boat fits in with that aesthetic. Plus, I'm kind of a hot rod guy, so I think it works.

CB1376F1-896D-48A9-8644-C2AB2E641CB3.jpg


I bought a 2 inch abrasive disc set at Pep Boys, I think. Since the discs are two inches, divide that by two, and you get a 1-inch grid spacing.

C76835DF-D16B-4FBA-B745-E310CD9D06EA.jpg


With the abrasive disc in the drill press, I started grinding with the center of the disc at each inspection of lines that I drew.

FB5953FC-E380-4D91-8E0C-38CCD8B2CB9D.jpg


You can see the pattern starting to emerge. I just went point by point, down each row. It definitely took some time.

EDDF6754-B1AD-47D8-96BA-171AFF2B42BF.jpg


I also went through discs pretty quick. I got about this far before I ran out. I found that you have to use the scotch brite pad discs. The sandpaper ones wanted to grab too hard and start walking the panel. I found that the coarse ones seem to give the best finish. You can use the fine ones, but they take about twice and long.
 

Propellerhead

Petty Officer 3rd Class
Joined
Nov 15, 2013
Messages
94
Re: 1969 Sea Ray SRX Pachanga Build Thread

21AB05AE-C6F5-43EF-9602-6205B7993AFC.jpg


Since this was a good time to take a break, I lined the panel up with the index marks again and traced the holes onto the boat.

E7802344-B3FA-4649-9723-8E8C44B53A5B.jpg


I basically connected the dots with the sawzall. The way I figure, this panel lost all it's strength when the last guy put the last set of gauges in, it already wiggled around, and the fiberglass was delaminated from the wood. I know it's ugly, but it'll give me a nice space to work with and I'll build some structure back into it when I get back to the fiberglass work. I already needed to do some work in that area. Maybe I'll even clean up the hole, too, so it doesn't look like a money attacked it with a chain saw. :)

A6F20DA2-4637-4095-8F06-736B60E4C50C.jpg


Ok, I got back with some more discs, and this is how the panel turned out.
 

Propellerhead

Petty Officer 3rd Class
Joined
Nov 15, 2013
Messages
94
Re: 1969 Sea Ray SRX Pachanga Build Thread

A9C78457-D793-404C-92C8-345DA935EED9.jpg


40EED1FA-9D39-4B60-BD4D-BA28D28495B9.jpg


36A3335D-E8F0-4B21-84AB-D229AE061E2C.jpg


9ACD2D34-9DA7-4135-B8A1-D85E85421A3C.jpg


DD48DB06-6EC8-468A-AC9D-4B74A418936E.jpg


F823ED60-C88F-41BB-82E0-2D1ED3BA89C9.jpg


The side panels followed the same process. Mark, cut, grid, engine turn. Rinse, repeat. One thing that I made sure to do, is to always start engine turning from the same place. In my case I always started at the bottom left corner. This way the pattern will match when the pieces are sitting next to each other.
 
Last edited:

Propellerhead

Petty Officer 3rd Class
Joined
Nov 15, 2013
Messages
94
Re: 1969 Sea Ray SRX Pachanga Build Thread

Almost done!

E0F02842-5EDC-4752-981E-E70AB61B497B.jpg


Next, I cleaned off all the grime with acetone, decreased the panels with paint prep, and clear coated them to keep them safe from the elements.

6961466F-CA44-4A4E-8F23-38D86BE7F5A9.jpg


I felt like the edges needed to be dressed up a little so I found some of that cheapie plastic chrome trim that you can get at Autozone. Hey, it does the job, and apparently made in the USA! (Surprising)

830013C9-5C65-4C6D-8502-5549C31E0619.jpg


It actually went on pretty well, and I think it looks pretty good.

01FF64D7-6751-4C70-A4CD-5F4D700F8EB9.jpg


Like I said before, I don't have all the gauges yet, but I put a couple in, along with the battery switches and push-pull switches, etc. I think this is turning out just how I wanted.

173B4269-B035-4052-A580-081B8FA47FA2.jpg


A little close up. Well, once again, it's time to get to my real work. See ya next week!
 

Scott Danforth

Grumpy Vintage Moderator still playing with boats
Staff member
Joined
Jul 23, 2011
Messages
51,841
Re: 1969 Sea Ray SRX Pachanga Build Thread

you are going to want to clear the aluminum with something to prevent oxidation.

I recommend Clearcoats
 

Natesms

Chief Petty Officer
Joined
Sep 8, 2012
Messages
464
Re: 1969 Sea Ray SRX Pachanga Build Thread

Great work on your panel. That's a great trick with the plywood and the hole saw to get it all lined up. I also really like the pull knob look. Keep it up!
 

bear_69cuda

Commander
Joined
Oct 10, 2008
Messages
2,109
Re: 1969 Sea Ray SRX Pachanga Build Thread

Cool boat brutha!

The dash bezels are awesome!
 

fat fanny

Lieutenant Commander
Joined
Feb 9, 2006
Messages
1,935
Re: 1969 Sea Ray SRX Pachanga Build Thread

The dash panel looks great! Just a hint to get a more consistant looking circular swirl use a wire wheel cup with light pressure.
 

Searayb

Seaman Apprentice
Joined
Jul 6, 2011
Messages
46
Re: 1969 Sea Ray SRX Pachanga Build Thread

Dash is very cool, nice work.
 

fishrdan

Admiral
Joined
Jan 25, 2008
Messages
6,989
Re: 1969 Sea Ray SRX Pachanga Build Thread

you are going to want to clear the aluminum with something to prevent oxidation.

I recommend Clearcoats

Yup, I used semi-gloss laquer (Deft) to clear coat a brass capacity plaque in my boat and it's held up well for 3-4 years, no tarnishing of the brass.

The 2-part stuff Scott mentioned is most likely better, but more expensive.
 

Propellerhead

Petty Officer 3rd Class
Joined
Nov 15, 2013
Messages
94
Re: 1969 Sea Ray SRX Pachanga Build Thread

Cool, thanks. Yeah, I actually did use a clear coat before applying the chrome trim.
 

detroitdonzi

Recruit
Joined
Jan 26, 2014
Messages
3
Re: 1969 Sea Ray SRX Pachanga Build Thread

got the same boat and watching how u do it looks good thanks
 

Attachments

  • pachanga side.jpg
    pachanga side.jpg
    32.5 KB · Views: 0
  • pachanga dash.jpg
    pachanga dash.jpg
    41.7 KB · Views: 0

detroitdonzi

Recruit
Joined
Jan 26, 2014
Messages
3
Re: 1969 Sea Ray SRX Pachanga Build Thread

pachanga2.jpg

Interior is set up a bit different
 
Last edited:

Kernallklink

Petty Officer 3rd Class
Joined
Aug 1, 2013
Messages
85
Re: 1969 Sea Ray SRX Pachanga Build Thread

Wow! I wish I was in the hanger helping out. BTW, any aircraft in the hanger?
 

Propellerhead

Petty Officer 3rd Class
Joined
Nov 15, 2013
Messages
94
Re: 1969 Sea Ray SRX Pachanga Build Thread

Detroitdonzi: Sweet! Another Pachanga! I'm excited to see another one out there! Are you working on it? From the 2-part engine cover it looks like another '69, but yours has the optional bow rail? Yeah, your interior is how they came, with the gauges in that center console. Somebody redid my interior back in the 70's and threw all of that out, which is too bad. I like the look.

Kernalklink: not yet. Maybe when the boat's done... and I make more money...
 

detroitdonzi

Recruit
Joined
Jan 26, 2014
Messages
3
Re: 1969 Sea Ray SRX Pachanga Build Thread

pachanga stearn.jpg

Work on it ,not yet have a collection of vintage old fiberglass speed boats and get to em one at a time
 
Top