1978 Starcraft Chieftan 18' - Starting point

GA_Boater

Honorary Moderator Emeritus
Joined
May 24, 2011
Messages
49,038
Re: 1978 Starcraft Chieftan 18' - Starting point

Practice on the little tinny is good practice for the big tinny. I don't know if I would bother masking. It's pretty much gonna go where it goes and with the flipping around, it will semi-ooze to the low spots anyway.
 

Watermann

Starmada Splash of the Year 2014
Joined
Jan 12, 2013
Messages
13,822
Re: 1978 Starcraft Chieftan 18' - Starting point

The "little tinny" is ready for the Gluvit treatment. I'm thinking I will flip it up, on one side, do the waterline seam, wait a day, flip it onto the other side, do the other seam, then maybe stand it on the stern, do the aft seam, and then do all of the floor rivets, and the bow area, where the bottom attaches to the keel. I have to dig out the various junk that has been put in the bow cavity, over the years, so I can Gluvit those rivets. I'm thinking of masking some, so the Gluvit doesn't get all over the place, I'll use a stiff brush to get a thinner coat and hopefully keep sags, and runs to a minimum. Sound right? Any tips, caveats, etc? - I know it may seem that I'm off in la-la land, but, this little one, is practice/learning experience, for doing the Chieftan, and I'm darned anxious to get on to that project.

Hey neighbor glad to see your still hanging with it.

Gluvit... yeah not much a guy can do to keep it in check. I haven't ever really tried though since everything it's on is far below the decks. Another worry you'll have when using on such a small craft. It says the stuff is flexible yeah to a point but when it's cold and you walk on it in the bottom of a flexible little tinny, it will surely snap, crackle and pop on you leaving a gluvit coated leaky hull. The thinner the coat the weaker it is and easier to snap the coat too. Just a thought and when you do the Chief remember not to walk on it, use a piece of ply or stay on the ribs if you can.
 

jpstude

Petty Officer 2nd Class
Joined
Feb 5, 2010
Messages
132
Re: 1978 Starcraft Chieftan 18' - Starting point

Thanks, GA and Watermann - Well... at least I don't have to bother with a bunch of masking. I hope this works, but from you're saying, Watermann, it looks like it may not. Here's hoping you're wrong, this time. LOL - I'm going to gluvit this thing tomorrow, call it good, and I'm movin' on. Time to start pulling stuff off the real project!
I'll shoot you guys pics as I go along.
 

Watermann

Starmada Splash of the Year 2014
Joined
Jan 12, 2013
Messages
13,822
Re: 1978 Starcraft Chieftan 18' - Starting point

Oh it will work I'm just passing on some experience with the stuff.
 

jpstude

Petty Officer 2nd Class
Joined
Feb 5, 2010
Messages
132
Re: 1978 Starcraft Chieftan 18' - Starting point

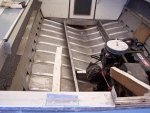
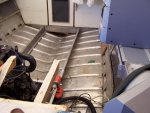
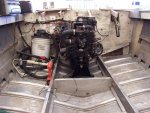
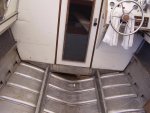
OK, just so no one thinks I have forgotten the REAL project - 100_2297.jpg - I removed the aft flooring, today - 100_2298.jpg - just a few views 100_2299.jpg - 100_2300.jpg :cool:
 

jpstude

Petty Officer 2nd Class
Joined
Feb 5, 2010
Messages
132
Re: 1978 Starcraft Chieftan 18' - Starting point

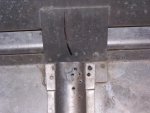
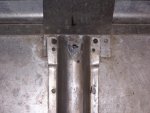
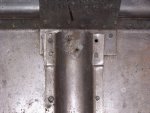
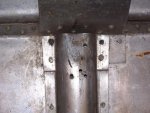
The hull was pretty clean with the worst of it, under the engine, as usual. What I did find was a few missing rivets, on a couple of the rib-ends. 100_2301.jpg 100_2302.jpg 100_2303.jpg 100_2304.jpg - There are a few more, but you get the idea. I have to crawl under her, and check out to see if the missing rivets, are all of the way gone, or are still "half there".
Question: can I get blind/round head rivets for a pop rivet gun?

Note - As you can see, from the extra screw holes in the ribs, this boat has had the floor replaced. The insulation was dry, although there was some gas/oil eaten stuff I threw out.
 

classiccat

"Captain" + Starmada Splash Of The Year 2020
Joined
Dec 20, 2010
Messages
3,412
Re: 1978 Starcraft Chieftan 18' - Starting point

The hull was pretty clean with the worst of it, under the engine, as usual. What I did find was a few missing rivets, on a couple of the rib-ends. View attachment 231937 View attachment 231938 View attachment 231939 View attachment 231940 - There are a few more, but you get the idea. I have to crawl under her, and check out to see if the missing rivets, are all of the way gone, or are still "half there".
Question: can I get blind/round head rivets for a pop rivet gun?

Note - As you can see, from the extra screw holes in the ribs, this boat has had the floor replaced. The insulation was dry, although there was some gas/oil eaten stuff I threw out.

IMO, 1st choice should be solid rivets. 2nd choice would be SS bolts/nylock nuts. Last would be a pop-rivet. The latter 2 choices are sub-optimal since you get zero expansion inside of the hole; you're relying on a sealant to fill the void (i.e. 5200). Pop rivets come loose over time.
 

Watermann

Starmada Splash of the Year 2014
Joined
Jan 12, 2013
Messages
13,822
Re: 1978 Starcraft Chieftan 18' - Starting point

Looking good neighbor! When are you going to get that chunk of iron out of the there?

Nice your Chief has the rib end braces already retro fitted. The missing rivets, yeah take a close look at the holes when you crawl underneath. If you see any cracking, there are a couple more steps involved for the repairs. On replacing the rivets, I echo what Bluefin posted.

So how'd the gluvit job go on the lil tinny?
 

jpstude

Petty Officer 2nd Class
Joined
Feb 5, 2010
Messages
132
Re: 1978 Starcraft Chieftan 18' - Starting point

Good morning, gentlemen, and thanks for the replies, I need all of the advice I can get.

BlueFin16 - I agree, So, we're talking large tank compressor, rivet gun, and something to buck the rivets with? It's been a long time since I bucked rivets. I worked for Boeing, as a "wing rat" on 727 wings, in the late '70's, and did a little of that. ANd, yep, pop rivets come loose. I have already found some on the little stringers, that I will drill out and replace.

Watermann - Hey neighbor! I didn't know the braces are a retrofit. I will inspect the bottom, after I get done pulling up the floor, in the cuddy, so I know where to look for "leakers". Hopefully, I won't find any stress cracking. I have to get a hoist, before I can pull the motor. - The gluvit job, on the Springbok, came out fine. The masking worked great, with only a couple of small dribbles, and I can feather those out prior to paint. Hope all is well, with you, and yours. I wish I was over your way, wetting a line... soon!

OK, back to it.
 

Watermann

Starmada Splash of the Year 2014
Joined
Jan 12, 2013
Messages
13,822
Re: 1978 Starcraft Chieftan 18' - Starting point

The air hammer doesn't use that much air if you already have a smaller set up. You will need an air hammer, rivet set, bucking bar, 3/16" brazier head rivets 1/2" long and a tube of 5200. If you find any other damaged, loose or wore down rivet heads you can set some new ones too. Not to mention the possible patches that may need to be fitted on. Take a look at Bluefin's resto page and I did some of the same repairs on my Chief.
 

jpstude

Petty Officer 2nd Class
Joined
Feb 5, 2010
Messages
132
Re: 1978 Starcraft Chieftan 18' - Starting point

Thanks, Watermann. Cool, I have a smaller compressor, if that doesn't work, I'll just get another. I'm going to need one anyway, when it's time to do the prep, and paint. Perfect excuse to tool up. I will also study up, on BlueFin's post - Thanks... Back to it
 

GA_Boater

Honorary Moderator Emeritus
Joined
May 24, 2011
Messages
49,038
Re: 1978 Starcraft Chieftan 18' - Starting point

She looks nice and clean. JP. Good to see the chine support plates from the factory. What is that chunk of wood in the lower port corner? It looks like the floor has been replaced at least once judging by the multiple holes in the rib ends.
 

Watermann

Starmada Splash of the Year 2014
Joined
Jan 12, 2013
Messages
13,822
Re: 1978 Starcraft Chieftan 18' - Starting point

Good to see the chine support plates from the factory.

There are a few clues here that make me believe that's not a factory job and is a retro-fit. 1. The plates are not evenly centered. 2. They drilled out the decking rivets to get to the rib ends and then re-installed the deck. 3. They used softer rivets that the SC factory does and the bucktails broke off, you can still see the rivet shafts in the holes and the rib end bucktails look like the soft 1100's do when mushed in. The only thing that doesn't fit is the bend in the rib foot? Not sure how they would do that one.

attachment.php
 

GA_Boater

Honorary Moderator Emeritus
Joined
May 24, 2011
Messages
49,038
Re: 1978 Starcraft Chieftan 18' - Starting point

Given the SC quality we've seen, I think it all fits. And there have been stories about a retrofit to add the plates. Weather it was factory retrofitted or dealer - :confused:. Factory I think though with the step in the ribs. Off center plates adds to a factory refit instead of as built originally. IMHO
 

jpstude

Petty Officer 2nd Class
Joined
Feb 5, 2010
Messages
132
Re: 1978 Starcraft Chieftan 18' - Starting point

BlueFin - Zoiks! I am doing some homework/idea thievery, on your restoration, and wow, the corrosion in the hull was not good. I almost want to take some close ups of mine, just to show how good the shape of the metal is. - Nice tip on getting rid of the contact cement.
 

jpstude

Petty Officer 2nd Class
Joined
Feb 5, 2010
Messages
132
Re: 1978 Starcraft Chieftan 18' - Starting point

GA Boater - That piece of wood... I was using it to sit on, while I cleaned the bottom, of the inside hull. LOL - And yep, it looks like the floor has been replaced to me, too. You can bet, I'll do a more accurate/stronger job than whomever did the replacement, the first time around. I'm going to brace the seams, where the sheets butt-up (that strip of flat aluminum is nothing), glue a piece of ply under the seats, for strength, and some angle cut 2x4 on top of some of the ribs. I don't like bouncy floors.
 

Watermann

Starmada Splash of the Year 2014
Joined
Jan 12, 2013
Messages
13,822
Re: 1978 Starcraft Chieftan 18' - Starting point

Man seeing that hole from the inside and the Donkey 'ahem' hanging down makes me think of another patch project you'll be in for on the outer transom skin.

attachment.php


Man your Chief wasn't used in the salt, your lucky as heck! Except the part about all of the old carpet glued on everything, not so lucky there. :grumpy:
 

jpstude

Petty Officer 2nd Class
Joined
Feb 5, 2010
Messages
132
Holy Smoke! So, we may be back up and operational again! I couldn't even log in until now. I was just checking in, to see if the IT folks managed to kill off some of the bugzzz. OK, I have done a little more work on the boat... I will post more pics - HAPPY FATHER'S DAY, to all of you procreators, out there.
 

Watermann

Starmada Splash of the Year 2014
Joined
Jan 12, 2013
Messages
13,822
Welcome back, there's still a bunch of bugs, posts don't take right sometimes and the photo handler for the forum doesn't stick, the pics tend to go away unless you use photobucket.
 

jpstude

Petty Officer 2nd Class
Joined
Feb 5, 2010
Messages
132
OK, I'm back. I got bumped out of work for about a year and a half, so the Chieftan has been quietly snoozing, in the boat shed. After this project, will be getting back to work on her. In the mean time, I have stripped the paint off the cabin, and deck, so the topside will be ready for paint, when the time comes. A couple of of minor questions: I want the plywood deck, the under-deck wood braces, and the new transom sealed so, what should I use, to seal it with? I will be putting marine carpet over the deck.
 
Top