1979 85 hp Johnson Tilt Trim # 85TL79R- need help

mwstone

Cadet
Joined
May 23, 2011
Messages
7
Hello everyone,
My tilt/trim has been working perfectly until this past week. I put the motor in the up position and went to the lake. When I got there, it wouldn't come down or move in any direction. You can hear the motor running in both directions, however nothing is engaging to move it up or down. A guy at the boat dock told me to unscrew the bottom screw on the tilt/trim cylinder and it would let the motor down. It did indeed let the motor down, however fluid came running out rather quickly when I did that and I couldn't get it plugged back in time before losing a lot of fluid. I also noticed the O ring on the plug was broke into. My question, would anyone know where I could find a new plug screw and or O ring for this model. The model # is 85TL79R and the serial # is J5135127.

I'm not sure what to do at this point, I know I will need to replace the fluid that was lost and hopefully this will make the tilt/trim work again. Would anyone have any suggestions on what to do / procedures to follow in doing that. I was talking with a guy at work and he said I shouldn't have unscrewed that screw on the cylinder, there is evidently another Manual release screw somewhere but I can't find it on the tilt/trim?. Any Advice would be Greatly Appreciated. I know it is an older model but it is in great condition. The guy that had it before me kept it in a garage and not exposed to any elements. It still looks new. I can take some photos if that would help any? Thanks so much for your help
 

superharmonix

Petty Officer 2nd Class
Joined
Sep 5, 2010
Messages
140
Re: 1979 85 hp Johnson Tilt Trim # 85TL79R- need help

tnt2.jpgtnt2.jpg
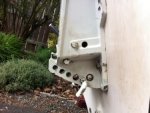
The black hole on the starboard side motor mount is your release valve. Only loosen 2 turns, and the pressure will release and allow you to raise the motor. Re-tighten manual release screw. From fully raised, unscrew the fill hole (starboard side cylinder above the ram rod), and fill with tilt/trim fluid until the level is at the bottom of the screw hole. Then lower, raise again and refill as above. You may have to manually raise a few times before enough air bleeds out of the system to allow the fluid to run around and fill the gaps. (if you do have to manually raise, you will have to rloosen the manual screw again, remember only 2 turns) As far as the o-rings/gaskets go, they are pretty accessible. I have been able to find many online sources. Start right here on iboats and if you can't find them, try www.boats.net, or www.marinenegine.com.
good luck! Let me know how it goes.
 

mwstone

Cadet
Joined
May 23, 2011
Messages
7
Re: 1979 85 hp Johnson Tilt Trim # 85TL79R- need help

Thank You So Much!!! I will try the procedure above. Thanks for posting the photo, That is the screw that I unscrewed to let the motor down and the one with the o ring seal that broke. Here is a link to a parts list. I think this screw is number 66 on the parts list ?http://s408.photobucket.com/albums/pp170/MSTONE1968/?action=view&current=18-1.png . Also I wanted to make sure that the screw hole that I fill with tilt trim fluid is the one that is marked Screw "B" http://s408.photobucket.com/albums/pp170/MSTONE1968/?action=view&current=IMG_4393.jpg
I was trying to find a part number for that O ring to order from. I can't say thanks enough for your help. I hope this fixes the problem.
 

Will Bark

Lieutenant
Joined
Aug 1, 2010
Messages
1,470
Re: 1979 85 hp Johnson Tilt Trim # 85TL79R- need help

I have found that our local Lowes store has a great selection of O-rings carry the old one with you and go to the plumbing section. If that fails, the local NAPA auto store has a marine catalog and can find the o-ring for you with your model #. Good luck.
 

mwstone

Cadet
Joined
May 23, 2011
Messages
7
Re: 1979 85 hp Johnson Tilt Trim # 85TL79R- need help

p...rrent=18-1.png

p...t=IMG_4393.jpg
 

mwstone

Cadet
Joined
May 23, 2011
Messages
7
Re: 1979 85 hp Johnson Tilt Trim # 85TL79R- need help

Thanks again, I will let you know how it goes.
 

mwstone

Cadet
Joined
May 23, 2011
Messages
7
Re: 1979 85 hp Johnson Tilt Trim # 85TL79R- need help

Thank you Will for the advice. That is a good idea. I will stop by there tomorrow.
 

mwstone

Cadet
Joined
May 23, 2011
Messages
7
Re: 1979 85 hp Johnson Tilt Trim # 85TL79R- need help

Hello ,
I found a replacement O ring and tried to follow the above procedure. However, I can't get that top Screw on the cylinder to loosen. Large Flat head screw. I tried squirting some WD-40 around the Screw but still can't get it to budge. I don't want to damage the screw, would you have any suggestions on how to loosen it so I can add the tilt/trim fluid. Thanks again for your help.
 

mwstone

Cadet
Joined
May 23, 2011
Messages
7
Re: 1979 85 hp Johnson Tilt Trim # 85TL79R- need help

Update...Finally got the screw loose to put the tilt trim fluid in. I followed the procedure above and replaced the O ring on the release valve. It took several times of manually raising/lowering the motor but it works perfectly right now. Actually seems to move a little faster than before. Thank you Superharmonix and Will Bark for your help. I'm very happy that it is working again.
 

Will Bark

Lieutenant
Joined
Aug 1, 2010
Messages
1,470
Re: 1979 85 hp Johnson Tilt Trim # 85TL79R- need help

Glad it worked out for you.:)
 

superharmonix

Petty Officer 2nd Class
Joined
Sep 5, 2010
Messages
140
Re: 1979 85 hp Johnson Tilt Trim # 85TL79R- need help

ditto on the gladness.. and thanks for updating us after you tried the stuff..always nice to hear a success story!
 

ezmobee

Supreme Mariner
Joined
Mar 26, 2007
Messages
23,767
Re: 1979 85 hp Johnson Tilt Trim # 85TL79R- need help

The black hole on the starboard side motor mount is your release valve. Only loosen 2 turns, and the pressure will release and allow you to raise the motor. Re-tighten manual release screw.

THANKS for that info! My TnT stopped working the other day and I was panicked at the ramp worrying that I'd have to drag my skeg on the ground the whole was home. Fortunately it turned out to be a loose connector to the control box but now I know what I could have done if I hadn't been able to fix it.
 
Top