1981 Ebbtide Bass Boat | Newbie Boat Repair

chevymaher

Commander
Joined
Mar 29, 2017
Messages
2,937
Then look on the boatworks videos. Get one of those belt sanders. That will eat it.
 

Booska

Cadet
Joined
Apr 13, 2020
Messages
22
Yeah I've been following a lot of his videos, but I very helpful. I saw he was using that makita belt sander for some repairs, but I but he also had the Fein random orbital sander (before also switching to Festool). He's actually the one who influenced my decision for the festool over fein. Because Im trying to achieve a smooth and flat surface, I avoided the belt sanding tool because wasn't quite sure how well that pan out.

I'm getting the festool in the mail Monday. I'll be sure to share what success I have with it and my own experience with it.
 

Booska

Cadet
Joined
Apr 13, 2020
Messages
22
fDmN2Yml.jpg


Decided on building a stand / roller for my rolls of glass so I can manage them more easily and carefully. Inspired by a video from Frisco boating. About $70 for all materials (wood, screws, casters, lagbolts). Essentially the same hardware as the engine mount I built, just with more wood. Added some scrap plywood on the bottom for some extra storage on the wheels. I plan on adding more to this as needed, like slots for brushes or whatever.

Here is the engine mount I previously built. Ive never taken or done woodworking before so I'd say pretty successful for my first two times ever picking up a skill saw haha.

37a9PMdl.jpg


Zk5UHzSl.jpg


Got the Festool Rotex 125 in the mail today. Looking forward to giving it a spin tomorrow! I'll be sure to update you guys on that too. I'm also gonna fit in a video here somewhere about my approach to dust extraction / collection. Thanks for reading and hope everyone stays safe!
 

Booska

Cadet
Joined
Apr 13, 2020
Messages
22
Having some problems uploading to my image hosting site so I'm gonna have to make attachments here...

So I found even more wood that was rotted, I really thought I got it all but it turns out there was some wood that had been glassed over completely and then painted over in the old bilge area. I'm not sure what purpose this served, gonna keep looking around for why the bilge area had this step up. Anyways, my oscillating saw and new festool sander made quick work of it.

While inspecting the bottom side hull I noticed the keel had a bunch of light shining through. Turned off the lights and put a flashlight in the boat and it really showed all the flaws, holes, and marks in the bottom side. Should I be worried about this? None of them are completely through, just thin enough to allow light to travel through. I was going to simply glass over them with a layer of 2oz CSM and 8oz Woven Roving. It's pretty obvious that the light is only shining through because the paint/gel coat is thin in these locations as is. It's obviously wear from beaching the boat, or bad rollers on the trailer.

Anyways, getting close to flipping the boat over and doing surface Prep on the bottomside so I can paint it. I have to fill any unused thru holes on the transom and Starboard side of the boat before flipping it so that I can surface Prep and paint over them instead of filling them after painting. For my prep,I'm going to wipe down the entire hull with three products. First I'm going to wipe down with dewaxer to remove the wax and stuff from the gel coat. Then I'm going to do a thorough wipe down with acetone. After that, to be sure, I'm going to hose it down and wash with Dawn dish soap. By now, I should have all wax and debris off the boat and it ready to sand. Going to sand starting at 80 grit and stopping at around 120. After first sand with 80 grit, I'm gonna apply Epoxy Fairing to any notches or uneven spots. Using Epoxy for extra strength and because I'm not using poly gel coat I should be okay. Once the bottom side is sanded and faired, I'll be applying two coats of primer while sanding with 220 paper between coats. Once done with that, I'll be spraying on two coats of Paint.

Hopefully that's a sound plan, if anyone reading this notices any errors or mishaps waiting to happen with my plan, let me know. Can't upload attachments either so gonna have to post pictures later haha.
​​​​
 

Booska

Cadet
Joined
Apr 13, 2020
Messages
22
20200507-230331.jpg


20200507-230344.jpg


My first experience with fiberglass and resin! Was really intimidating in the beginning, but made sure to mix up some test samples to ensure proper cure and working time. I needed to fill unnecessary holes in the transom immediately so that I can flip the boat over and start painting. What I've done is sanded both sides of the holes to give a nice taper and clean working area. I then applied some unwaxed PB with quarter inch chop strand and Cabosil. I applied the peanut butter onto the holes, sort of feathering it out some and being really generous about it on some of the larger sized holes. Because it's unwaxed, I'm going to go back and put CSM on holes near or larger then quarter inch. Just to ensure I have proper structural support and the fill doesn't pop out. I'm using tape on the outside of the holes to ensure proper coverage and so the resin doesn't spill out the other side obviously. Once I've mostly cured the unwaxed PB in the holes, I'm going to remove the tape and apply Total Boats Epoxy Fairing compound on the back side of the hole. It won't be a lot, but just enough to fill any small gaps from shrinking and also to get a nice smooth fairing on the exterior side of the hull. Since it's Epoxy and will also feather in to surrounding glass, I have absolutely no worry that these holes will resurface in the future.

To paraphrase what I'm doing, I'm taping the back side of the hole and filling the front side with PB. Once the front side PB has cured to a tacky finish (because there is no wax) I'm going to remove the back side tape and apply an Epoxy Fairing compound to smooth out the exterior side of the hole. The Epoxy Fairing should bond really good with the polyester PB that's existing in the hole because it's still tacky, and the Epoxy will fill and voids or air bubbles that may be caused from the resin not completely filling the hole. It will also feather out slightly, giving a nice smooth finish to that location so when I go to paint over it, I don't need to worry about the resin shrinking or popping out, not being smooth, or leaving an outline. Finally, going to layup some 2oz CSM for larger holes that need extra rigidity. This layup will be on the inside side of the boat.
​​
 

Booska

Cadet
Joined
Apr 13, 2020
Messages
22
This is going to be a long post, because I haven't been able to post due to not being able to upload some images. Thanks for your patience and hope someone finds this interesting or helpful! This weekend I really only had one day (Saturday) of good weather, and this sucks because I hadn't planned this out correctly and need to be doing a lot of prep work on the trailer. Unfortunately, the trailer is outside and I'm not looking to work on it in the rain so it's gonna have to wait. In reality, I should've moved the trailer into the garage first, and leave the boat outside covered. I have to prep, paint, wire, and grease up the trailer (with new bunks) before I do anything more on the boat because I want to restore the trailer completely before putting the boat back on (since it's so much easier to do when you don't have a boat on it haha)

So yesterday I successfully removed the boat from the trailer, flipped it upside down, and got it stored in the garage. I'm really glad I did this - even though I did it out of order - because it made surface prep for the paint probably three times easier and quicker. I have a 16ft boat with absolutely nothing in it but it's shell (hull). I think if this was an eighteen footer, had any sort of wood left, or was wider, I would not have been able to complete this maneuver. So if you're reading this and looking to flip your boat over, and you don't meet that criteria, you're probably gonna have to enlist a different method or many more hands then me.

This is how I flipped my boat over using a 1 ton cherry picker (Engine Hoist), and a buddy.

L3UXswel.jpg


First thing I did was jack up the cherry picker as high as possible. One thing this does is shift all the weight of the boat (when lifting) to the stern instead of evenly distributed. If I were to do this again, I wouldn't raise it as high, but instead get the trailer out from underneath. Raising it this high proved pretty challenging when my buddy and I were supporting the weight at the stern. One thing to notice in this picture above, the tow strap I'm using is aligned off-center of the U shaped tie down. This is intentional. Shifting it to one side with a lot of tension on it means when we lift up the boat it will naturally want to flip over because of the straps position.

I don't have any pictures of us in the middle of the process, so I'll simply describe it. Me and a buddy positioned at the stern of the boat grabbed both corners and began to slowly lift. As we lifted, we indeed felt the boat naturally wanting to list due to the strap. Once lifted, we had limited time to work because honestly with how high the bow was lifted, there was a lot of weight back there. So immediately once we cleared the bottom of the trailer on the stern by lifting, we simply let the boat flip over while bracing it. Once the straps tension released (upon flipping) the bow dropped about six inches to a foot (the distance from the gunnel to the hook coincidentally). This release and difference in height in the bow took off probably fifty to seventy pounds of weight where we were lifting. Now that the boat was flipped upside, we carefully set it down on the trailer to take a break. One thing to mention is you -must- ensure clearance at the bow when you flip. If you don't have it raised enough, the tip of your boat will smack your winch, roller, or trailer in the process of rolling over. The bow will drop in height when using this method, so ensure proper clearance.

After flipping it over, somewhat effortlessly for two guys, our next task in order was moving it into the garage. Here I have a cherry picker on wheels, so we simply picked up the boat on the stern while the bow was supported by the engine hoist. We lowered the hoist from its previous position so that the weight on the stern was more manageable. In the garage, we put down a couple 2x4's so the gunnels aren't directly on hard concrete.

hAN8Vvfl.jpg


And that's that. The only lesson learned here, is it would be much easier to lift the boat up, take the trailer out, and -then- do the flipping. Because we had to flip the boat above the trailer, it was a little trickier. We're young and in pretty good shape I'd say so very much doable for us. My biggest recommendation in terms of safety and efficiency is just more hands. If we had four guys instead of two, it would've been so much easier. Considering the circumstances of my country and health concerns that wasn't an option so this sufficed. Figured I'd share it for anyone interested!

d3x8mhHl.jpg


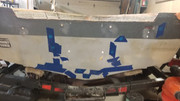
With the trailer empty, I'm doing to replace the bunks with new wood and better rated carpet. Rewire the trailer lights because currently they're old and spliced. The trailer lights are also using the frame for a ground which is bad practice from what I'm reading, so going to run a dedicated line for that. Not sure how I'm going to chase the wires from the rear to the front (If I'm going to use clips, pipe, or flexible plastic socks). Also going to touch up the rollers. The rollers themselves are in great condition and were replaced recently, but the pins need cleaned and greased. So in order, going to remove all hardware and lights, remove bunks, surface prep and paint the trailer, rewire the trailer, install new stainless steel hardware, install accessories, and then reinstall new bunks.

I'm definitely behind schedule due to weather, and now I'm essentially forced to paint the trailer outside. That's a real bummer and wish I would have thought about it before. Live and learn, right? haha.
 

Booska

Cadet
Joined
Apr 13, 2020
Messages
22
So it's been awhile since I've posted an update. I haven't abandoned the project! I just lost a lot of motivation and had some problems with physical pain that I was dealing with over the past two weeks. I got a second wind this weekend, especially with it being a three day weekend, and decided to pick back up. So to catch everybody up to speed. I've pretty much just been sanding and surface prepping everything. The boat is still being sanded, although I've done about 80% of it thus far. The trailer, up till today, was being sanded too. As of writing this post, I finished all the surface prep and sanding on the trailer and thankfully was able to lay down my three coats of primer on it today. The weather was really spontaneous and I started spraying paint at around 4pm (which was a terrible idea haha). The first coat dried almost as quick as I put it on, so the subsequent coats went pretty fast. Using a HVLP Gravity Feed spray gun was sort of difficult when getting into the nooks, crannies, and underside of the trailer but I managed. Really glad I decided to spray the trailer first and get a feel for the spray gun before going at it on my boat. So that's where I'm at now. Below I'll detail some steps I went through and how I managed to paint my trailer.

nAkfSq3l.jpg


So when removing the hardware from the trailer before prep, I decided to clean up my rollers and roller pins. The rollers looked like they were relatively new. I poured baking soda, vinegar, lemons, and salt into a five gallon bucket and put the pins inside. These are zinc plated (I believe) so this chewed away at all the rust and exposed the metal. I have to put some kind of protection on there from rust before reinstalling it.

xRaP8T4l.jpg


This is after countless hours of sanding. I don't know why I decided to go down to bare metal with the sander but I did so oh well. The spots I couldn't hit with the sander, it wasn't possible to get down to bare metal so I did the next best thing and sanded them down by hand the best I could. All the sanding here was done with 40 grit for heavy material removal, then 120 for a finer finish. Once I had everything sanded down as much as I could, it was time for me to wash. The wash follows just about the same procedure as my boat. I did Goof Off, Vinegar acid, and then Dawn dish soap. All separately obviously. This was probably overkill but I just wanted to make sure and had some extra materials.

uHGY0Hgl.jpg


Next up was building the painting booth for me to spray outside. I live in a populated city so spraying without coverage wasn't really an option. In addition, my driveway here is packed full of stuff so didn't want paint on everything. What I did was bought 100ft of paracord that's rated for ~150lbs. Used eyelet screws and other locations to hang up the paracord in a square around the trailer. Then used 4mil clear plastic sheeting around the exterior sides of the booth. One foot folding over the paracord then taped. The corners are clamped with just regular clamps. Then the bottom is being weighed down with bricks that I had laying around in the backyard. In the middle, the brown, is regular construction paper. Just rolled it out and put some bricks on it. The height of the booth is about six feet, but sags down to about five feet when the sheet is draped over it. Not the prettiest thing, but it works for me and did the job.

aqqnFlQl.jpg


Finally, all the effort leading up to this point. This is just the first coat of primer, and I ran out of time today to throw the finish coat on. Ended up going with three coats of primer, which ended up being two quarts of paint. For anyone that's curious, you could definitely get away with one quart of primer for a trailer this size if you knew what you were doing with the spray gun. Since this is the first time using a spray gun, there was a lot of time spent learning how to set it up and get good coverage. One thing I did not do between coats is sanding. I know it's recommended, but with how much prep work I did before hand and how the primer laid down. I think it worked out. I'm still going to be wet sanding it down before throwing my final coat.

So yeah, that's about it for now. Left all the plastic up hoping it doesn't blow away. Going to get some rain so not sure when I'll be able to throw the finish coat on. I will be honest, lost a lot of motivation over the past two weeks with weather and health. I put in over twenty hours on surface prep and painting this weekend and I'm so excited to see progress. Getting the paint on the trailer has been a huge accomplishment for me during this whole process, and I'm really excited to see the trailer start coming back together. That's all for now guys. Thanks for reading!
 

emoney

Commander
Joined
Jul 19, 2010
Messages
2,551
You've done great so far and you're making better progress than you think. Don't let it bother you when you take "breaks', this is a marathon and not a sprint. Keep those updates coming!
 
Top