1985 Capri 1600 rebuild

ImWingnut

Cadet
Joined
Dec 13, 2011
Messages
11
Hello all,

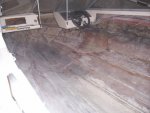
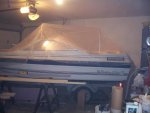
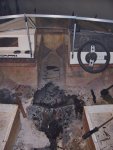
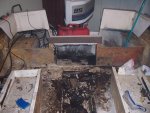
Not being one to back down from a challenge, and frankly needing something to do other than sit in front of a computer all winter, I looked at purchasing a Capri with a good motor, good hull and good trailer knowing it would need a complete floor replacement. I suspected stringers as well (didn't have shots of the floor just a description that there were "holes" in the floor) but hoped for a good transom. While looking at the boat (purchased off eBay from a charity) I began researching floor replacement and landed at iboats. That was 4 weeks ago and I'm watching soo many of the threads as well as reading and re-reading the hull extension and Sea Ray rebuild threads. After many late nights oo iboats looking and learning I decided to buy the boat ($600 - figured if it all went really poorly I could sell the motor and trailer for that much more or less) and promptly drove from Ohio to Wisconsin to get her. I got her home on the 17th and this is what she looked like:
045 (600x800).jpg 017 (800x600).jpg

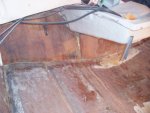
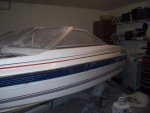
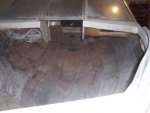
Lol, when they said holes in the floor I didn't expect that. More of the floor was missing than was there. Oh well, made tear out really easy which I started immediately the next night, reading forum posts for guidance and info while making progress and forming a plan. I've read so many forums I feel like I know some of you. Friscoboater (Jay) your thread and videos (and attitude with everthing from the boat to your Mom) are an inspiration. Woodonglass and Oops I'm hoping to get some response from you guys as I am sure I'll have some questions as I go as well as soooo many of the other forum members (pmccraney I loved the animation video) that have provide so much on the info that I'm now trying to swallow in a short period of time. So with a bit of work each night and weekends this is what she looks like now:
003 (4) (640x480).jpg 004 (4) (640x480).jpg 005 (4) (640x480).jpg

Done with the cutting and really close to done with the grinding (thank goodness). I'm actually starting to get used to the itchy writs and hands - haven't found gloves I like yet using the 4 1/2 grinder and now it seems like there's no sense I'm so close to being done.

So, now it's question time. I live in SW Ohio and its cold. Even with the boat in the garage temperature is a huge concern. I have a torpedo heater and can raise the air temp to 75 or 80 but the surface (mold) temps will be significantly lower, in the 50 degree range I would guess. And the air temp will fall as I know I won't be able to keep the heater running with the fumes. So, question 1 - Is there a "minimum" temp to glass and if I 'm within that range what special steps do I need to take? I will be using poly resin. I know that I can go up 50% on the MEKP but US Composites (where I plan to buy from - there's only 1 local supplier that I've found so far and the prices are slightly higher) mix sheet says I can go up 50% but doesn't recommend temps below 60 degrees. I need some input here on this one. I guess I could wait until early spring to do the glass work and start on the seats but I really don't want to unless I have no other options. Besides, I'd hate to "finish a seat and not have it fit the new bases I have to build. Just seems liek a bad idea to do seats before construction. I read the hull extension (yes all of it - and Oops I'm so going to copy that Bayliner interior you did) and I know that work was done up north in the cold but Oops said many time he "stoked up the stove" and the space looked much larger than what I have - further from the material/fumes - so I suspect that the temp was much better than what I think I will be able to do. So ideas, comments, theories, working knowledge. Let's have it guys.

Thanks all,
Tony
 

Woodonglass

Supreme Mariner
Joined
Dec 29, 2009
Messages
25,929
Re: 1985 Capri 1600 rebuild

Welcome to the iBoats Dry Dock!
R U doing the Transom? As far as the glassin goes you can tent the boat with a tarp inside the garage and then use a bank of heat lamps to heat the surface you are wanting to glass. A small fan will keep things circulating so you will be fine. Don't forget to wear all the PPE!!! Looks like you did a good job on the tear out! 25 yrds of CSM, 15yrds of 1708 15 gals of 435 resin 5 qts of Cabosil and a pound of chopped fibers and you'll be good to go. Get a glass roller too!
 

ezmobee

Supreme Mariner
Joined
Mar 26, 2007
Messages
23,767
Re: 1985 Capri 1600 rebuild

Welcome. Not a bad hull you got there, the galvanized trailer is a plus, and I always thought those old Chrysler-based Forces were pretty badass looking. Should be a cool boat when you're done.

I did my restoration in an attached garage in the winter and bought myself one of these http://i176.photobucket.com/albums/w200/ezmobee/New Boat/DSCF2360.jpg heaters from Northern Tool (or similar). I have to wire up a 220V outlet for it but my fuse panel is in my garage so that was no big deal. Not sure if that's an option for you but if it is, it would allow you to keep the temps up all night more easily.
 

ImWingnut

Cadet
Joined
Dec 13, 2011
Messages
11
Re: 1985 Capri 1600 rebuild

Great idea about the tent and heat lamps Wood. Should take care of the surface temp and air temp all in one. I liked the setup Jay used on the Sea Ray with the PVC, if I copy that it should work out nice. I think I even have some 6 or 8 mil plastic out in the garage. Insta-tent. And yes, I have the full safety gear set, respirator, goggles and suit. Did some work as a booth painter for a few years and the safety thing carried over. I'll need to check out that heater Ez, I'm sure I'll be in the garage quite a bit and I like the idea of electric heat better than kerosene. I wonder if HF has one like it, there's one near me. Oh good, another reason to go to HF, lol. Like a kid in a toy store.

Also thanks for the material estimate Wood, you answered the next question before I could ask. Man you guys are good, lol. I had just figured as I was pulling everything that I'd be doing the transom but I have it deskined (almost to the splashwell) and have taken 2 core samples and it looks really good. The only part that was wet at all was under the jump seat on starboard side where the swim platform is (no glass at all, just bare wood, geez) and it wasn't bad at all. I put a little portable ceramic type heater blowing on it to see if it will dry out over the next few days but we'll see. Still not sure I won't be replacing it since I have it torn apart this far.

OK, next question. Anyone have an idea what this is and how I get rid of it:

001 (4).jpg

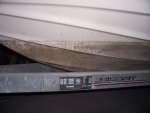
I'm assuming the boat almost never left the water and it was some sort of water stain, calcium deposit or the sort. I've hit it with CLR and a scotchbrite sanding pad and it doesn't make a dent. Even did multiple applications of CLR over about 2 hours to let it soak and nothing. It's really think, about 4 - 6 mils or so. The thinner stuff near the edge does come off with CLR nicely.

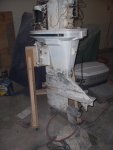
Also got started on the motor clean up - it had the same crap on it and based on that I may be looking at sanding unless you gurus have a magical answer on getting it off (please say you do, I really didn't want to sand the entire hull). Here's the motor after tonight:

003 (5).jpg

Which brings me to the next question - painting the motor. I have a good Devilbiss TGA 515 gun which would be perfect for this but don't really want to buy a quart for such a small job. I suspect that spray can job won't hold up to the beating the motor will take under water though. Thoughts? And do they even still make the color in cans anymore? I know Tempo used to but I'll be darned if I can find any out there. Idea on the paint and if so what kind and if cans any suggestions there?

Thanks,
Tony
 

Woodonglass

Supreme Mariner
Joined
Dec 29, 2009
Messages
25,929
Re: 1985 Capri 1600 rebuild

Great idea about the tent and heat lamps Wood. Should take care of the surface temp and air temp all in one. I liked the setup Jay used on the Sea Ray with the PVC, if I copy that it should work out nice. I think I even have some 6 or 8 mil plastic out in the garage. Insta-tent. And yes, I have the full safety gear set, respirator, goggles and suit. Did some work as a booth painter for a few years and the safety thing carried over. I'll need to check out that heater Ez, I'm sure I'll be in the garage quite a bit and I like the idea of electric heat better than kerosene. I wonder if HF has one like it, there's one near me. Oh good, another reason to go to HF, lol. Like a kid in a toy store.

Also thanks for the material estimate Wood, you answered the next question before I could ask. Man you guys are good, lol. I had just figured as I was pulling everything that I'd be doing the transom but I have it deskined (almost to the splashwell) and have taken 2 core samples and it looks really good. The only part that was wet at all was under the jump seat on starboard side where the swim platform is (no glass at all, just bare wood, geez) and it wasn't bad at all. I put a little portable ceramic type heater blowing on it to see if it will dry out over the next few days but we'll see. Still not sure I won't be replacing it since I have it torn apart this far.
If the overall transom is solid and dry then that one Damp spot is not going to be an issue if you get it dry. I'd put a layer of1.5oz CSM over the whole transom and call it good.


OK, next question. Anyone have an idea what this is and how I get rid of it:

View attachment 126533

I'm assuming the boat almost never left the water and it was some sort of water stain, calcium deposit or the sort. I've hit it with CLR and a scotchbrite sanding pad and it doesn't make a dent. Even did multiple applications of CLR over about 2 hours to let it soak and nothing. It's really think, about 4 - 6 mils or so. The thinner stuff near the edge does come off with CLR nicely.

Boat Scum. Go to WalMart and by The Works bathroom Cleaner. It has Oxalyic Acid as it's active ingredient. USE LATEX GLOVES and a RESPIRATOR!!!!! Spray it on, let it set for a couple of minutes, scrub with stiff bristled brush. If that does not take it off, then a light sanding with 220 grit may be your last resort, just be careful to not sand thru the gelcoat.

Also got started on the motor clean up - it had the same crap on it and based on that I may be looking at sanding unless you gurus have a magical answer on getting it off (please say you do, I really didn't want to sand the entire hull). Here's the motor after tonight:

View attachment 126536

Which brings me to the next question - painting the motor. I have a good Devilbiss TGA 515 gun which would be perfect for this but don't really want to buy a quart for such a small job. I suspect that spray can job won't hold up to the beating the motor will take under water though. Thoughts? And do they even still make the color in cans anymore? I know Tempo used to but I'll be darned if I can find any out there. Idea on the paint and if so what kind and if cans any suggestions there?

Thanks,
Tony

Ditto on the Moeller Engine Paint. Good stuff and durable. Make sure and spray a light coat of Moeller Self Etching Primer first. You need this to ensure good bonding on aluminum especially any bare spots. Wipe it All down with acetone before priming and painting.
 

ImWingnut

Cadet
Joined
Dec 13, 2011
Messages
11
Re: 1985 Capri 1600 rebuild

Happy New Year everyone!!

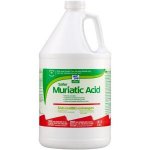
Waiting on the Moeller primer/paint that I ordered for the motor to get here. Also waiting on US Comp to open back up from Holiday break so I can place my order. Composites One is local but only sells full rolls of mat/cloth and resins do not include catalyst so with tax and catalyst it actually is a bit more. Been working on cleaning the hull. CLR and "The Works" didn't touch the scum. But this is doing a good job:

acid.jpg

Can be found at HD for $6.98 a gallon. Even has instructions on cleaning a hull right on the bottle. It says to apply with a stiff bristle brush but I'm rolling it on with a mini roller and letting it sit and then reapplying it after a while. Nasty stuff. Need to cover the trailer with plastic and most certainly wear gloves and resp. Even laid plasticv down on the garage floor because it started eating (OK, etching) the concrete but it's working well on teh hull scum. About half of the hull is clean now.
 

Woodonglass

Supreme Mariner
Joined
Dec 29, 2009
Messages
25,929
Re: 1985 Capri 1600 rebuild

Lot's of issues using muriatic acid. As you discovered with your concrete it is VERY STRONG stuff. Fumes can KILL!!! ALWAYS add Acid to water not water to acid. 50/50 mix is all that should be needed. I used this when I was in the Swimming Pool Business and it is not something you want to be flippant with. It will EAT the metal on your boat, trailer or anything else it comes in contact with. Should NOT be left on the boat or anything else for more than 10 minutes. Rubber Gloves, Full Face Respirator and Long sleeves are a must.

BE CAREFUL!!!!!
 

ImWingnut

Cadet
Joined
Dec 13, 2011
Messages
11
Re: 1985 Capri 1600 rebuild

Update time finally.

Hull is completely scum free. Really took my time and was carefully with that muriatic acid. We had a pool for a number of year at the old house so I had some exposure to it from that as well Wood. Covered the trailer with plastic in the areas I was cleaning and went nice and slow but it's done and she's all clean. Guess what? Scum hides gel-coat issues really well, now I've found even more things to fix. So, question 1 for the night, there's no problems with gel-coat blemishes as far as operating the boat and doing damage is there? There are about a dozen or so "spots" (ranging in size from a few mm to the size of a dime) where the gel-coat is damaged. None of the ?blemishes? penetrate into the fiberglass, just the gel-coat. Besides, I can?t fix everything this winter, what will I do next winter? Gel-coat repair sounds like the perfect winter project next year, lol. Unless of course I can do additional damage.

And since the boat is just an empty hull (still has cap but no wood or motor) I thought "what better time to take it off the trailer and check the bunks?" Besides, I needed to clean the hull where it sits on the bunks. So last weekend was building the support cradle, and so very carefully, pulling the trailer out from under the boat. Support cradle at the transom and two floor jacks to "walk" the trailer out. Glad I did, just like all the other wood in the boat the bunks were gone. So some PT wood and new carpet and now I have new bunks, a completely clean hull and the boat when back on the same day.

Also got the first CSM layer back on the transom. Not sure I need additional full coverage layers - so I guess that's question 2. I still ahve to tab with 1708. I did some additional pre-stringer template grinding a couple days after the transom which is what's showing in the pics, it's grinding dust not air bubbles/pockets or it would have come back off.I just haven't shop vac'd it out completely again, for like the 5th time. Wood, the tent idea was wonderful thanks. Two 350 watt infrared heat lamps and a small ceramic heater and it get to about 80 degrees in the ?tent?.

014 (3) (800x600).jpg

001 (2) (800x600).jpg

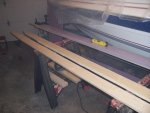
Also finished cutting the stringers tonight. I cut the hull mate side and to height (instead of cutting to height after bedding them) because the starboard side stinger passes through the rear buldhead and gets fiberglassed to the transom (port side stops at the rear bulkhead - starboard side goes through it).

015 (2) (800x600).jpg

So that brings me to question 3 for the night - stringer "wrapping". I've read/viewed lots of recommendations on stringer construction anywhere from one full CSM wrap and then tabbing with two layers of CSM and two layers of 1708 to just resin coating and then tabbing the whole side with CSM and then two 1708 layers (both recommendations are followed by two CSM cap layers). Just wanted input from the folks that have done it and why they did it "their way". I tend to agree with the resin coat and then CSM and two 1708 layers up the side and then cap it simply because of the size of the boat. My stringer height is only 4" and deck's widest point is 40". My thoughts are a larger boat may need the extra reinforcement of the additional layers but a small boat like mine may not. Thoughts/input please.

Thanks,
Tony
 

ImWingnut

Cadet
Joined
Dec 13, 2011
Messages
11
Re: 1985 Capri 1600 rebuild

Oh, almost forgot. I finally went through the glove box contents (there was a ton of crap in there) and look what I found:

014 (800x600).jpg

Owner's manuals for Capri, Force OBs and Escort trailers. I'll have to send some emails to check on copy right issues before doing anything like scanning them for folks but at least I can look up questions. The boat manual has all the wiring diagrams for all 1985 Capri models. Score!
 

Woodonglass

Supreme Mariner
Joined
Dec 29, 2009
Messages
25,929
Re: 1985 Capri 1600 rebuild

Check the link in my signature for drawings on how to do your transom, stringers, and deck. Glad the tent is working for you.
 

dorelse

Chief Petty Officer
Joined
Feb 24, 2003
Messages
624
Re: 1985 Capri 1600 rebuild

Nice! I have a link to my 1986 Capri 1600 rebuild in my signature. I miss that boat!!!
 

ImWingnut

Cadet
Joined
Dec 13, 2011
Messages
11
Re: 1985 Capri 1600 rebuild

I've looked at at your rebuild thread and youtube vids many times dorelse. One of the things I really like about O/Bs is the sun deck that a lot of them have. Good idea with the bench seat and deck build on yours.

OK, I've got 3 sheets of MDO, one side finished. Cover the finished side in CSM or not? I'm specifically talking about the deck but I guess my question goes for everything above deck too.
 

ImWingnut

Cadet
Joined
Dec 13, 2011
Messages
11
Re: 1985 Capri 1600 rebuild SPLASHED!!

Re: 1985 Capri 1600 rebuild SPLASHED!!

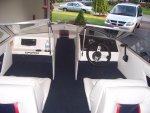
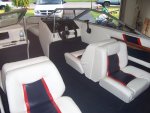
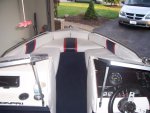
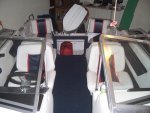
Not much updates or progress reports on this during the build. Frankly I didn't do anything that hasn't been asked and answered on here a hundred times. And with all the Bayliner threads I had nothing new to post. The search button is a life saver. Anyway, put her in the water yesterday. Happy to report no issues. Heck we even towed a 21' Sea Ray in to dock, lol. Here's the "after" pics:

10.jpg

11.jpg

12.jpg

13.jpg

Still a couple trim things to do but test run went fine. No issues the 2 hours we were on the water. The help and info on this site made this all possible. Everything from fiberglass info, general boat construction info and even sewing - boy did those lounge seats take forever. Thanks so much for all the help, whether you were aware you helped or not. BTW - WoodonGlass, you were almost spot on with the material estimates, thanks so much.

Tony
 

SDSeville

Lieutenant
Joined
Mar 19, 2010
Messages
1,481
Re: 1985 Capri 1600 rebuild SPLASHED!!

Re: 1985 Capri 1600 rebuild SPLASHED!!

Great work ImWingnut. Congratulations!
 
Top