1988 johnson 120 powerhead removal

Bosunsmate

Admiral
Joined
Apr 7, 2012
Messages
6,135
Yes you are i think right about there still being material holding it together. I used a much bigger drill bit, which helped mean no bit snapped either. Id get a much bigger bit and make sure those bolts are clean cut through. Dont be concerned about leaving holes. They fill up easy and can be painted over. The main thing is to get them all free near the top. Where you have drilled them seems good enough to me.
If you have like a little gas burner (the $10 or so butane/propane ones) you can put some heat down the holes and that helps a lot in term of breaking the bonding of whats left of those bolts to the adaptor plate.
Ive had bolts on mine red hot before with no damage to the adaptor plate. The only problem is if you do it at the bottom you can melt the bottom gasket in the adaptor but since you are doing it near the top and you are replacing that top gasket anyway then theres no need to hold back
 

Bosunsmate

Admiral
Joined
Apr 7, 2012
Messages
6,135
Those studs forward and aft ive had to drill around them before to give them a cavity to lift out of. And then epoxy JBWeld etc the area later on reinstall. Works quite alright. Ive worked on a 90V4 on a mates boat who goes way out to sea with that procedure having being its history.
Post a photo of those studs if unsure still about what to do
 

muddyfishin

Seaman
Joined
May 31, 2018
Messages
66
I will get around to working on her tomorrow, or sunday I was curious and had called a local shop for a quote on work to be done, he said they will do pistons rings bearings rebuild carbs fuel pump water pump , basically the works, for 4100$ and im in Connecticut. thats quite a bit of money however id have a tip top outboard, just curious on what your thoughts are about that, the main reason im doing work is one cylinder was at 70psi dry test and jumped to 90 with a dab of oil.. all others are at 120 psi, I didn't notice any bad scoring in the top half of the low cylinder and I tried to decarb with seafoam multiple times incase it was a stuck ring..so let me ask if I continue the work myself could or should I just replace rings on the bad cylinder or piston if needed? or should I go through the whole top end, or is a professional rebuild worth the money to let them get rid of my headaches???
 

Bosunsmate

Admiral
Joined
Apr 7, 2012
Messages
6,135
Dont think twice, that $4100 is ridiculous. Just get it apart and see whats needed. It may just be rings which means it costs you about $300 or so with a new gasket set. You may need a resleeve in that cylinder but even thats only a couple of hundred.
You are doing the hardest bit by far now, the rest is easy. On salt water rebuilds removing the powerhead takes me on average 90% of the time. Once you have it off its only about an hour to disassemble and it takes about three to put it all back together properly with sealant and correct torque. Plus when you are out on the water its great telling woman on the boat that the motor was rebuilt by yourself
 

Bosunsmate

Admiral
Joined
Apr 7, 2012
Messages
6,135
Just post some pictures of the parts when apart. Adding oil and no scoring suggests broken or stuck rings. Decarb doesnt free them in pretty much every occasion, it needs to be done with the piston removed.
Drill wider holes in that adaptor plate so you are sure you have drilled all of the bolt to dust and clear zones around those rear studs and she will come apart
 

muddyfishin

Seaman
Joined
May 31, 2018
Messages
66
okay I just wanted feedback on that quote,,im pretty confindent in myself with 2 stroke engines,, I didn't see the actual tear down of the powerhead being a problem besides messing with the timing later on.. but if I could just get the powerhead off I know I could fly through the rest. I wil add there is not much side to side movement of the piston in that cyinder, a little but does not seem like bad wear on the walls.. as for now I will just focus on getting that block off , I am going to make sure those blts are completely cut through and as for the 2 front studs and the one in back, when you drilled around those to give them some room to play with, I assume to use a small bit maybe 1/8" and carefully put 3-4 holes around the studs?
 

Bosunsmate

Admiral
Joined
Apr 7, 2012
Messages
6,135
I just drilled a clear area around each stud. And when i reinstalled i put epoxy resin/JB weld around where the hole was, then a washer then tightened down the nut.
When you drill the adaptor plate main ones you should be able to look through the holes and confirm that you have got the bolts cut through by seeing the change in colour of the material
 

muddyfishin

Seaman
Joined
May 31, 2018
Messages
66
okay I went out as the rain stopped and although I could see through the adapter before I just confirmed with my drill that there was still some meat hanging on to those big bolts so those are 100% cut now, going to give the studs clearance and get the hoist setup, ill let you know how it goes
 

muddyfishin

Seaman
Joined
May 31, 2018
Messages
66
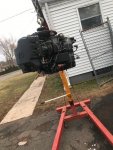
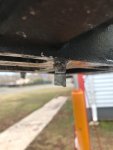
v42.jpgv41.jpg with some time, some drilling , some heat and a little bit of leverage it never felt so good to see a gasket seal break.. as suspected the saltiness was real, around the base of the studs it was built up pretty good,, I appreciate the knowledge greatly.. tomorrow I will start the tear down and im sure there will be more questions to come
 

Bosunsmate

Admiral
Joined
Apr 7, 2012
Messages
6,135
Great news.
Heat on those studs and then cool. Repeated cycles like that to break up the corrosion and then they'l back out with vise grips. I always loosen and then tighten a little. That alternating technique stops the threads from filling up and seizing them from backing out all the way out, really important actually.
Do take heaps of pictures or a video before dismantling so you can refer back to it later.
All the time while dismantling keep searching for anything that may of caused problems in that cylinder. I cant remember which one it is, but the lower one goes bad if the lower crank seal goes. That part is like $10 to replace.
Dismantling is straight forward. Flywheel first (keep the nut on loosely so the wheel doesnt launch off). And make sure you keep all big end bearings etc with the same piston (as with normal dismantling procedure )
Nice engine lift by the way, you can wheel her into the lounge now. Ive done all mine by hand or rope over a tree tied to a car
 

muddyfishin

Seaman
Joined
May 31, 2018
Messages
66
definitely going to be careful in taking those studs out,and it is the top portside cylinder that is low, no signs on the paint of overheating, when I had previously removed the head the cooling chamber did have salt build up like chunks I was wondering if theres a good way to flush out the cooling system to make sure nothing could clog it up.. and ive got to say I am even more thankful for this engine hoist now that you mention your method with the car lol
 

Bosunsmate

Admiral
Joined
Apr 7, 2012
Messages
6,135
Haha yeah i can get away with stuff like that here as ive no neighbours here to see it.
The port side cylinder is the lowest side bank so it could well be that the bottom crank seal has faulted.
Whats best for flushing question will open up a hornets nest here. I just do mine with water as soon as ive finished boating. Some people use salt away some dont. The best thing to do is mechanical scrapping of it with the heads and very rear water jacket cover off. And also checking the rubber deflectors in the heads are ok.
Im not sure where you live, I live in New Zealands northern waters which are warmer and thus worse for salt build up. I grease those adaptor bolts and back them out every 5 years for a regrease (im too cheap to buy antiseize and grease works- even used grease!) and never have a problem with them again.
Thats one nightmare I like to avoid
 

muddyfishin

Seaman
Joined
May 31, 2018
Messages
66
ive just started to take the carbs off and then the leaf plate, should be able to see the crank seals today, honestly whoever the previous owner was took care of the motor its real clean all over besides where that powerhead to adapter gasket was, allthpugh they did not seem to flush with freshwater after use...once I have this motor on the water I will only be using in fresh water,,maybe once in a while ill head out into long island sound for stripers or fluke, but for the mst part ill be in the river.. I live in Connecticut on the east coast of the US and my neighbors must love when im testing engines out on the muffs loll
 

Bosunsmate

Admiral
Joined
Apr 7, 2012
Messages
6,135
I like hearing engines on muff, so may be your neighbours will too, im drawn towards it like a curious cat with nine lives!
The head unit looks clean from what i can see. Be sure to clean the intake manifold cover as paint peelings etc can get in and are abrasive on the cylinder walls when sucked through. I always clean the intake in the cowling too.
I knew it was raining in Connecticut lately as ive being watching a webcam recently in Philadelphia which has a black bear hibernating under someones porch. You can tell its raining as the drips start coming through the gaps in the planks, I hope to keep the bear dry they have put a tarpaulin above this poor soul
 

muddyfishin

Seaman
Joined
May 31, 2018
Messages
66
I love the sound of a 2 stroke screaming as well. neighbors are pretty close quarters over here though lol anyways, I got her stripppped down to the crank and so far everything has been good, not noticing anything bad or leaky everything is just so clean im liking it. I get down to the connecting rod and ofcourse dont have the socket , so tomorrow hopefukly ill get thst piston out and try to identify the issue
 

muddyfishin

Seaman
Joined
May 31, 2018
Messages
66
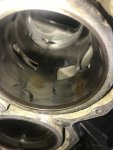
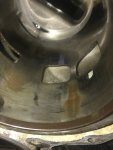
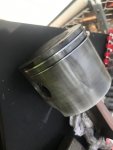
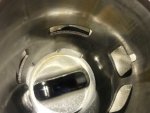
IMG_1229.jpgIMG_1231.jpgIMG_1234.jpgIMG_1233.jpg so got a 5/16 spline socket and got the piston out as you can see, pistn was really tight in the cylinder and when she popped out the rings were free, the only marks on the piston are that shown in the picture. cylinder walls are smooth didn't notice any gouges but it looks like ive got some blow by next to the exhaust port and the marks on the piston line up with that on the cylinder,, so my question is, the cause??? I had a dry compression test about 70 psi,, kind of a big drop for a small area,, could this just be worn rings? the rings seem more worn out right at the markings section they dont seem flush with the edge of the piston but set back in the ring channel and thats just by tightening the rings by hand? so what do you think my options are? and while im in here, I figure I might as well replace all bearings and rings sounds like a good idea correct?
 

racerone

Supreme Mariner
Joined
Dec 28, 2013
Messages
38,794
Measure the bores to determine total amount of wear.-----Check ring gap in 3 places down the bore from top to just below the ports.
 

muddyfishin

Seaman
Joined
May 31, 2018
Messages
66
okay the only one ive measure is the one ive taken out, but I will check the others shortly, ive got a measurement of 3 11/16"
not sure what the standard bore size is and to check the ring gap I need to just slide the piston back in and check?? how do you properly do that??
 

muddyfishin

Seaman
Joined
May 31, 2018
Messages
66
the other portside cylinder is measuring the same at 3 11/16" haven't removed the starboard side head yet will get to it
 

racerone

Supreme Mariner
Joined
Dec 28, 2013
Messages
38,794
Bores are measured with numbers like 3.685" or so.-----3-11/16" means absolutely nothing here.
 
Top