SHSU... Thanks for the advise I will look into all that you suggested. I have decided to do a few things differently. I talked to a respected marine mechanic and based on the quote he gave and the fact that I paid $0 dollars for the boat I am going to have him go through the motor and what-not. I would have a better piece of mind. After exploring boat motors and giving it a look, it would take too much trial and error or headache.
I tore my 1974 Evinrude (1977 power head installed) down to the casing and cleaned everything myself; however, that is an old two stroke vs your newer four stroke. If you can and have the time, ask the mechanic if you can watch and learn from him while he works on your motor. That way if you break down on the water you have a better idea what you are looking at and how things are supposed to work. Plus, once you see him do it you may feel comfortable replacing some of the items yourself when the time comes. Also, ask him about his thoughts on bypassing the oil injection and premixing your fuel. Do a quick search on the forum or google and you will see people that talk about doing it. There are pros and cons to it, but in a nut shell if you premix your fuel, you know your motor is getting oil. Where as if the oil injection fails, you have no idea until its to late (or so I have read)
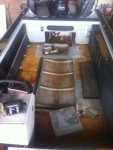
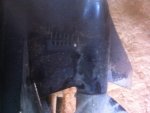
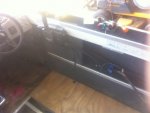
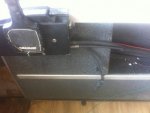
However, the deck, foam, wiring, etc... I will do. What I want to do on the deck is replace all the wood and paint it. No carpet for me. So the plan is to use stainless steel screws, and use some type of nonskid paint or bed liner (suggestions?), I have read that I need to paint both sides of the wood, so i'll do that. I also plan on caulking of sealing all the seems and crack before painting.
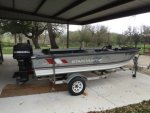
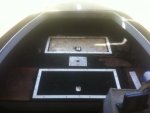
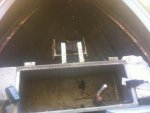
There is some wasted space in the design i think so I'll do a little bit of change to the original plan, but essentially it will be the same. Its set up for fishing already and thats what we like to do.
Any suggestion on deck replacement would be welcome.
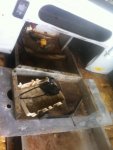
Foam: Closed cell foam is a must. Most guys use the pink/blue foam from the big box sores. You can use pour in foam, but there are varying opinions on which is better. As pour in closed cell foam isn't entirely closed cell and will absorb water over a long period of time. Do a quick search and you will see people going back and forth on it. You will note Starcraft did put pour in foam so......
Deck: exterior deck plywood is what a lot of guys use here on the forum (CDX). Some use marine grade, but you will find most everyone says why pay the huge difference.
Fasteners: If you are talking about securing your deck to the hull, then you should be looking at blind rivets. Screws will back out with time and don't have as much holding power in this situation. Just make sure you measure your distance for your drill bit and mark it with tape so you don't over drill and go through your hull.
Sealing: it comes down to what do you want to do with it and how much effort and time you want to spend. Some guys use oil based paint/spar varnish and paint all 6 sides with several coats and call it good. Other's decide to go the extra mile and use epoxy or poly resin to seal. Sealing it will give you a leg up on what the factory did before. As for caulking the cracks and seams, no need. Your sealing should take care of it, and if it didn't then the caulk would only be temporary before failure.
Top coat/flooring: Some guys have used bed liner on the top and others have used vinyl (Nautolex Marine Vinyl Flooring). Another option is to use some form of paint and use non skid beads in them to give you same type of grip in it.
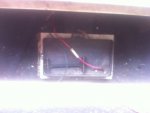
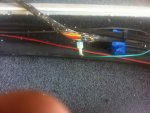
Wiring: See below pic on gauge vs amps vs distance (From West Marine). If you are going to be in saltwater, make sure to use marine grade wire. I am rewiring with 14 gauge for most everything except motor and trolling motor.