1993 Mercruiser 4.3 v6 valve fine tunning

dlogvine

Master Chief Petty Officer
Joined
May 4, 2015
Messages
839
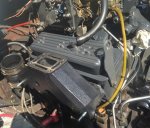
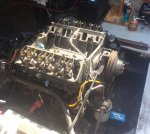
I rebuild and assembled 1993 Mercruiser 4.3 v6 engine on my Bayliner Capri. Of course I forgot to adjust the rockers and fine tune the valves when it was easy and the engine was out of the boat. Now I had to do this after all was assembled and I had to adjust the rockers by the sound. I tightened them a little while engine was running so they stopped making knocking noises and then one by one got them loose and tightened until the noise disappeared and then 3/4 of a turn. Are there any suggestions about better fine tuning them without taking the risers and exhaust manifolds off? Also I noticed that I cannot remove valve covers without untying the riser bolts and lifting them a little. This is on the top of removing the shifting linkage on the starboard riser and I think some ignition module on the port side. Any secret to easy valve cover removal? Thx for any help, greatly appreciated.
 

Bondo

Moderator
Staff member
Joined
Apr 17, 2002
Messages
71,332
and then one by one got them loose and tightened until the noise disappeared and then 3/4 of a turn.

Ayuh,.... No easy way to pull valve covers from marine motors, ya gotta pull the junk in the way,....

Sounds like the valves are adjusted as good as they get now,....
Should be nearly centered in their hyd, travel,....
 
Joined
Feb 13, 2018
Messages
2
No it's the gm recall I think , you have to have the machine and if course they kept it on the low ?? That adjustment is so precise only the dealerships speacial machine can pinpoint it because it's onlly one cylynder ??? See the gm recall on that engine
 

Scott Danforth

Grumpy Vintage Moderator still playing with boats
Staff member
Joined
Jul 23, 2011
Messages
51,543
No it's the gm recall I think , you have to have the machine and if course they kept it on the low ?? That adjustment is so precise only the dealerships speacial machine can pinpoint it because it's onlly one cylynder ??? See the gm recall on that engine

what are you talking about?

the OP has a pre-vortec headed V6. you tighten the rocker to zero lash, then 3/4 turn. with the vortec heads, GM took the adjustment out of the rockers unless you change the rocker studs for adjustable rockers.
 

alldodge

Moderator
Staff member
Joined
Mar 8, 2009
Messages
43,476
Manual 18 - V6 - 1993 to 1997
No valve lash adjustment. Tighten nuts to 20 ft lb and your done

If your motor is in one of these serial number ranges
EDIT: guess its a 1992 if Scott is correct

MCM 4.3L Alpha OF000615 - OF800000

MCM 4.3LX Alpha OF001220 - OF800000

MCM 4.3LX Gen+ Alpha OF803000 and Above

MCM 4.3LXH Gen+ Alpha OF803114 and Above

MCM 262 Magnum EFI Gen + Alpha OF803800 and Above

MCM 4.3LX Bravo OF 605305 - OF800000

MCM 4.3LX Gen+ Bravo OF831000 and Above

MCM 4.3LXH Gen+ Bravo OF803400 and Above

MCM 262 Magnum EFI Gen+ Bravo OF803802 and Above
 
Last edited:

Scott Danforth

Grumpy Vintage Moderator still playing with boats
Staff member
Joined
Jul 23, 2011
Messages
51,543
AD, good catch.

I keep forgetting that the V6 switched to fixed valve train prior to the SBC's.
 

dlogvine

Master Chief Petty Officer
Joined
May 4, 2015
Messages
839
So just simple 20 ft lbs and done? Cool! Thank you! One more question, when lifting the risers for the valve cover removal/install, is there any way to prevent water getting in the oil without draining the risers first? I forgot about the water and contaminated the oil, now will have to change it. Thx
 

alldodge

Moderator
Staff member
Joined
Mar 8, 2009
Messages
43,476
Best way is to drain the manifolds.
If it only got a little bit of water, it will be burned off once motor gets to temp
 

Scott Danforth

Grumpy Vintage Moderator still playing with boats
Staff member
Joined
Jul 23, 2011
Messages
51,543
So just simple 20 ft lbs and done? Cool! Thank you! One more question, when lifting the risers for the valve cover removal/install, is there any way to prevent water getting in the oil without draining the risers first? I forgot about the water and contaminated the oil, now will have to change it. Thx

Depends....if you motor has adjustable valve train or non adjustable valve train

Drain the water, then pull the elbow
 

Bt Doctur

Supreme Mariner
Joined
Aug 29, 2004
Messages
19,466
loosen the manifold bolts a bit , slide the manifold back about a 1/4 inch and there is just enough room to remove the valve cover.
Or remove the 2 end bolts and install longer bolts, remove the remaining bolts and slide manifold back for clearance
Done correctly you should not damage the exaust gasket,
 

Lou C

Supreme Mariner
Joined
Nov 10, 2002
Messages
13,503
first pic shows how to use the all thread or long bolt with head cut off to slide back manifold, second pic shows what the adjustable valve train looks like. photo285080.jpgphoto285081.jpg
 

dlogvine

Master Chief Petty Officer
Joined
May 4, 2015
Messages
839
loosen the manifold bolts a bit , slide the manifold back about a 1/4 inch and there is just enough room to remove the valve cover.
Or remove the 2 end bolts and install longer bolts, remove the remaining bolts and slide manifold back for clearance
Done correctly you should not damage the exaust gasket,

Im not sure if loosing the bolts on the manifold (i assume you are talking about exhaust manifold) would give me enough clearance to remove the valve cover. Also it is easier to remove the riser than trying to reach exhaust manifold bolts. And riser gaskets are much cheaper than manifold ones.
as for tying the rockers, 20 ft lbs torque was perfect. All the rockers are tied up evenly.
 

dlogvine

Master Chief Petty Officer
Joined
May 4, 2015
Messages
839
Got this boat running, still need some adjusting and fine tunning, need to replace leaking oil pressure switch and adjust the throttle lever, but it ran strong for about an houtr on the lake
 

Attachments

  • photo286483.jpg
    photo286483.jpg
    86.3 KB · Views: 0
  • photo286484.jpg
    photo286484.jpg
    49.7 KB · Views: 0
  • photo286485.jpg
    photo286485.jpg
    35.7 KB · Views: 0
  • photo286486.jpg
    photo286486.jpg
    38.8 KB · Views: 0
  • photo286487.jpg
    photo286487.jpg
    37.6 KB · Views: 0
Top