1996 Crestliner Sportfish ? Refurbish w/ pics and questions

Frayed_Knot

Seaman Apprentice
Joined
May 17, 2011
Messages
46
Re: 1996 Crestliner Sportfish ? Refurbish w/ pics and questions

Been doing some sanding on the hull and just started gluing vinyl to the deck panels hopefully will have pics soon. Sanding just hit the tedious stage - no more large areas for the orbital sander... just hand-sanding now.


Are you going back original or changing the layout of the boat? Is this going to be a fishing rig or a family boat? I changed stuff when I rebuilt mine. I left off the side panels and put rod holders down the sides of the boat. Works great for a fishing boat, probably not so great for a family of watersport boat though.

The plan is to change the layout to make it more of a fishing rig. side panels will become open rod storage - I nee to check out your threads to get some ideas of how you did it. I am going to do away with the conversion bow and just make it a solid deck with extra storage. Also going to make the rear bench larger to make a better casting platform. I will have to test that out though before its final... I do a lot of trolling and will have to make sure I can still work rods out the back no problem. Should be OK.


Nice project boat there. That big 130 looper should move pretty good. I used contact cement too, but I'd guess the Nautolex adhesive should work fine without any surface prep.

Thanks! It was your resto project that inspired this one.. and what I used to sell the idea to the Mrs. "see hon, how good our boat could look... just need the garage for a bit... won't take long at all :D" didn't fool here for a second... she knew better... and still let me do it. I'm pretty lucky!

I was excited about the v4 looper. from what I understand they are pretty solid motors. took it out last fall when we first got it and it was impressive. once the boat is complete I will rebuild the carbs, fuel pump, and water pump. It ran ok but was a bit rough for my liking. I am also not convinced it is propped correctly I was getting ~4800 RPM and 42mph at WOT ... was expecting a bit more from that big of an engine on the 17 footer but will have to do some more investigating. All that comes later though... lots to do before then!


By the way, what have you been eating for breakfast? You've made more progress on your project in two days than I made in two months on mine.

well actually ... i have been skipping breakfast lately ... my post might be a bit misleading ;) I managed to tinker a bit here and there over the summer so all of the above was just a recap of where the project sits now.


I don't know how I've missed this one. That's a super nice hull with a heck of a motor. You're going love that boat when you're done. Great work so far!!

Thanks! yeah, I love it already, The boat was really smooth the few times i had it out... before the destruction began :D!


If those Petoskey stones are gonna be exposed to UV then you might want to clear coat them with something that has UV blockers.
The resin will break down if exposed to the sun. I use Epifanes clear varnish, good stuff.

Good Point! the pudding stone should be fine, it jsut sits on the bookshelf, but I will need to use the Epifanes as I do more. I am just starting this stone polishing ... I am a total hack at it right now, but its fun. The first attempts involved the bench vise and the grinder :facepalm:. I probably shouldn't go into details in case any of you are professionals with the stone polishing ... you might hunt me down and beat me..:D


OK back to the boat! I have the whole weekend off so hopefully can make some good progress! Thanks to all for the comments and advice - really helpful!!
 

fishrdan

Admiral
Joined
Jan 25, 2008
Messages
6,989
Re: 1996 Crestliner Sportfish ? Refurbish w/ pics and questions

I'm ashamed to say it,,, but I didn't post up a thread to my rebuild. It was like yours though, complete down to a bare hull resto.

I'm doing a couple of things to my rig this weekend and will post up a couple pics to give you some idea's. I troll a lot too and have rod holders setup for it, that and rod storage.

During my rebuild I scoured the internet for pics of different boats, things I wanted to incorporate. Newer Crestliner outboard boats have a sweet stern seating setup, rear seating that flips down into a casting platform, I thought that was cool. I have an I/O so I couldn't do that, though I did make the stern layout different.

I bet your rig scoots once you get that 130 running right. With my 140HP I/O I'm happy to get 35MPH at WOT...... :rolleyes:
 

Frayed_Knot

Seaman Apprentice
Joined
May 17, 2011
Messages
46
Re: 1996 Crestliner Sportfish ? Refurbish w/ pics and questions

Its been a bit since the last post.... I have hit a snag and need some help. This is going to be a long post - sorry about that! The short version is - I am having trouble with the Nautolex adhesive and am looking for advise... I put the entire process below along with some questions. Thanks for any help you guys might have!! I thought this was going to be one of the easy steps :redface:


I have been attempting to glue the nautolex flooring to my deck panels in the basement and then let it dry while I am off sanding the hull in the garage. been working at this for the past week and half. I must be doing something wrong - the glue isn't drying / holding properly. Probably doing something really stupid so I am hoping you all can toss some ideas at me... laughing at me is acceptable too ...so long as it comes with some advice;). So far I have had one board that worked OK and multiple failed attempts.

First attempt - put the glue on, watched for 10 minutes, nothing, set a time for another 10 and watched football, nothing, reset timer for 20 minutes, still wet, reset time for 20 minutes, come back and the glue on board was tan and too far gone to put the vinyl down... Start over! :facepalm:

Second attempt I was a little more gun-shy and watched the glue the whole time working on some other stuff in the basement... Let is sit for about 1/2 hour and decided it was tacky enough... put vinyl down... 3 days later glue was still jsut as wet as when I first put the vinyl down ... Start over! :facepalm:

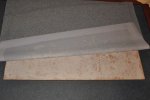
Third attempt watched glue carefully, noticed it was drying around the edges but the middle was still wet. added a bit of fresh glue to edges and then worked it into the middle with the brush... tried to keep it all at the same stage of drying. only put it on the board to start. when it hit the tacky stage all over I rolled the vinyl down smoothed it a bit and then pulled it back up... this actually brought a fair bit more moisture to the surface of the glue. and made for a nice even coating on the board and the vinyl. let it sit for 10-15 minutes more, it seemed to be nice and tacky again so I pressed vinyl down and smoothed out. rolled it back into place slowly smoothing it and pressing out the air as I put it down. I checked it the next day and it looked good the glue had turned the tan color that the instructions said. i just pulled up a tiny bit of one corner the glue was still soft and stringy like week old gum on your shoe but was sticking to both the vinyl and the board. I smoothed it back down and put the weights back on it and let it sit for 2 more days. Thinking I had solved my issues I started on two more boards.... just checked the first one after 4.5 days of drying - here is the result -

7.JPG

Looks more wet than when I pressed the vinyl down. glue seems to be sticking onto the board, but not so much the vinyl. :confused: So now I have the glue cleaned off this one. I am going to leave the other board sit for a couple more days and then check it. I thought I had a good plan going with this last attempt .... guess not.

I am using the glue as is, no thinning. spreading on with a cheapo paint brush for what looks like a thick coat of paint as the instructions said... basically just enough to cover board evenly all the way across so I can't see board.

The basement has been constant 71 degrees all week and I have dehumidifer running down there keeping it nice and dry.

My adhesive was separated when I first opened the can... closed it back up and shook it until it had mixed back to an even consistency. It looked a bit white/grey in color and was thicker than honey... closer to a toothpaste consistency.

Once I have the vinyl smoothed into place I have been putting another board over top with weights on that to put even pressure across the whole surface.

So here are my questions -

what did I do wrong?

How thick are you guys spreading this stuff on?

How long does it take to hit the "tacky" stage?

what is the "tacky" stage? the instructions say right as it it turning tan... i haven't seen that except for when it is really dry... hard to the touch kinda dry. it seems to go from white (wet) to clear (dry) with a brief point where it gets gummy in between - that gummy phase is when I have been putting the vinyl down, but it is still white during that stage.


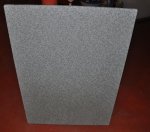
and just to end on a positive note... here is the one board where the glue seemed to work OK...

first.JPG


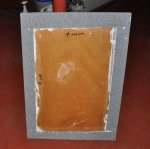
I wasn't totally convinced that the nautolex adhesive was completely holding so I slathered the edges and back with 5200 when I wrapped the vinyl around the back and socked about 18 bazillion staples in it... overkill? yes... but it was the first one to actually get to this stage and that sucker isn't going anywhere! :D
first_back.JPG
 

ezmobee

Supreme Mariner
Joined
Mar 26, 2007
Messages
23,767
Re: 1996 Crestliner Sportfish ? Refurbish w/ pics and questions

I put my vinyl down pretty much immediately with the glue wet and didn't have any issues (nautolex adhesive).
 

fishrdan

Admiral
Joined
Jan 25, 2008
Messages
6,989
Re: 1996 Crestliner Sportfish ? Refurbish w/ pics and questions

I used contact cement, but would do like EZ and put it down while it's still wet so you get transfer from the wood to vinyl...... Unless you are supposed to coat both the vinyl and wood with the adhesive, then I'd treat it like a contact cement, letting it tack up like you were. Dunno, I used contact cement...

Are you using a J roller to press the vinyl onto the wood. I wouldn't do vinyl without one as it will put a LOT of pressure in a small concentrated area, to stick the vinyl down. Basically, apply glue, place vinyl, smooth out by hand to get air out, lightly roll with J roller to further get air out,, medium pressure to set vinyl, hard pressure in multiple directions to get it stuck permenant.

One thing, make sure the top glue is completely dry before wrapping it around the edges, or it could suck air and bubble/pucker a bit at the edges.

No pics of my boat yet, didn't even get the cover off this this weekend.... :rolleyes:
 

andythomas

Seaman Apprentice
Joined
Aug 29, 2011
Messages
38
Re: 1996 Crestliner Sportfish ? Refurbish w/ pics and questions

if the weather is like it is here the humidity might make the glue take longer to cure. i plan on cranking up the heater when i start epoxying and glueing. i love how you had the floor all laid out with the seats too. its really looking good. what wood did you use for your floor is it 3/4 inch? how much epoxy did you use on it too. i am really thinking about a wood floor with the price of aluminum being so high.
 

pmillar

Petty Officer 1st Class
Joined
Sep 23, 2009
Messages
298
Re: 1996 Crestliner Sportfish ? Refurbish w/ pics and questions

I had good luck this summer putting vinyl on the rear deck of my '97 Sportfish. Same boat, different color... 'cept I only have a 115 looper. :( She still moves pretty well though even though I may reprop next year for the same reasons as you, ~ 4800 rpm with two people and a 1/2 tank of gas. My Fast Strike should be closer to 5500rpm.

Anyhow, is your adhesive the stinky stuff or the "greener" variety? I had good luck with the stinky, nasty contact cement (Dap - Weldwood, red can) You can find it at Lowes and regular hardware stores. One can was separated but mixed up and worked just fine.

A few questions for you since I expect to eventually work my way through the rest of the boat since I really like the vinyl over the old carpet... what plywood did you go with? With respect to the gas vapors, I haven't pulled the deck panel covering the tank but I do notice a gas smell coming from the bilge area when the tank is full. I have never seen a drop of gas come from the bilge, however. It's almost like it's venting under the deck :confused: I try to keep it below a 21/2 tank as a result.

Regarding the foam, one possible benefit of a welded hull over the rivets may be better odds for dry foam vs. a riveted hull. That's just my speculation but my foam sure looks dry and I don't get much, if any water, except when the kids go tubing and drip tons of water inside the boat. (maybe 1-2 gallons at most) Be sure to post back up in the spring when get get her dialed in. I'm curious what the 130 will do. For comparison, I came in at 42 by gps the one time my buddy brought his gps. My guess is it might reach 45 mph (not knots) under flat conditions so you should be north of that. I did go with a remanufactured powerhead last year though, fwiw. As a final comment, I would be happy to swap trailers with you. If I had looked closer when I bought mine 2 yrs ago I would have bargained harder as the trailer needs some TLC. It works but it sure is ugly (aka rusty with crappy wheels/tires which were immediately replaced.)
 

McGR

Senior Chief Petty Officer
Joined
Jun 19, 2004
Messages
664
Re: 1996 Crestliner Sportfish ? Refurbish w/ pics and questions

I hate to rain on your parade since you have already bought the Nautolex adhesive... and someone will probably chime in to tell me I'm completely off base.... But, I hate latex/water based adhesives etc.

Every time I try one of these new "green" water based type products, it seems I have bad results. I had really poor results on my last boat with latex carpet adhesive. I ended up redoing much of it with contact cement. I have always had better luck with the good old fashioned solvent based products. On my Crestliner, I used contact cement on my Nautolex and carpet without any issues - and this was in the middle of winter in my freezing garage. My general preference is for those "old school" products that burn holes in the ozone layer and kill you if you inhale too much.

Seriously, if you continue having problems you may want to try some contact cement.
 

Frayed_Knot

Seaman Apprentice
Joined
May 17, 2011
Messages
46
Re: 1996 Crestliner Sportfish ? Refurbish w/ pics and questions

Thanks guys! I am going to give it another go tomorrow and see what happens. I want to wait until this rain clears up a bit - like you said Andy it is really wet here right now. It wasn't when I started this process the other week but its been raining for the last 4 days here and everything just feels damp now. I still have one panel in the basement with glue drying... going on day 6 now. That seems a bit ridiculous. Maybe even with the dehumidifier the basement is just holding too much moisture. I have a space heater on the one remaining panel now to see if that helps... Friend used this stuff and would let a space heater blow over it while it dried - said it worked really well. Seems to be the story with most everyone though. I am getting a bit worried if I am having this much trouble gluing a piece of vinyl to a board what chance do I have with the rest of this project :rolleyes:. The stuff was separated pretty bad when I first opened the can... who knows maybe I jsut got a bad can. It seemed to mix back together fairly well though.

Anyway, I will give it a go again tomorrow - going to take the weather station jobby down there and actually monitor the conditions... see if moisture really is the problem... I am going to give the space heater a try too. now just debating if I should actually follow the instructions on the can and let it tack up before putting the vinyl down or do like EZ and a lot of others here and put it down right away. Maybe two panels - one each method... this has turned into an experiment at this point.

I used a laminate roller on the first attempt with this stuff but I wasn't too happy with the results. I ended up with really nasty ridges from the edge of the roller all over the panel and I ended up squishing most of the glue right out the end... maybe pressing too hard? Anyway, I saw someone else here suggest jsut using leather gloves So I went that route for the other attempts. It seemed to work pretty well for smoothing the vinyl I was able to press it down nice and flat and rub out any air bubbles... then I just used the heal of my hand to really mash it down tight. That seems to pull the vinyl nice and tight as I went too. Maybe I need to give the roller another try?

McGr what cement did you use was it the the 3M stuff? I have to agree with you and PM - the stinky stuff is looking like a pretty good idea at this point. the weldwood looked like a good option too. I went with the nautolex adhesive because it is "specifically formulated to be used with Nautolex vinyl" seemed like a good plan. I am not ready to give up just yet - I have a gallon of this stuff and it seems to be working without issue for others so I should at least give it a fair shake. we will see how it goes tomorrow :D
 

Frayed_Knot

Seaman Apprentice
Joined
May 17, 2011
Messages
46
Re: 1996 Crestliner Sportfish ? Refurbish w/ pics and questions

i love how you had the floor all laid out with the seats too. its really looking good. what wood did you use for your floor is it 3/4 inch? how much epoxy did you use on it too. i am really thinking about a wood floor with the price of aluminum being so high.

Can you believe my wife made fun of me when she came downstairs and caught me doing that with the windshield up on the card table! Its not like I was sitting there making motor noises ..... much ;)

I used a 3/4 7ply hardwood that I got from HD. Supposedly exterior so I am assuming the glue is exterior grade... It was the best I could find locally in stock, but I think the general recommendation here is the Arauco. you should probably double-check that though in some of the other rebuild threads going on here.

I used up a full gallon of the resin and gallon of the hardener (the clarkcraft stuff is 1:1 ratio) on the floor panels you saw in the picture and had just enough left over to do the couple pieces for the little locker in the nose of the boat. I put 3 coats on both sides of most panels - a couple only got two coats. I just kept putting it on until they were glassy smooth. And lots on the edges.. the edges really soaked it up. I have another gallon of each saved back for the rear bench, front deck, and consoles. hopefully that will be enough.
 

Frayed_Knot

Seaman Apprentice
Joined
May 17, 2011
Messages
46
Re: 1996 Crestliner Sportfish ? Refurbish w/ pics and questions

I may reprop next year for the same reasons as you, ~ 4800 rpm with two people and a 1/2 tank of gas. My Fast Strike should be closer to 5500rpm.

I am thinking the same thing. I am getting the same top end as 17 footers with 90's and 115's. I don't have a huge desire to go all that fast but I am thinking if the motor isn't propped right won't be running efficiently. Maybe the prop is fine and the tune up will take care of everything. we will see .... some day ...


A few questions for you since I expect to eventually work my way through the rest of the boat since I really like the vinyl over the old carpet... what plywood did you go with? With respect to the gas vapors, I haven't pulled the deck panel covering the tank but I do notice a gas smell coming from the bilge area when the tank is full. I have never seen a drop of gas come from the bilge, however. It's almost like it's venting under the deck :confused: I try to keep it below a 21/2 tank as a result.

some gas smell in the bilge is common. The plastic tanks are permeable to gas vapors so there will always be a little leaking. Typically they get worse with age. probably worse when the tank is near empty... more vapors to leak out. Mine was something much worse than that. When I found the boat it was in the back of a storage barn at marina. pulled the cover off and the whole boat stunk pretty bad like gas. popped the little 6" hatch over the sending unit it was really bad. I actually assumed one of the lines or the tank itself was leaking and the bilge was going to be standing full of gas. That wasn't the case but I ended up replacing everything anyway.


For comparison, I came in at 42 by gps the one time my buddy brought his gps. My guess is it might reach 45 mph (not knots) under flat conditions so you should be north of that. I did go with a remanufactured powerhead last year though, fwiw. As a final comment, I would be happy to swap trailers with you. If I had looked closer when I bought mine 2 yrs ago I would have bargained harder as the trailer needs some TLC. It works but it sure is ugly (aka rusty with crappy wheels/tires which were immediately replaced.)

good to know. that is basically my top end right now.

You like my homemade trailer huh? The side of the tongue with the id info sticker for the trailer was all buggered up so I had to go through the process of re-titling / licensing or whatever you call it, get it weighed, etc and the state of Michigan now has it listed as a homemade.
 

McGR

Senior Chief Petty Officer
Joined
Jun 19, 2004
Messages
664
Re: 1996 Crestliner Sportfish ? Refurbish w/ pics and questions

I just used DAP contact cement... nothing fancy.

By the way - were you wearing your captain's hat when your wife caught you playing in your imaginary boat? Just curious.


Frayed_Knot

Seaman Apprentice
Joined
May 17, 2011
Messages
46
Re: 1996 Crestliner Sportfish ? Refurbish w/ pics and questions

Ha! No it was more like .... pirate.JPG
 

Frayed_Knot

Seaman Apprentice
Joined
May 17, 2011
Messages
46
Re: 1996 Crestliner Sportfish ? Refurbish w/ pics and questions

Vinyl is down Woohoo! Only took me a month for me to figure out how to operate ... glue :facepalm:

ended up putting the glue on both sides (board and vinyl) and then putting the space heater on it for ~15 minutes. let dry to the point what looked like way too dry. The board side would go almost completely clear but the vinyl side would stay a bit more tacky and still be a bit white. Once it got to that point I rolled the vinyl out, smoothed all the wrinkles with leather gloves and then hit it with the j-roller to really mash the two together. Just a warning - I am not providing proper instructions for applying vinyl flooring in case anyone stumbles across this thread and only reads this post. Scroll up a few posts and you will see i clearly have no idea what I am doing... just happy to have finally gotten this part finished and wanted to share.

I did experiment a little - I tried one with just putting the glue on and pressing the vinyl down immediately. Let the space heater blow across it the whole time it was drying. the edges dried just fine where the glue was exposed to the air, but the center never did dry - 8 days in I checked and as soon as you cracked the edge loose (it would pull up really easy at the corners) you could see the entire inside area of the glue was still wet.

I am actually on to bigger and better things now - like foam and corroded aluminum :eek:! I am going to have more questions for everyone. Need to get some pictures off the camera first though.
 

Frayed_Knot

Seaman Apprentice
Joined
May 17, 2011
Messages
46
Re: 1996 Crestliner Sportfish ? Refurbish w/ pics and questions

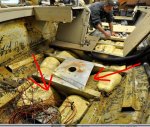
Ok here are some pics. I was taking a few more samples of the foam just to make sure there was not moisture anywhere. Back in the rear section of the boat, the seat posts had punched holes in the foam under the deck panels so I was most concerned about that area.

rear foam.JPG

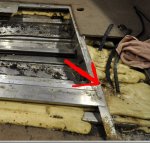
finally decided to just cut a whole square out around where the foam was damaged, thinking I would just patch it and put a block of polystyrene back into the space. As I was digging it out I realized how much of the drainage in the boat was actually blocked by the foam. there are channels all allong the boat and holes under the edge of each bulkhead, but the foam was blocking all but the main channel down the middle. That was even partially blocked off way up in the nose

front foam.jpg

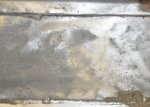
Soooo I thought ... I will jsut take out the rear channel and the front two channels to open up the drainage, replace just those sections with poly, and leave the rest. that is when I found the pitting. Under one section of the foam up in the nose.

Pit 1.jpg pit 2.jpg Pit 3.jpg
 

Frayed_Knot

Seaman Apprentice
Joined
May 17, 2011
Messages
46
Re: 1996 Crestliner Sportfish ? Refurbish w/ pics and questions

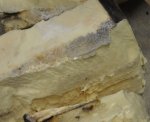
Still had found no moisture at all in the foam at this point but it had to go...

Foam 1.JPG foam 2.jpg Foam 3.JPG

Ended up finding 3 more spots with pitting and one spot where a there was just a tiny bit of water between the foam and hull right under the walk-thru - foam was even looked a bit moldy -

mold.JPG


So the hull is all cleaned out now - what is the best way to keep it protected?
leave it bare? Gluvit? prime and paint? I have seen some discussion about painting the inside of the hull but not a consensus.


I am planning to smeer some jb-weld over the pitted areas - mostly because I have three tubes of it sitting on the workbench. I have seen others here using marine tex or all-metal for this. Is one better than the other?
 

pmillar

Petty Officer 1st Class
Joined
Sep 23, 2009
Messages
298
Re: 1996 Crestliner Sportfish ? Refurbish w/ pics and questions

Uhg. Here I was waiting for your next update but now I'm kinda wishing I hadn't seen it. Good deal on getting the vinyl down finally but that just stinks about the pitting... and makes me very nervous about my boat. Good on you for jumping right in and making it right though. I'm sure mine looks horrible under the deck seeing how squirrels must have lived there before it came to me. (clue = a few dozen walnut shells with a little chewed up foam - I bet their pee was corrosive. :facepalm: )
 

fishrdan

Admiral
Joined
Jan 25, 2008
Messages
6,989
Re: 1996 Crestliner Sportfish ? Refurbish w/ pics and questions

Progress, gotta love it :D (I got hit with vertigo last weekend and was stumbling around like a drunk sailor, so no progress here :rolleyes:)

I did experiment a little - I tried one with just putting the glue on and pressing the vinyl down immediately. Let the space heater blow across it the whole time it was drying. the edges dried just fine where the glue was exposed to the air, but the center never did dry - 8 days in I checked and as soon as you cracked the edge loose (it would pull up really easy at the corners) you could see the entire inside area of the glue was still wet.

Sounds like a quirk of using the Nautolex "waterbased" adhesive with epoxied plywood, no place for the moisture to escape and dry out the adhesive? I think you have it licked, treating the Nautolex adhesive like contact cement.

I hope I don't have crevice corrosion in my hull like you found, too later for me now. (Crevice corrosion is caused by water being trapped against the aluminum.) I wouldn't use JB weld to fill the pits as it gets brittle once it cures, could pop off as the hull flexes. I'd use something that has a bit of flex to it. Gluvit would work, but it's pricey and you don't really need it for your welded hull, no rivets to seal up. I had (had) some epoxy that would not dry rock hard, still had a bit of flex once it cured, that would work OK. If the pits are not very deep you could use alumiprep (or Jasco Metal Prep) to clean the surface and corrosion, hit it with some ZC primer, then top coat with enamel paint to seal the aluminum.
 

ezmobee

Supreme Mariner
Joined
Mar 26, 2007
Messages
23,767
Re: 1996 Crestliner Sportfish ? Refurbish w/ pics and questions

Bummer. This is why very few of us are reinstalling poured foam in our aluminum hulls. I think if you went the sheet foam (or pool noodle) route, they'd be laying on top of the ribs and wouldn't trap water against the hull.
 

Frayed_Knot

Seaman Apprentice
Joined
May 17, 2011
Messages
46
Re: 1996 Crestliner Sportfish ? Refurbish w/ pics and questions

thanks guys. I am guessing it was just from water working its way down through the deck. going through the bilge there is no sign of standing water in there, no waterlines on the transom or on the bulkheads, no stains or sludge piles in the bottom... must have been just enough seeped through to wick down around the foam. The foam appeared to still have a nice "skin" on it and the moisture seemed to be between the skin and the aluminum.. not actually inside the foam itself. Oh well its gone now and I am definitely going to replace it with the Sheet foam like you said EZ.

thanks for the heads up on the JB weld Dan. I don't want it cracking out of there. I will look around and see if I can find an epoxy that will stay a bit more flexible and bind to the aluminum... i don't want something that is going to let moisture seep back under it again. Open to any suggestions if anyone out there know of anything good.
 
Top