1996 Princecraft 16' Project

detrickm

Cadet
Joined
Mar 17, 2011
Messages
12
Picked up a 1996 16' Princecraft at the end of last year. The previous previous owner had started making it into a side console, but never finished. They also seem to have loaded the thing up with non-marine plywood and 2x4's. 1974 Evinrude 40 tiller, don't know if it runs, I bought it assuming it doesn't. It supposedly did the last time the PO had it out ... over 2 years ago ... I'm expecting it will need TLC at the worst, and repowering at the best case. The engine did come with a box of parts that I haven't inventoried yet, but includes pistons (they are on top).

Since this forum helped lead me to finding this boat in a weird sort of way, and since everyone seemed excited over other boat rebuilds, I'll try to document my journey here. The intent in the end is to have a duck blind boat, river boat, lake boat, and Chesapeake Bay boat on rare occasions. I do think I'd like to build a side console for it, but that might eat up too much space too.

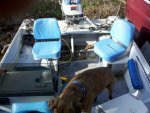
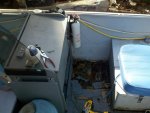
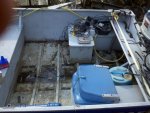
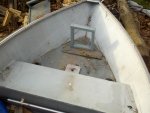
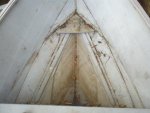
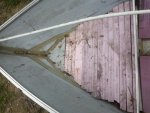
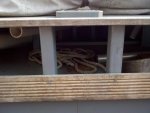
The trailer seems to be in very nice shape, as does the hull. Here's an idea of what I'm starting with on the inside:

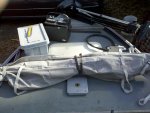
bow.jpgunder casting deck.jpgstern.jpgbehind console.jpgcasting deck.jpg
 

ezmobee

Supreme Mariner
Joined
Mar 26, 2007
Messages
23,767
Re: 1996 Princecraft 16' Project
Welcome to the madness. Princecraft makes really good boats. Your Evinrude, if it has good compression, could end up being and runner with very little investment. I'd like to see some pics of the overall boat. My vote would be side console but I know we have some real tiller fans here also.
 

detrickm

Cadet
Joined
Mar 17, 2011
Messages
12
Re: 1996 Princecraft 16' Project
I'm leaning towards the side console right now, mostly because I like the way it looks better. I've removed the console and the boat looks much smaller, to me. Tiller is probably better for duck boating. I'm definitely planning to try to get that engine running, and if I do I'll put at least a season on it, hopefully getting a good feel for what I want to do with it in the long run.

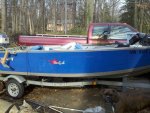
Quick pics of the overall boat (although I cut the ends off a bit) and some of the wooden bits that I've removed:
port.jpgstarboard.jpg

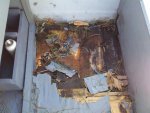
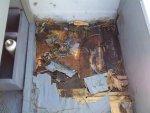
Here's the wooden console, and a closeup of the rottenness behind it. It's not much more than a desk, really. I think I'll keep the acrylic windscreen bit and see if I can't build a new console out of aluminum or carbon fiber (I've a buddy who swears he can build CF stuff).
console.jpg
behind console.jpg

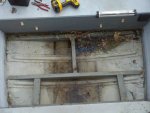
The rotten wood is starting to come out. As expected, the floor is peeling out easily by hand. 2x3 cross bracing was under the plywood. The 2x3s were heavy, but surprisingly not as rotten as I expected. The nails holding them together were well rusted though. There were pieces of plywood wrapping around the benches (why I don't know), and to my surprise they seemed to have been screwed together with stainless screws. The console was put together with stainless too (well, mostly anyway). Why you would use stainless up high, and steel nails under the floor is beyond me. Ah, well, it doesn't matter ... it's coming out anyway. Thankfully all of the screws so far have *not* been through any of the boat's aluminum. The wood seems to just be a facade.

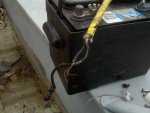
The wiring under the console was mostly zip cord wire (the stuff like you might find on a table lamp), and the main power feed from where the battery was was two solid 14ga conductors ... the stuff you'd wire lights and switches in your house with ... run under the plywood deck.

My plan is to pour foam and put a sheet aluminum deck on top of it. That shouldn't rot, and ought to be a few pounds lighter than even dry lumber.
gutting begins.jpg
 

ezmobee

Supreme Mariner
Joined
Mar 26, 2007
Messages
23,767
Re: 1996 Princecraft 16' Project

At the risk of starting another flotation foam war.....I will tell you that many of us tin heads (not all) have decided to avoid the pourable foam because we've seen multiple instances of it trapping water against the hull and causing corrosion. My recommendation, if you go with the pourable, would be to put some plastic between it and the hull or something. Most of us have gone with either the pink or blue construction sheet foam from Lowes/Home Depot or pool noodles (believe it or not). Either or those options should allow the hull to drain better.
 

detrickm

Cadet
Joined
Mar 17, 2011
Messages
12
Re: 1996 Princecraft 16' Project

I've been reading through the STARCRAFT RESTORATIONS. Pink/blue foam it is. Makes sense to me, and I think it may be easier to work with in some ways. I'll try not to mention it again for a while, so we don't start a debate. Reading the Starcraft restoration threads is fun and exciting, but wears me out after a while. Lots of good answers there to questions I didn't know I had. After I read all I could, I figured I'd get some time in with the boat.

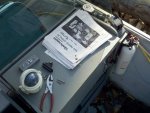
The top of the console flipped up, and had a little storage area under it's lid. A nice little surprise was inside, a photocopy of parts and repair manuals for the old engine. I suspect a search would turn up electronic copies of these too, but now I have less need to go hunting for an electronic copy.
console surprise.jpg

Here's another random image from the first batch I took. Nothing much interesting here, mostly just another view of the rotting deck wood. Oh, and the bent u-bolt I found laying inside the boat. It worried me at first that the trailer might be missing something rather important. A quick search around the trailer and I'm now convinced it used to hold the spare tire down. Not sure how it got bent, but there's a new one in it's place holding the tire in now. All of the other bits on the trailer look like they're in the right places, and in nice shape.
port aft.jpg

With some of the deck up, you can see the 2x3 support system that was below it. I've got enough trash from ripping rotten deck out to fill the can again, so I might try to fiddle with the engine if I get more time before the trash truck empties my can again:
deck supports.jpg

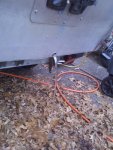
I started removing the trolling motor from the bow too. It was about ready to come off on it's own, and I'm glad it didn't while I was trailering home. There was this big fat yellow power wire running from the center of the transom along the starboard gunwale all the way up to the bow, for supplying power to the trolling motor. At first glance I thought maybe someone had done something right, putting nice heavy gauge wire in to feed power (maybe it would be even better to have the trolling motor battery up in the bow, but that's another discussion). After looking more closely, and finally ripping this wire out, I find it's an old extension cord that has been cut up. I guess that works, but it seems slightly less than professional.
trolling power.jpg

Time to go read more Starcraft restoration posts ... it's dark outside.
 

detrickm

Cadet
Joined
Mar 17, 2011
Messages
12
Re: 1996 Princecraft 16' Project

Should you feel like getting a factory service manual for your motor (and I HIGHLY recommend it, they are awesome) check here: http://shop.ebay.com/i.html?_trkpar...&_sticky=1&_trksid=p3286.c0.m14&_sop=15&_sc=1

It seems like you're really trying to encourage me to keep this engine. I'm not opposed to the idea, and I do think it will run ... if it does not now, it came with a bin of NOS parts, including 2 carbs, pistons, rings, coils, points, fuel pumps, gasket sets, propeller shaft, crankshaft, and a bunch other random bits. I still plan to try to run it for at least a season, if for no other reason than it will save me dropping a few grand for a while longer. Long term, I don't want to be in a position like NorthBeach was, where I plan a week or two trip to the lake and end up losing power on the first or second day, which is what makes me want to lean towards repowering with something more modern.
 

ezmobee

Supreme Mariner
Joined
Mar 26, 2007
Messages
23,767
Re: 1996 Princecraft 16' Project

Well basically, it's either a runner or it isn't. Small outboards are pretty simple machines. Once you get it running and all the maintenance up to date I can't see any reason it wouldn't be reliable for you. Also, unless you went with something brand new like and etec or something, I don't think you'd be gaining much in the way of new technology. Like if you found a '94 40HP it wouldn't a heck of a lot different. I'd save my pennies.

My '81 Evinrude is a great runner. I had it completely looked over by a mechanic last year. It got lower unit oil changed, new water pump, new thermostats, carb rebuild kits, fuel pump rebuild kits, and new plugs. Runs fantastic. I had basically the same things done to my '73 Johnson and I ran that for 5 years and sold it running. There are still outboards from the 50's whose owners use them frequently without a thought of being stranded. North Beach had an OLD I/O and that's a whole different ball game.
 

detrickm

Cadet
Joined
Mar 17, 2011
Messages
12
Re: 1996 Princecraft 16' Project

More deck ripping out today. I removed the casting deck, and found another one beneath it. Two more rod holders and one more seat mount to add to the inventory of bits to keep. Trash comes tomorrow, then I can refill the can again, and maybe take the kitchen trash out.
basement casting deck1.jpg

A little bit of water, but otherwise nothing scary under the basement casting deck:
under casting deck.jpg

Aren't you supposed to let it do this when you pull out? This might actually be my fault. The PO said he left it in his garage, or under a tarp. After I bought it, it sat at my buddy's house for about 2 months before I brought it back home. No tarp on it during that time, and it snowed a few times. All of the wood is out now, and it doesn't look so bad underneath. It's also covered now. I'll try to pressure wash it soon, then there's one spot I want to get a good look at.
water draining.jpg

Gluvit order is planned for tonight or tomorrow. I'll fill the hull with water and check for leaks after pressure washing. After gluviting I think vinyl wrap for the hull will be next. Seems like it would be best to put that on (or have it put on) while the thing is still gutted.

Putting my thinking cap on, I'm trying to figure out how to do a new casting deck. I'd like to avoid wood, ideally go with aluminum, although starboard might be nice. Any ideas or helpful threads I haven't stumbled across yet?
 

detrickm

Cadet
Joined
Mar 17, 2011
Messages
12
Re: 1996 Princecraft 16' Project

I guess I'll be working on getting the engine going next, if the weather holds:

"I regret to inform you, there was an inventory discrepancy. We should have [gluvit] in our office in 7-10 days."
 

detrickm

Cadet
Joined
Mar 17, 2011
Messages
12
Re: 1996 Princecraft 16' Project

Gluvit is in hand, now trying to snag the pressure washer to clean out the rest of the hull before sealing. In the mean time, I decided last night to take the lid off of one of the benches at the stern. Knew there would be foam inside. Turned out to be two bricks of EPS sitting on top of several inches of pour in foam. I was planning to put a deck in with foam under the deck. Now that I know what kind of floatation foam it has already, all of the benches will be coming apart to have their guts removed. That might delay gluviting, as I'm sure there are rivets hidden under the foam. That means I need to get the new decking in quicker to get some floatation foam back in, which might mean some temporary plywood decking for the rest of this season.

eps.jpgpour foam.jpg

This bench is destined to become a battery/storage box. Its mate on the starboard side is destined to become a livewell. Meanwhile, I think I'll use remnants from the lid for building up a mount for the trolling motor. Trolling motor is becoming a high priority now, what with the nice weather and a bunch of restricted water very nearby.
 

detrickm

Cadet
Joined
Mar 17, 2011
Messages
12
Re: 1996 Princecraft 16' Project

Been doing a few things to it here and there, but not telling anyone about it.

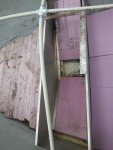
All of the foam came out weeks ago. Between the poured in foam and the EPS blocks, there was 20,327.75 cubic inches of foam. This works out to 4.4 sheets of 2'x8'x2" pink panels. I do not plan to put (much) foam back in the benches, but rather intend to put the foam on top of the stringers, building the deck up to level. The basic idea is to taper the foam to match the hull angle, then dado out slots where the stringers are. This should (in my mind anyway) help "lock" the foam into the stringers. Here's some foam tapered and notched to fit inside one of the stern storage boxes:

https://picasaweb.google.com/lh/photo/xJb1pqIeKSSYhRaVyUYe8Q?feat=directlink
https://picasaweb.google.com/lh/photo/d9qOlmSoSXpemzdsOO8Xwg?feat=directlink

One foam panel "installed":

https://picasaweb.google.com/lh/photo/ZE0UD9pAS4vd_BTM8hjNwA?feat=directlink

Both panels in:

https://picasaweb.google.com/lh/photo/lEYiHcfIZ0L8sjxRdKsPHg?feat=directlink

I ordered some fiberglass cloth and poly resin a few weeks back, and toyed with wrapping a 1/2" thick foam panel with glass. That went pretty well, I think, considering I had never done fiberglass work before. The basic idea is to make glass-wrapped panels that sit on top of the pink foam, then rivet through the glass-foam board, and into the stringers to secure it all in place.

A few images of the last layer of 4oz glass going on top of the 10oz layers:

https://picasaweb.google.com/lh/photo/NL2iwqO2TIO-hBvJ3Li5fQ?feat=directlink
https://picasaweb.google.com/lh/photo/r1_-NTG8dYeiDKDGWnN0lQ?feat=directlink
https://picasaweb.google.com/lh/photo/ZvIe5-JMGLahkgR86E0KyQ?feat=directlink

The 10oz cloth didn't like going around the edges, so next time I think I'll try 3 layers of 7oz instead of 2 layers of 10oz. I'm on the fence about adding a 4oz layer on top of it all.

The glass-wrapped foam panel resting on top of the pink foam, inside the storage box:

https://picasaweb.google.com/lh/photo/K02Lo9VlwJi0V2771NUpTg?feat=directlink

Gluvit went on all of the rivets last night. Bay fishing on the Mako tomorrow, then probably some more pink foam fitting on Sunday. I was nervous about the gluviting, but now that I'm past it, I think things may progress a bit more speedily.
 

detrickm

Cadet
Joined
Mar 17, 2011
Messages
12
Re: 1996 Princecraft 16' Project

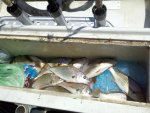
Fishing was good. Limited out on stripers in a little over an hour. Decided to leave the mass of folks fishing for stripers and look for something fun. We settled into a spot, put a few lines in the water, and set about making some sushi for lunch. Here's my buddy with the first croaker that found us (for perspective, he's 6'7" ~260lbs... not a small guy, and (for a croaker) that fish doesn't look tiny next to him):

IMG_20110702_112941.jpg

You can see how many boats were around us in the background. That's how it looked in every direction. I had never imagined that, on 4th of July weekend, the Chesapeake Bay would look so empty. It was a very nice surprise, and made for one of the best days I've ever had on the water.

After that, they started jumping in the boat, interrupting sushi making and eating. Ah, well, you can't have it all I guess. 21 croakers later, we headed for home. Good thing too, by the time we got to the loading ramp, every idiot with a canoe was out on the water.

IMG_20110702_132556.jpg

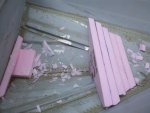
And, as promised, I started cutting foam for my boat. I started with the bow for a few reasons. First, I had some smallish pieces of foam lying about, bits that would be too small to use further back in the boat. Second, the V is deepest here, so the angles are most complex. This will be the hardest bit to cut, I think, so I might as well get the harder stuff out of the way first:

IMG_20110704_122843.jpg
 

detrickm

Cadet
Joined
Mar 17, 2011
Messages
12
Re: 1996 Princecraft 16' Project

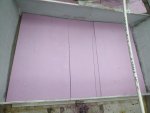
A year almost to the day since the last update. It's either too cold outside, too hot outside, or other things take priority over working on a boat. Still, some progress has been made in that year. All of the foam pieces have been cut and placed in the bow. I was going to line the first bench with foam, then move onto the middle of the boat, but lining the inside of the box proved frustrating so I moved onto building the deck up to level in the middle section of the boat. The middle section is level, and it feels good.

A view from above, for perspective:
view from above.jpg

Bow filled with foam:
bow-foam.jpg

I cut most of the foam for the ice box, got frustrated with the results, and threw most of it away. Here's the little bit of foam I kept, roughly in place:
icebox foam.jpg

Foam to bring the center section of the deck up to level:
deck foam.jpg

I plan to bring the deck up to level in the back section next, the area that's currently under the tarp in the first picture. After that, I think I'll be ready to build out the icebox and livewell. Working with this foam is simple and frustrating all at the same time, but finishing this last section feels like real progress.
 
Top