An update without pics for now. I will add some tonight.
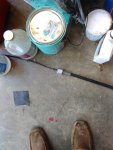
Wiring is complete, and gauges work, engine turns over. Needed a new battery as the 6YO was just too weak. Needed new cables all around. The last control cable is due for delivery today, and the new steering cable needed an adapter to connect to the helm/steering box. That is due 7/5. I have the seat placement marked with holes drilled for bolts/screws and the floor reinforcement is sealed and drying/dried. To do list includes: connect control cables, cut and place the seat floor reinforcement (seat sits over a rib), install the seat, strap the 2" conduit used for the cables run to the stern to the top of the gunnel, add some fuel to the front tank, start the engine, attach the floor, add the CC inserts. All of this should be done in ~2-3 4 hour days.
Some lessons learned was that epoxy and paint drying in colder weather is a pain. I made a mistake and bought bar top epoxy, but used it to seal most of the covered supports and the locker panels which were then painted. I did use pressure treated wood for supports where they did not touch metal. Even most of that was sealed with epoxy. WHENEVER ESTIMATING TIME AND WORK DOUBLE THE ORIGINAL ESTIMATE! (Note the above estimate.)
Splash should be next week.


![IMG_20170612_191141[2].jpg](https://forums.iboats.com/data/attachments/253/253784-aee143ff9d2bb79af8cf8475266b7e53.jpg "IMG_20170612_191141[2].jpg")
![IMG_20170612_191141[2].jpg](https://forums.iboats.com/data/attachments/253/253785-aee143ff9d2bb79af8cf8475266b7e53.jpg "IMG_20170612_191141[2].jpg")
![IMG_20170612_191218[2].jpg](https://forums.iboats.com/data/attachments/253/253788-0dca63982b9618df96b4c80a565a6bf6.jpg "IMG_20170612_191218[2].jpg")
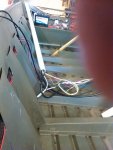
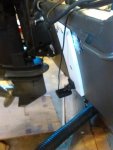
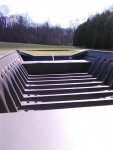
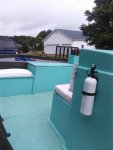
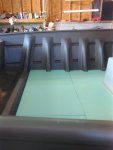
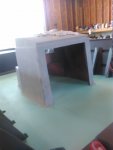
![IMG_20170612_191221[2].jpg](https://forums.iboats.com/data/attachments/253/253789-0310fdc5733c5ec3305652c9080d87a7.jpg "IMG_20170612_191221[2].jpg") I lost some of the room in the front with the fuel & anchor lockers. Some slow progress has been made. CC is filled/patched/painted, most wiring fuel line etc. pulled and nearly all electronics installed and wired. The front lockers are built and not installed. I built the frames. Rebuilt and sealed them, and then finally sealed and painted the panels. If you look closely you will see I forgot to remove one of the panels for sealing/painting. I forget that there are precious few straight cuts on a boat. If you are wondering about the difference in the lockers, the bigger locker is for the fuel tank and lines, The shorter locker is for anchor and miscellaneous storage. the short locker will act as a step to the front platform, and both will be seats.
I lost some of the room in the front with the fuel & anchor lockers. Some slow progress has been made. CC is filled/patched/painted, most wiring fuel line etc. pulled and nearly all electronics installed and wired. The front lockers are built and not installed. I built the frames. Rebuilt and sealed them, and then finally sealed and painted the panels. If you look closely you will see I forgot to remove one of the panels for sealing/painting. I forget that there are precious few straight cuts on a boat. If you are wondering about the difference in the lockers, the bigger locker is for the fuel tank and lines, The shorter locker is for anchor and miscellaneous storage. the short locker will act as a step to the front platform, and both will be seats.


![IMG_20170612_191207[2].jpg](/data/attachments/253/253787-e570f53eeb577b4a821e92ac0ea723a8.jpg)