Woodonglass
Supreme Mariner
- Joined
- Dec 29, 2009
- Messages
- 25,932
Re: '94 Crownline 182 Restore transom/stringers/deck
Stringers, mounts, bulkheads anything that's wet and rotten.
Stringers, mounts, bulkheads anything that's wet and rotten.


Stringers, mounts, bulkheads anything that's wet and rotten.
I think most people on the forum use 1708 for the engine mounts. I've never worked with woven roving, but from what I understand it's a little more of a pain in the butt to work with around corners, and you have to use layers of CSM in between each WR layer for proper bonding. Also, I think I've heard the strength to weight ratio of 1708 is better than WR all said and done. In WOG's guide, he mentions using 4 layers of 1708 on the engine mounts, rather than the standard 2 layers for stringers and bulkheads. If you follow his suggestions you should be just fine.
In this link, starting at post #213, I begin fabricating my engine mounts and doing the install. They are a slightly different configuration than yours, but may still give you some ideas on how to proceed.
http://forums.iboats.com/boat-resto...90-engine-mount-stringer-repair-636552-9.html
I also did a sister joint on my stingers up near the bow. Take a look at post #111.
http://forums.iboats.com/boat-resto...90-engine-mount-stringer-repair-636552-5.html
One thing I may suggest, if you haven't already, take many many many many many many measurements of your engine mount dimensions and heights, and from various reference points. I didn't see in your thread which engine/outdrive combo you have, but if it's an Alpha One paired with a 5.0L, it will be identical to mine. The forward engine isolators (between the engine block and your fiberglass mounts) that lag into your glassed in mounts have about 1/2" of adjustment up and down, so you'll want to get the final height of your engine mounts as close to possible to spec.
Here's a couple of installation manuals with dimension specs, right from Mercury's website. They only go back to 1996 for some of the drawings, but they should be close.
http://www.mercurymarine.com/media/mercury/drawings/alpha1.pdf
http://www.mercurymarine.com/media/mercury/drawings/50l57l.pdf
And here's a link to the page to search for documents, it's kind of hard to find from the their homepage.
Installation Drawings | Mercury Marine
Looks like you're well on your way, good luck sir!
I'd like to jump on board too. Looks like you're getting some good feedback that will help me with my project.
Good luck to you.


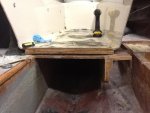
Getting the transom perfectly flat isn't really that necessary; you'll be attaching your new transom with PB, yes? If so, you can use PB to equalize things out, putting on more where you need to.
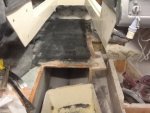
When I ground my transom, I took not only the dry glass (light colored) but also the dark pink stuff down to almost where the original hull was. (I took it down to where the fiberglass fabric was visible, just like on the rest of the interior hull.)
I don't know if that was really necessary (it entailed a lot of grinding, which isn't much fun, as you're learning). Probably the most important thing you'll want to be mindful about is the thickness of the transom after you're done. If you leave a lot of the dark pink stuff intact (that was probably the thickened resin used to attach the original transom), you will need to make sure your new transom core, plus any thickness contributed by PB or glass laid on top, don't exceed the specs for your drivetrain.
I know lots of other people who have done restorations have left the dark pink stuff on, so there's certainly not a problem with it. You just need to keep that in mind when figuring out how thick to make your transom core.
Good luck with the grinding!


How thick is your hull just left of the keyhole where you've ground down to good glass?