Success! Got the boat back in the water and the drive is super quiet. I feel really good about it.
I attend church with a retired Volvo mechanic, and he backed me up on the initial setup hypothesis: the initial measurements for all three shim points are done on the bench, meaning you don't need the specialty setup tools when rebuilding a drive if reusing the shafts. Just mic out the shims you remove, or don't remove the shims at all if you're reusing those bearings.
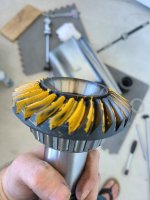
In my case I was transferring all good used parts to a new case, so all the bearings were being removed. Both new and donor units had 25 thousandths of shim on the driveshaft bearing race, and 25 thousandths on the forward bearing race, and I never took the rear bearing off the shaft at all. When I painted the rear teeth and loaded the drive, my contact pattern was good on the first attempt! And the gear lashes were in spec as well.
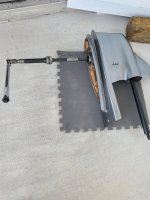
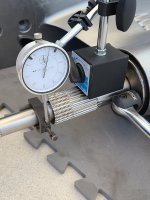
You don't need many of the specialty tools, but in my opinion you do need some. Most important is the long tube and the enormous "socket" looking end that you use to get 80 ft lbs on the pinion nut, and which, along with a threaded propshaft adapter, is used to extract the inner shaft from the forward gear by pressing safely against that gear. The amount of force required is tremendous. Most everything else you can get by using various sockets and other clever repurposing. For instance, I had two drive shafts, so I did not buy a drive shaft adapter; I used the intermediate shaft connector to butt the two drive shafts together, then used the second pinion nut to check rolling torque while preloading the bearing races.
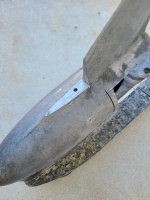
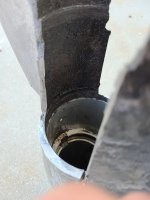
Another virtual impossibility is removing the drive shaft from the pinion gear without having their specialty puller. I could not extract it even with 3 Vise Grips and a sliding hammer. It was nuts. I ended up measuring carefully and cutting off a section of the skeg so I could drill a hole and drive the shaft UP from the bottom using a titanium rod I had lying around. I had to really whale on it. That tool is essential if you're keeping the case.
Because all my parts are worn in, I did not go to the upper end of the range when preloading my bearings. On the initial driveshaft bearing I did spec, 2-4 in lbs, but really they just want you to get zero end play plus a little tighter. You can feel it change and then go a little past that. For the final they want 18-26 on my 1.95 ratio drive, and I was about 20.
Also to make sure it would hold pressure later, and it did, I cleaned the muddy crap off the walls of the open area where the carrier sits. Only the front O-ring truly seals anything, against the machined area at the front of the carrier's position. The back is only for mechanical support. I read some people having trouble getting the carrier back into place, and I'll bet that crusty wall is the culprit. I used sandpaper, taking care around the machined area at the front.
After the pics is a paste of the text file I made after poring over the manual to formulate a bare bones plan that I liked. I added some notes, too. The asterisks indicate the tools I actually purchased. I also purchased a bunch of shims from various vendors all over the country, but used none of them except 0.010 and 0.005 of the two larger sizes, i.e. drive shaft and forward bearing race. I certainly hope anyone else doing it gets as lucky as I did. Even the big local Volvo dealer didn't have shims in stock.
Loosen Pinion Nut - these tools are important
*3855919 - Prop Shaft Adapter
*3855922 Tool Shaft
*3855921 Tool Tip
Pull Inner Prop Shaft - these tools are important
*3855922 Tool Shaft
*3855921 Tool Tip
*3855919 - Prop Shaft Adapter - Tighten this nut against tubular tool shaft
Press Inner Prop Shaft Bearing **SHIMS** - I ended up not doing this
*3855921 Tool Tip - use as a press tool
thread other tool onto shaft threads while tapping
Insert shaft and press bearing off
Pull Drive Shaft Up
Remove Pinion and Forward Gear
Remove lower driveshaft bearing **SHIMS**
*3855860 - Rod
3850619 - Top Guide Plate ** SUBSTITUTE LARGE REAR PLATE
*3855859 - Remover Tip - I lost this tool and used a sliding hammer
Possibly replace pinion bearing - these tools are not important
*3855860 - Rod
*3855868 Remover/Installer Tip
3850619 - Top Guide Plate ** SUBSTITUTE LARGE REAR PLATE
Remove forward bearing race **SHIMS** - these tools are very nice
*3855860 - Rod
*3855863 - Guide Plate Rear
*3855862 - Race Remover Tip
Install forward bearing race
Shims go in and then forward bearing race is driven in
3850623 Rod - NOT SURE, All-Thread?
*3855863 Guide Plate Tail
*3855864 Race Installer
*3855860 Nut & Washer
Install Pinion Bearing
3855867 is just a plain spacer tube or you easily pull past the spot
*3855860 - Rod
3850619 - Top Guide Plate ** SUBSTITUTE LARGE REAR PLATE
*3855868 Remover/Installer Tip
Install lower driveshaft bearing, fairly accessible from top, maybe 4 inches down.
Shims go in and then forward bearing race is driven in
3850623 Rod
3850619 Guide Plate Top
3850621-8 Bearing Cup Installer
Install forward bearing and gear with shaft preinstalled. You have to drive the shaft until it seats, which gets downright abusive without a press.
Install pinion and the vertical drive shaft - you can do this even with the bearing pre-installed on the inner shaft, but you have to wiggle it around.
Tighten pinion nut
*3855922 Shaft
* 3855921 Tool Tip
Set initial rolling torque with top retaining collar, prop shaft toward sky
Follow manual for rest.


