Drain Plug Install/Repair

JASinIL2006

Vice Admiral
Joined
Feb 10, 2012
Messages
5,725
Re: Drain Plug Install/Repair

The back of my boat is built differently from yours, I think, but my drain hole doesn't go through the wooden transom shield, either. (My boat has some sort of molded fiberglass piece at the back of the lowest part of the bilge, and thru that there is a tube that leads to the garboard drain.)

It sound like your boat may be different, but I offer that just to point out that it's possible the drain hole might not have originally penetrated the hull.

While it seems like there would have been some sort of backing for the garboard drain to screw into (other than just the fiberglass hull), I can't imagine how anyone would have been able to get in there and cut off the wooden transom shield so neatly across the bottom, with or without the engine in there. (Not to mention chipping away the lower portion from peanut butter or tabbing....)

Pics would definitely help...
 

britisher

Petty Officer 1st Class
Joined
Feb 23, 2012
Messages
369
Re: Drain Plug Install/Repair

OK, so the transom may or may not be rotten and the transom may or may not be deliberately flat at the bottom, but if your main objective is to get a new drain plug installed, here's what I would do:
Use SS machine screws, nuts and washers instead of the SS screws. See it as installing a 'thru hull' fitting, cos that's what you would be doing. Lowe's have greatly improved their SS selections recently and their prices are also more realistic. When you offer up the drain plug housing to the boat, ensure you have a good amount of marine sealant to seal the space, then pop the nuts & washers on inside the boat and tighten everything up. I don't know how much wiggle room you have in the engine bay with the engine still being in there, but if you can get those nuts & washers on and everything tightened up, you have succeeded in your main objective and get to 'float your boat'.
It takes the heat out of the situation and allows you to check out the condition of the transom and all the other wood when it fits in your time schedule.
 

ormjgrouch

Petty Officer 2nd Class
Joined
Oct 8, 2012
Messages
144
Re: Drain Plug Install/Repair

hopefully this rain stops tomorrow so i can snap some pics and post it up for you guys.
thanks JAS & BRIT for chiming in.

- Bondo, i will check if the bottoom portion is glassed or not, i want to say its not but will verifiy.

- JBcurt - Thanks for the pics for core sample...
 

bajaunderground

Lieutenant
Joined
Apr 18, 2008
Messages
1,401
Re: Drain Plug Install/Repair

At least it's not snowing, we're in day three of snowing...I just checked the mail and looked at the boat...she's covered and has about 6" of snow on top...it's like 3˚ degrees outside I have no interest in clearing the snow off until it stops...I CANNOT WAIT FOR WARM WEATHER!

Whatever the outcome and choice of repair, at least you've found the right place!! Britisher offers a good quick repair! Bondo's got you covered for mechanical stuff, Wood and JB have you covered if it's transom (partial or otherwise) replacement and I'm along for comic relief!!

Ciao,

~Brett
 

ormjgrouch

Petty Officer 2nd Class
Joined
Oct 8, 2012
Messages
144
Last edited:

jbcurt00

Moderator
Staff member
Joined
Oct 25, 2011
Messages
25,134
Re: Drain Plug Install/Repair

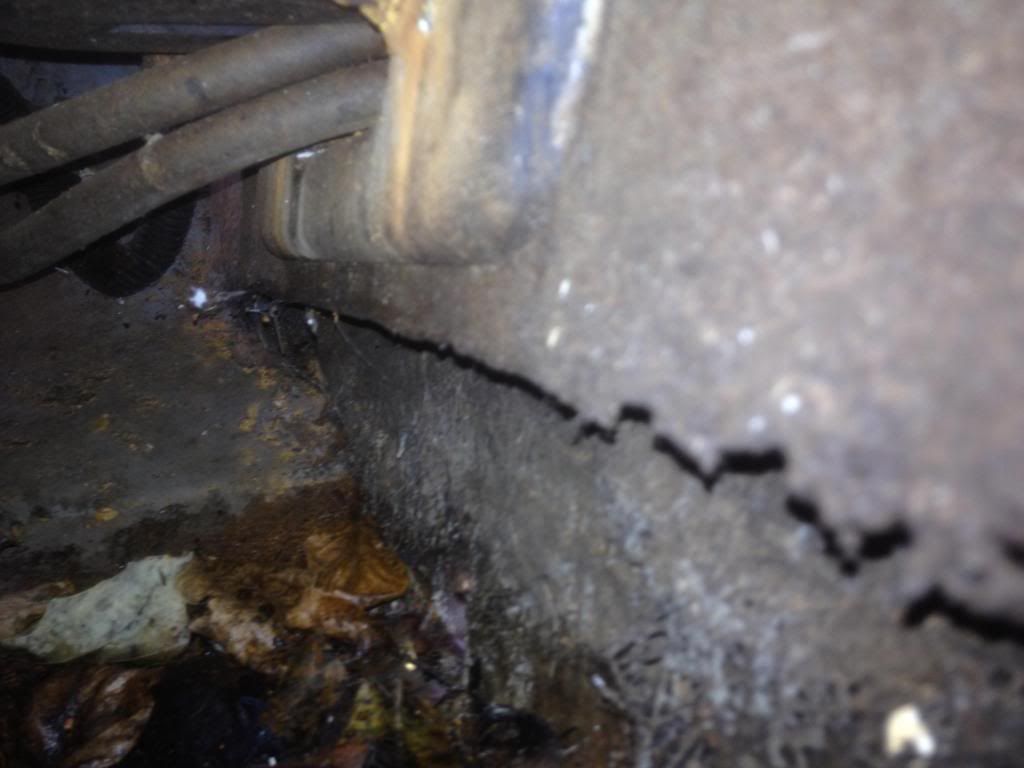
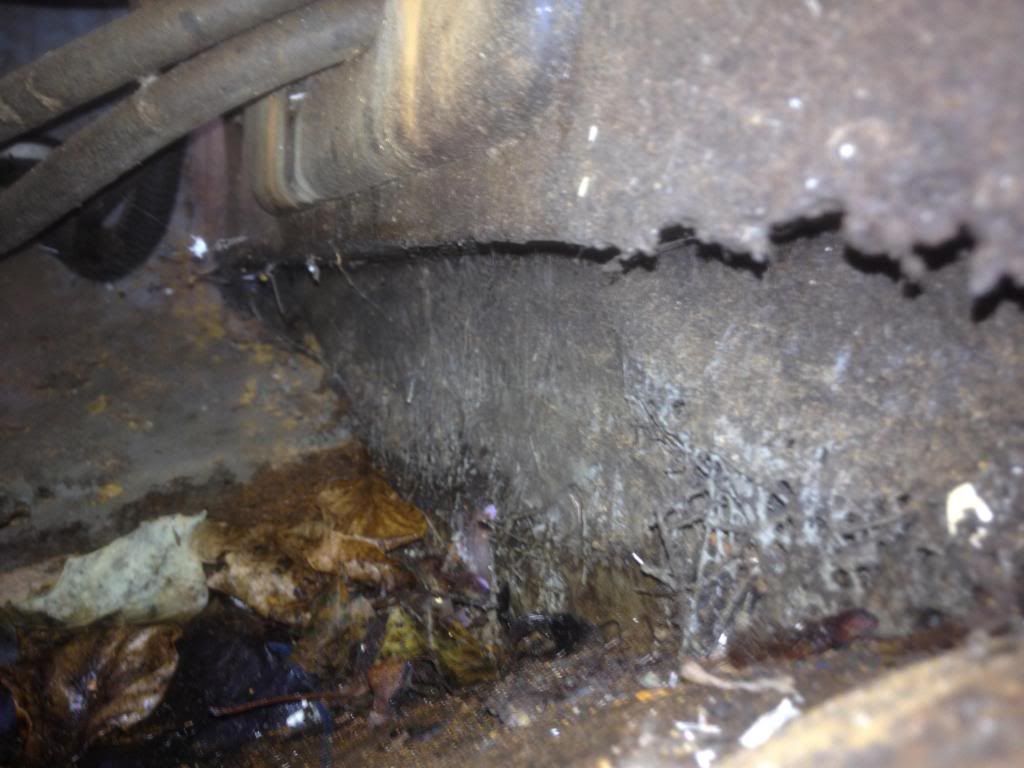
Although it's not pretty, IMHO it hasn't been messed w/, it's original...........
 

JASinIL2006

Vice Admiral
Joined
Feb 10, 2012
Messages
5,725
Re: Drain Plug Install/Repair

And a nice thing about how they designed the transon, is that even if a bit of water collects in the bilge, it won't necessarily be coming into contact with the wooden core. (Fiberglass would offer protection, but if water would infiltrate....)

Since it looks as though the drain area hasn't been altered, I'd be inclined to clean the drain area thoroughly, maybe even ream out the screw holes, fill them with an epoxy like PC-11 or MarineTex and re-drill them. I'd then install a new garboard drain with 3M 5200 and some stainless steel screws. What do you all think?

Jim
 

bajaunderground

Lieutenant
Joined
Apr 18, 2008
Messages
1,401
Re: Drain Plug Install/Repair

I agree with you ormj...

I looks original, but then I question why? I see the chopper gun fiberglass there, but no real structure behind it...maybe the hull was laid-up on a Friday? I don't know much about Rinkers as far as comparing cost vs. value? My CC (same year) has wood and a thru-transom plug? Weird?

Let the experts chime in and get you moving in the right direction!

~Brett
 

Woodonglass

Supreme Mariner
Joined
Dec 29, 2009
Messages
25,929
Re: Drain Plug Install/Repair

Yup, that's Factory!!! I'd grind the drain area, tape it off on the out side, Mix up some Hairy PB fill EVERYTHING in, Lay a layer of CSM, 1708, CSM, 1708 and then Re-drill the Drain hole and re-install a new Garboard Drain. But Hey, that's just how an Old Dumb Landlubber Okie would do it. :eek::D
 
Last edited:

GT1000000

Rear Admiral
Joined
Jul 13, 2011
Messages
4,916
Re: Drain Plug Install/Repair

Woody's suggestion is the way I would do it...that way you can shape it into a "funnel" to direct any and all water directly into the drain...

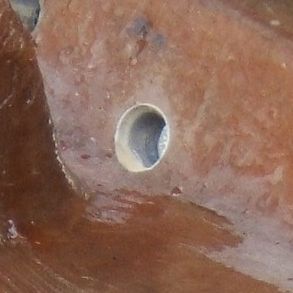
Here is a pic of how I did mine to give you an idea of what I mean by creating a "funnel"...


The obvious differences are that it is installed in a layer of 3/4" plywood and I went a step further and lined the hole with PVC after drilling it larger than needed, filling with PB, then re-drilling to the needed size for the PVC insert...you wouldn't need to do this extra step since you would be drilling into PB, which in and of itself is basically water resistant...but the principle is the same...

BTW, acquaintance of mine has the same size and year Rinker as yours, not sure if its the same model, though...real nice boat...he bought it new and pampers it...still looks like the day he bought it...

Best of luck getting this one all fixed up...
GT1M:)
 

Woodonglass

Supreme Mariner
Joined
Dec 29, 2009
Messages
25,929
Re: Drain Plug Install/Repair

Yup, this ^^^ show's EXACTLY how I'd do it!!!!
 

ormjgrouch

Petty Officer 2nd Class
Joined
Oct 8, 2012
Messages
144
Re: Drain Plug Install/Repair

Sweet, thanks guys, can't wait to start this will be my first time glassing.... Need to read up on how to...will keep you guys posted...
 
Last edited:

ormjgrouch

Petty Officer 2nd Class
Joined
Oct 8, 2012
Messages
144
Re: Drain Plug Install/Repair

ok guys, trying to do some research. where should i purchase my supplies, only need a small amount, went on west marine and i'm a bit confused on their products, sorry guys i'm a newbie with this stuff.

Also should i wait for warmer weather to start glassing?

Can you guys verify my steps, please.

Sand first (outside)
Clean surface with acetone
fill holes with peanut butter, wait for it dry.
Sand down?
Smother with resin Lay CSM wait for it dry.
sand down?
Smother with resin Lay 1708 wait for it dry.
sand down?
Smother with resin Lay CSM wait for it dry.
sand down?
Smother with resin Lay 1708 wait for it dry.
sand down?
then re-drill drain hole..
install new garboard drain

Sorry guys for the questions..want to get it right before spring hits.
 

Woodonglass

Supreme Mariner
Joined
Dec 29, 2009
Messages
25,929
Re: Drain Plug Install/Repair

Ok, let's get you on the right path. On the outside, for now, just duct tape some wax paper over the area, about a 6" square. Done.


On the inside, grind/sand the area on the stern and the lower hull to about 10" square. Wash with Acetone. Since you're doing such a small area and buying product locally, get some of this to use for your PB..
bon-762.jpg


From the Inside use a plastic Bondo Spreader or a Plastic putty knife and fill and smooth the area with some of this. A Pint should be enuf but you'll prolly have to buy a quart. Mix according to instructions. How thick is the glass at the area where the drain will be? You might want to consider building it up a bit thicker which would give the screws a bit more BITE!!! If so, just use the Hairy Bondo to make a thicker wall.Temps need to be 60? or higher. It will cure hard enuf to sand in an hour. Sand an wash with acetone. Buy a Quart of this Resin...

bondo-fiberglass-resin-402.jpg

Get about 2 sq ft of CSM and 1708. Check with some Body Shops or Marina's. They may have some scraps they will Give you for free.
Wear Latex gloves and a mask
Cut a patch of CSM about 1" larger than the area where the screws are for the drain. Use a Cheap Chip Brush and brush on some Mixed resin (Add 2% MEKP) to the surface and then use the brush to DAB the CSM into the resin and onto the Stern. Don't attempt to brush it to much, just dab it till it goes clear and then brush lightly to smooth. Not much resin is needed. Have a 1708 patch ready that's 1" larger than the first and do the same with it. You will need to but more resin on the brush and you can brush the 1708 a bit but dabbing at it works well too. When it goes Clear Repeat the entire process with each patch being 1" larger than the previous. Baby sit it for a while to ensure no Air Bubbles form. If they do dab at em with the brush and smooth em out. If you don't use a LOT of resin and are careful, it will be neat, smooth and bubble free. It will be cured the next day and ready for the new Drain install. We can talk about that when you're at that point.

Let us know if you need more info.:)
 

ormjgrouch

Petty Officer 2nd Class
Joined
Oct 8, 2012
Messages
144
Re: Drain Plug Install/Repair

Wood your the best, perfect, exactly what i need...to get me rolling, sucks I need to wait for 60 degree weather!...argh, at least i can start getting my supplies ready...

Need to start losing some weight so i can glass between the engine and transom. ha
 

Woodonglass

Supreme Mariner
Joined
Dec 29, 2009
Messages
25,929
Re: Drain Plug Install/Repair

This is from OOPS, one of our RESIDENT EXPERTS on Glassing. Since his shop was in Canada, I figure he knew a thing or two about glassing in cold temps...

What you have to do is fool the materials !;)

Keep your resin and glass in the house. (so they are both at the 75 deg range)
Heat the substrate with a big quartz halogen lamp. Running a Heat Gun over the area just before glassing occurs can help alot too!!
Heat the air as best you can. Build a "Blue Tarp Tent" over the back of the boat by the Transom so you can heat a smaller area.
Mix everything inside. (it'll stink up the place but Hey, sacrifices HAVE to be made!!!"
:lol:)
Run out with the materials and glass it.
Keep the lamps on it and the heat in the air as long as you can.....done. Don't let it get below freezing for 24 hours

Resin and glass wont know its cold if you have the substrate warm/hot. The substrate will keep the mix warm till the reaction starts.....The Chemical reaction of the cure generates it's own heat. The trick is to keep the lamp on it while the resin is coming off the back end of the cure....when the heat from the chemical reaction starts to dissipate, this is what gibes you the strength. It take about an hour for the Chemical Reaction to abate. If you leave the Lamps on over night, You're good to go in the morning.

Your repair can be done just as strong as if it were in the summer. Kind of a Hassle but it can be done with Great Results.
 
Top