Chris51280
Ensign
- Joined
- Jan 24, 2018
- Messages
- 932
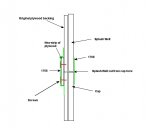
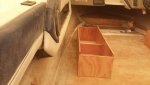
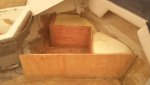
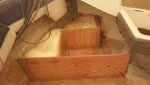
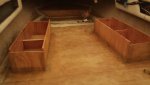
a picture is worth a thousand words


a picture is worth a thousand words
")
Good stuff, man! You're humming along nicely now
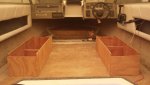
Just curious - did you treat the wood in any way for those back seat boxes prior to tabbing them into place? Particularly interested in the foam-facing sides of ply there.
Also curious as to how many batteries you're going with, and if you'll mount one on each side or both to starboard. Sorry if rehashing from further back in the tread if you've already states as much as well; seems like it might have been addressed before.
Thanks!
And in hindsight maybe I should have, but no... other than coating the wood with a couple of layers of resin and then tabbing them in with 1708, that was it. They'll be pretty much sealed with a top that will be tabbed to the hull and to the other pieces. I probably should have put a layer of CSM on them too. I guess time will tell.
And I was going to put a battery on each side only because it's what I've seen other people do... but there's enough room to put both on either side. Just need to leave room for the switch to activate one or the other, or both.
I think you're fine having just done that - just wanted to know your method, as a lot of what you're doing are things I'll also be doing in my build.