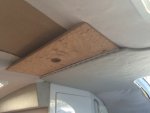
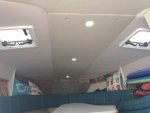
Formula 330 SS Head Liner Refubishment

tpenfield

Moderator
Staff member
Joined
Jul 18, 2011
Messages
18,285
I noticed that the headliner cloth was hanging down at the end of last season. The cloth seems to be separating from the foam backing, etc. So, I planned to do a little bit of work on it as part of the prep for this season. My plan is to remove the center section of the head liner and rebuild it using the existing foam and cloth. Today I started into it . . .

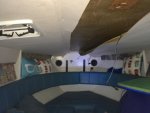
Here is the cabin of my boat IMG_5895.jpg
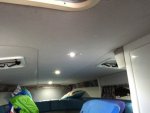

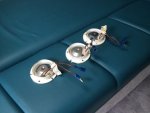
The headliner is mainly held up by screws that are under the light fixtures IMG_5900.jpg
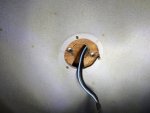
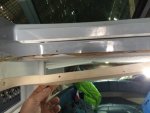
IMG_5896.jpg


I am not sure what the 'proper' procedure for removing the headliner, if there is even a proper way to do it, but my plan was to take out all of the fasteners and then pull it out from the side where it is clamped somewhat by the restroom and electronics panel.


I had to cut the light fixture wires, as they were not on connectors, just crimp splices. IMG_5903.jpg
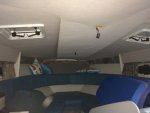

After a bit of tugging and various gyrations, I got the head liner to drop down IMG_5908.jpg
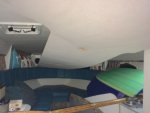
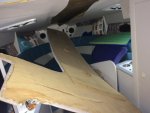
IMG_5909.jpg


* * * continued on next post * * *
 
Last edited:

tpenfield

Moderator
Staff member
Joined
Jul 18, 2011
Messages
18,285
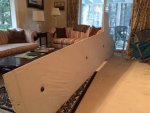
Here is the headliner (center section) in my living room for the evening. I plan to refurbish it outside tomorrow, as the weather will be dry.
IMG_5912.jpg

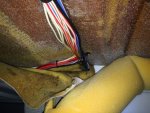
I took the opportunity to check out the wiring runs, as I plan to add wiring for a windlass (to be installed next year - maybe)

IMG_5916.jpg

The outside sections look OK, so I will leave them alone.
IMG_5913.jpg

To be continued . . .
 
Last edited:
muskyfins

Chief Petty Officer
Joined
Jun 7, 2012
Messages
580
Wow. That's some undertaking. Mechanical I've got. But upholstery is a pain. Bravo.

Waiting for more updates on Monday.:pop2:
 

tpenfield

Moderator
Staff member
Joined
Jul 18, 2011
Messages
18,285
Thanks. :)

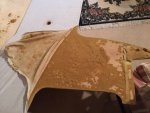
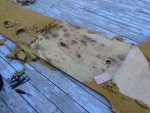
After a bit of inspection and some dis-assembly, it looks like I will need to get new headliner material. I was hoping that the foam backing would be in decent shape and re-usable, but that is not the case.
IMG_5923.jpg

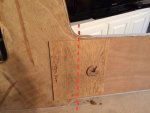
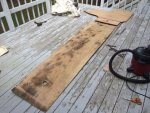
I also have noticed that the headliner is made up of 2 pieces of 1/4" plywood, bonded together with a 1/2" ply backing piece. To make re-installation easier, I plan on separating the headliner at its joint and installing it as 2 sections rather than 1.
IMG_5922.jpg

I will make the 1/2" backing piece part of the wider section and then use a couple of screws to attach the longer section during installation. Even though these screws, will show, I think it will make installation so much easier.

Now the search for headliner material. . . It looks like this project just went 2X on my original expectations :rolleyes:
 
Last edited:
tpenfield

Moderator
Staff member
Joined
Jul 18, 2011
Messages
18,285
Quick Update:

I ordered a sample board from an auto trim supplier. None of the colors matchd exactly, but the old material being almost 20, I figured that may be the case. So, I ordered the closest one. . . "PH1747 - Quicksilver"

Probably will be finishing it up during the first weekend in May.
 

bigdirty

Senior Chief Petty Officer
Joined
Oct 4, 2013
Messages
652
Yup, that looks like it will be a bit of a job, but it will look good in the end I'm sure. The clean look (no fasteners showing) is nice, but would defiantly make it more difficult. I for one don't mind fasteners showing, if they have proper eyelets and are spaced even/symmetrically in some way. And I'm all for "ease of assembly" too..

Surprised ur boat didn't come with a windless from the get go.. That must be a bit of a walk to get to the bow on that ship.. :laugh:
 

tpenfield

Moderator
Staff member
Joined
Jul 18, 2011
Messages
18,285
Yup, that looks like it will be a bit of a job, but it will look good in the end I'm sure. The clean look (no fasteners showing) is nice, but would defiantly make it more difficult. I for one don't mind fasteners showing, if they have proper eyelets and are spaced even/symmetrically in some way. And I'm all for "ease of assembly" too..

Surprised ur boat didn't come with a windless from the get go.. That must be a bit of a walk to get to the bow on that ship.. :laugh:

Yea, this is the early model of the 330 series, so not all the boats had the 'goodies'. I'll be happy to have it all installed . . . tired of going up the the bow to pull the anchor.
 

bigdirty

Senior Chief Petty Officer
Joined
Oct 4, 2013
Messages
652
Ya, my friends 1994 31pc has the factory windlass, very handy indeed. Mind you, his doesn't have a walk through windscreen, and the side walk-around isn't much bigger than my little 250 crownline... somewhat death-defying even getting around the radar arch in fact... so might be that they deemed it a necessity for his model, which is still a 34' overall boat.. shes not small :lol:
 

Scott Danforth

Grumpy Vintage Moderator still playing with boats
Staff member
Joined
Jul 23, 2011
Messages
50,621
tagging along as I may soon have to tackle a similar job
 

tpenfield

Moderator
Staff member
Joined
Jul 18, 2011
Messages
18,285
Some Updates . . .

My headliner material should arrive early this coming week. This weekend, I did some prep work on the headliner, and will probably do the installation next week.

Here are a few pictures . . .

I terminated the wiring that I had to cut for the lights. So, going back in, they have connectors instead of hard wiring.
IMG_6107.jpg

I removed the old headliner material and the deteriorated foam . . .
IMG_6097.jpg

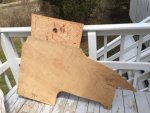
I separated the headliner at the seam. Lots of mold on the forward section.
IMG_6106.jpg

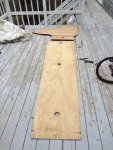
Here is the rear section, which will carry the backing piece that the forward section will screw into . . .
IMG_6104.jpg

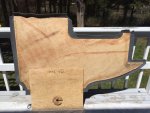
Here are the pieces after a bit of bleach to clean them up . . .
IMG_6109.jpg

Everything is ready to go for when the material arrives. My hopes are separating the one large piece will make installation much easier..
 
Last edited:
Corjen1

Lieutenant Junior Grade
Joined
Aug 24, 2013
Messages
1,237
Good work so far! Tagging along if you dont mind.....
 

tpenfield

Moderator
Staff member
Joined
Jul 18, 2011
Messages
18,285
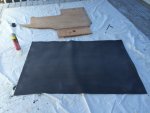
IMG_6114.jpg

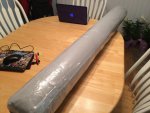
The material arrived today . . . sort of wish it came a day earlier as I would have been able to knock this off over the weekend. Looks the same . . . maybe a bit darker than the original.
 

tpenfield

Moderator
Staff member
Joined
Jul 18, 2011
Messages
18,285
Well I'm looking forward to the renovation!

Welcome aboard. . . I'm looking forward to completing the headliner, as so far it has been the easier of my boat projects. Of course now that I said that watch all heck break loose. . .
 

kcassells

Fleet Admiral
Joined
Oct 16, 2012
Messages
8,738
I have a lot to do in my little cuddy/berth from scratch to final so watching and learning as we all do will be a great benefit.
 

tpenfield

Moderator
Staff member
Joined
Jul 18, 2011
Messages
18,285
Update:

I finished off the headliner today. I was quite a bit of work installing it into the boat . . . overall I would put this project at an 8 on a 10 scale. Here are some pictures of the day.

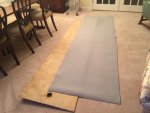
Cutting out the material for the headliner sections
IMG_6118.jpg

I used spray adhesive on the headliner board and the material backing
IMG_6120.jpg

Then it was a matter of adhering the piece and making the cuts for the curves and corners.
IMG_6122.jpg

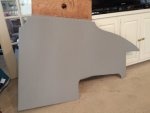
Here is the finished piece. This is the rear section.
IMG_6126.jpg

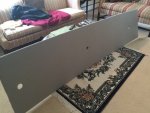
Here is the forward section all done up.
IMG_6128.jpg

I did a bit of cleanup in the cabin on the side headliner pieces.
IMG_6130.jpg

Continued on next post . . .
 
Last edited:
tpenfield

Moderator
Staff member
Joined
Jul 18, 2011
Messages
18,285
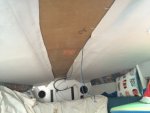
Here is the rear section installed. Things were getting difficult at this point.
IMG_6131.jpg

Another view of the rear section
IMG_6134.jpg

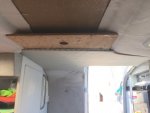
Here is the forward section installed, along with the lights, etc.
IMG_6138.jpg

The seam looked OK, and the 2 screws that attach the 2 sections seems fine too.

At some point, I'll probably need to replace the remaining headliner material . . . but that can be a project for another day.
 
Last edited:
zool

Captain
Joined
Aug 19, 2012
Messages
3,432
Looks real good Ted, the slight contrast in color looks like it was always there...
 

tpenfield

Moderator
Staff member
Joined
Jul 18, 2011
Messages
18,285
Looks real good Ted, the slight contrast in color looks like it was always there...

thanks . . . I could not find an exact match, so I went with the closet thing. The color contrast looks OK. I'm not sure if the original material faded in color, but if I re-do the rest of it, I'll use the new color.
 
Last edited:
Top