General Engine Rebuild Questions

fmjnax

Chief Petty Officer
Joined
Jul 21, 2011
Messages
457
Thanks raceone. Is the nut put back on just so that the engine doesn't break free and take a tumble?
 

fmjnax

Chief Petty Officer
Joined
Jul 21, 2011
Messages
457
Yeah, that was probably a stupid question, sorry. I seem to be full of those here lately. Learning as I go. Ha!

That did the trick nicely, though. Threaded the nuts on just enough so that I was putting pry on the nut and not the stud (which I'm guessing is the reason?). Hit each side with the pry bar and off she came. The block is off and now and work can continue.
 

fmjnax

Chief Petty Officer
Joined
Jul 21, 2011
Messages
457
Got the crankcase split tonight without issue. I will start on the rods this weekend. I noticed they are Torx, though, which I don't have any of. Anyone know the size I need to pick up?
 

fmjnax

Chief Petty Officer
Joined
Jul 21, 2011
Messages
457
None Bosunsmate. I checked it out as per my manual and from information I have read. Of course, I'm not expert but the crank looks good to me. Bearings appear fine as well. No pitting that I have seen so far, not even minor. No gouges or scratches; everything I've felt is smooth and even. No corrosion or rust or anything indicating damage (to my untrained eye). I'll take a better look as I am removing the pistons and I will upload a picture or two tonight or tomorrow morning.
 

Bosunsmate

Admiral
Joined
Apr 7, 2012
Messages
6,135
Got the crankcase split tonight without issue. I will start on the rods this weekend. I noticed they are Torx, though, which I don't have any of. Anyone know the size I need to pick up?


Good news about the journals. Not sure what you are after here... conrod sizing?
 

fmjnax

Chief Petty Officer
Joined
Jul 21, 2011
Messages
457
The connecting rod bolts that hold the rod and cap on the crankshaft. They are star shaped (and I assume that is Torx). A standard 10mm socket fit on them, but due to the star shape of the head, there's no way it will work without rounding off. I'm going to have to buy a set of star sockets, but figured I would ask if anyone knew the exact size so I don't end up making multiple trips (nearest store is 10 miles from home).
 

Bosunsmate

Admiral
Joined
Apr 7, 2012
Messages
6,135
Not me sorry, check the depth too, more often than not you need the deep sockets to reach them.
The last motor i did i used a 12point deep socket i think it was 3/8 but as you say you need the right size so you dont strip them and thats what it was in the service manual for the v4 i worked on.
I reuse all my bolts, i just put a bit of blue threadlocker on them.
Just remember its very important to keep them as a set. Each cap must go with the machine cut rod.
When i dismantle i keep each conrod and bearings in a different jar from the other conrods
 
Last edited:

Bosunsmate

Admiral
Joined
Apr 7, 2012
Messages
6,135
What you can do is put a bit of chewing gum or plasticine in there and then pull it out and measure
 

fmjnax

Chief Petty Officer
Joined
Jul 21, 2011
Messages
457
Thanks mate. Manual says the same about keeping them all together, but doesn't say anything about size. Phooey! Good idea on the mold to measure, though!
 

racerone

Supreme Mariner
Joined
Dec 28, 2013
Messages
38,501
????----That has been a 5/16" -12 point socket on these connecting rods since the early 1960's
 

Bosunsmate

Admiral
Joined
Apr 7, 2012
Messages
6,135
I think you need the thin walled sockets too to fit in there, normal sockets are often too thick walled to fit inside the curve of the cap.
So deep socket and thin wall would be my recommendation.
i live out in the country too so definitely know what you mean about the the commuting issue
 

fmjnax

Chief Petty Officer
Joined
Jul 21, 2011
Messages
457
Aside from cleaning it up, the block is ready for machining.

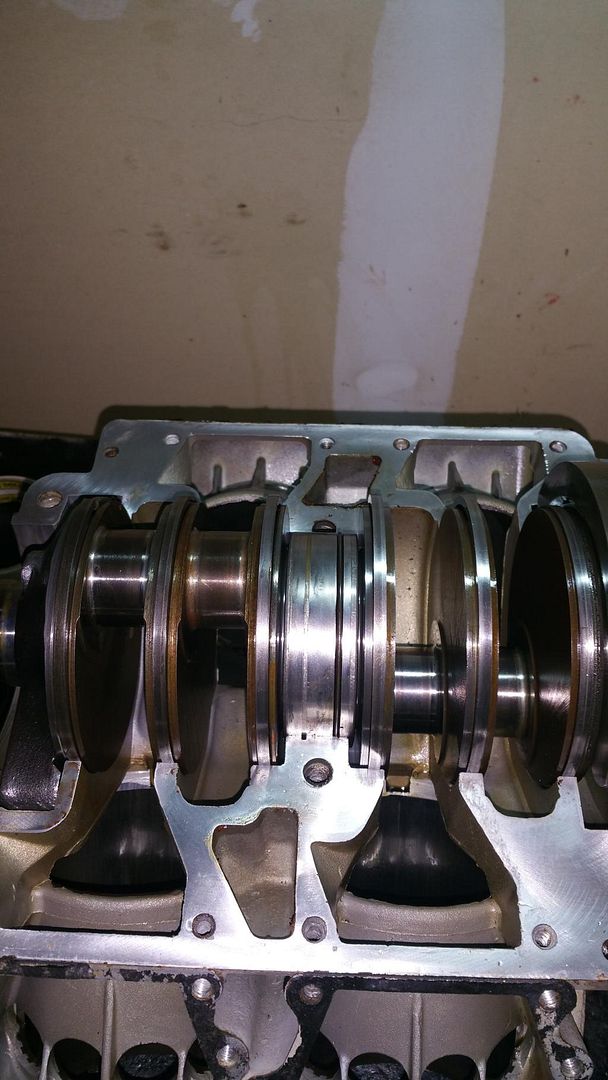
The crankshaft looks good to me. I felt no dings, scratches, pits, or gouges. Doesn't appear to have any blueish heat telltales. There is some staining, but no rust or signs of water intrusion. I didn't take any pictures after pulling it it, but here's one just before.
20150124_092515.jpg


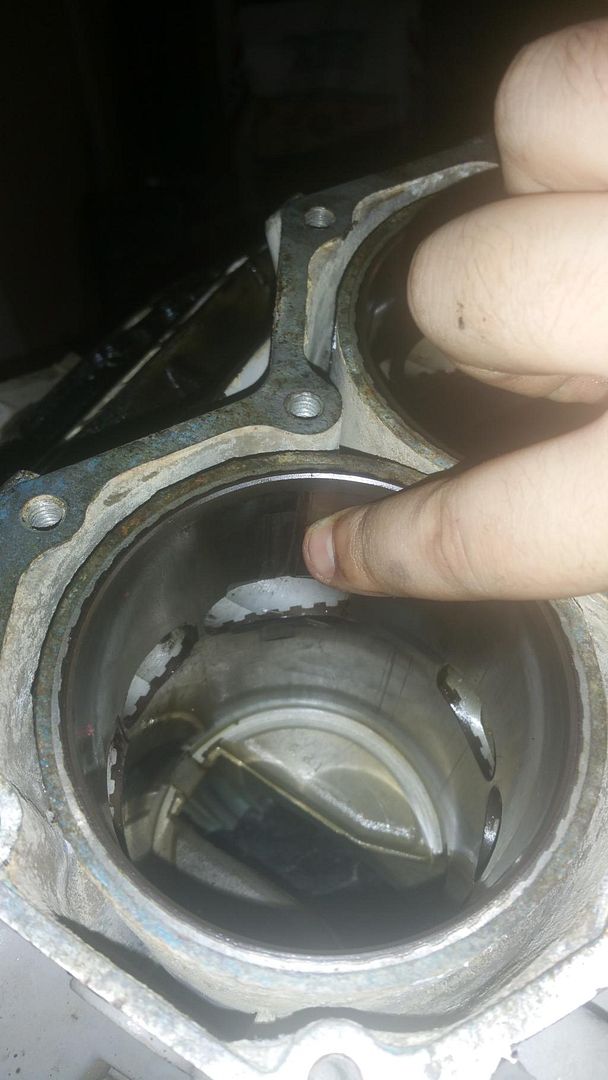
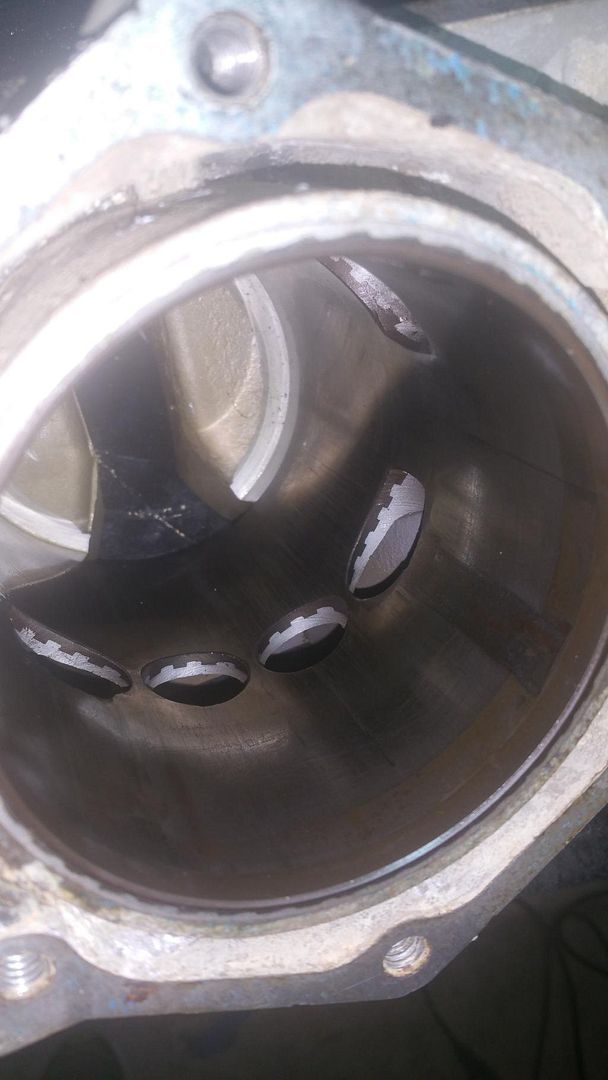
And with the pistons out, I can clearly see the damage. Here is the dead cylinder and piston from my initial post; the top cylinder on the port side. The gouge in the cylinder is barely deep enough to catch a nail on. I've been planning on having it sleeved, but now that I see it in a better setting, I think it can be bored out.
20150124_093431.jpg

20150124_093812.jpg


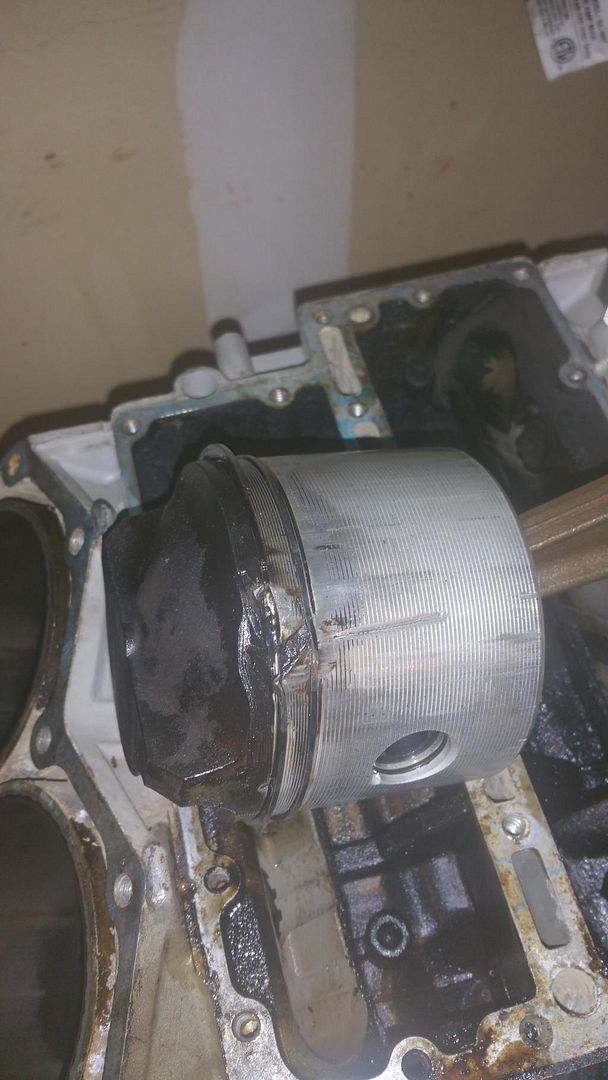
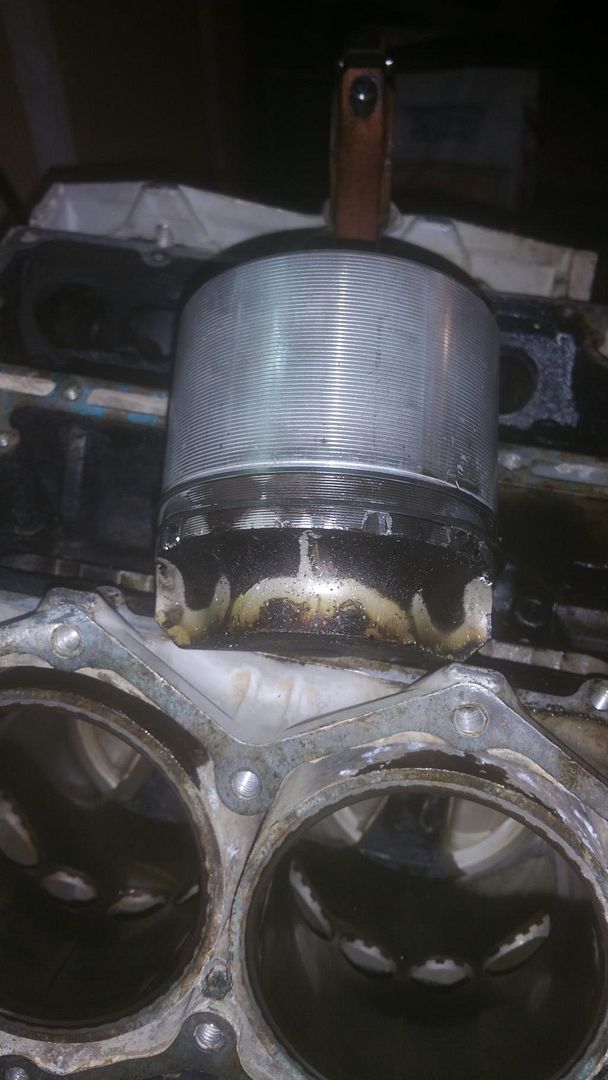
And here is the other cylinder that was low on compression, but not horrible; the lower cylinder on the starboard side. The cylinder also has the beginning of a groove, but I cannot catch a nail on it. I know it can be bored out fine. The piston isn't as bad as the other one, but it's certainly not in good shape. Instead of just one piece completely blown up, it has 3 areas that broke off.
20150124_093640.jpg

20150124_093856.jpg


The other two looked their age, but still in good shape. I'll just have those 2 cylinders honed.

I will be replacing all 4 pistons with WiseCo sets and will build it back up with a rebuild kit. I still have to clean up the block, but I won't be able to get it to the machine shop for a few weeks so I have plenty of time to do that. I think I'm going to repaint the block as well. Is it best to mask and spray each part on its own now or wait until after it's all assembled and ready to go back in?
 

racerone

Supreme Mariner
Joined
Dec 28, 2013
Messages
38,501
Any marking / brand on top of these pistons ?-----What size are these pistons ?----What size is the bore bow, 3.500 + a bit ???
 
Last edited:

fmjnax

Chief Petty Officer
Joined
Jul 21, 2011
Messages
457
I don't have a micrometer to check bore size but all 4 pistons are stamped "KD 3013P3 030"
 

racerone

Supreme Mariner
Joined
Dec 28, 2013
Messages
38,501
That is not a surprise !!-------Pistons did not look original and it has been rebuilt already with 0.030" O/S pistons.-----Now what are you going to do ????
 

fmjnax

Chief Petty Officer
Joined
Jul 21, 2011
Messages
457
Wisco has 044 and 064 pistons. Are those not acceptable? If not, I guess I will throw more money at it and resleeve all 4
 

Bosunsmate

Admiral
Joined
Apr 7, 2012
Messages
6,135
Since you can barely catch a nail on one, and the other one you cant catch a nail, then id just hone.
With new rings and a nice cross hatching hone pattern to wear them in its worked fine on the few outboards ive done that too.
Precision is nice to have but i find it unnecessary so long as the imprecision is within reason
 
Top