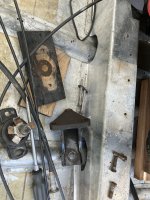
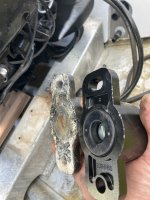
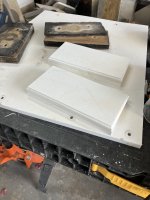
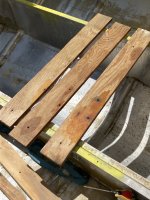
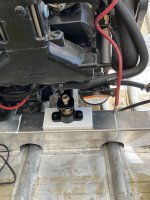
I didn't want to restore this 1997 Islander this summer

Fj40fiji

Petty Officer 3rd Class
Joined
Sep 13, 2024
Messages
94
I’ll have a total of three bilge pumps with dedicated outlets and the live well inlet/outlet fittings all new and sealed with 3M 4200 (not 5200) sealant when they go in. Does anyone have a brand preference for these fittings? Perko? Atwood? Is there something out there proven more or less durable? My originals seemed in good shape other than the inlet missing its screen and the bilge discharge being a little chalky from sun exposure but I don’t see who made them.
I also plan to put maintenance hatches in the floor and use pink foam, in pieces I can remove through the hatch, against the transom so that I can access the lower transom if needed and vent the space when store long term.
 

Fj40fiji

Petty Officer 3rd Class
Joined
Sep 13, 2024
Messages
94
I replaced the seized up 500 gph that was in the boat with an 850 Johnson. I got a 2200gph to install as an auxiliary in the engine compartment and I got a Johnson low boy 1250 to put under the cuddy floor.
I intend to wire all three for auto and manual operation. I’m thinking the two aft ones on separate batteries for auto, but would have to put the forward on one of those batteries as well. I don’t expect to slip this boat much, but am likely to do so at least a little bit.
I’ll route the forward pumps discharge to come out amidship, near the helm. The rear auxiliary will discharge next to the original discharge, all three on the starboard side so I can look at them when I switch them on.
 
Last edited:

Fj40fiji

Petty Officer 3rd Class
Joined
Sep 13, 2024
Messages
94
Alumahawk says on the can, “roll, brush, or spray” but in all the online literature they really discourage spraying. I don’t have and can’t readily get MEK to thin it and I watched 100 people “roll and tip” boats online with results I’d find satisfactory for this project.
This still drying so it may improve a little, but it drys fast so you have to be more careful than me to not over work this paint. I don’t know if I am going to do any better on future coats than orange peel and lap marks. I put this down at about 68 degrees ambient at 6 am and 60% humidity. I thought that’d be ideal conditions, unusually cool and typically dry for this area this time of year.
Has anyone ever used topside paints on the hulls of trailer boats? There is a chance this boat may get slipped for 3-5 days 1-2 times per year but otherwise it won’t be in the water for more than 8 hours at a time. I trust that this paint offers the adhesion and protection that it claims but I’d like a little better look for my effort and I get better results with rustoleum oil paint, so I will probably top coat this with something but I don’t know what and didn’t plan to use any ablative paint (I know not to use copper bearing paints, be very careful with Al boats!). Pics won’t upload for me at the moment.
 

Fj40fiji

Petty Officer 3rd Class
Joined
Sep 13, 2024
Messages
94
Still can’t get pics to post so you’ll just have to trust me.
As the day went on the paint tightened up quite a bit and some parts looked presentable. There were too many and too heavy lap marks and orange peel generally though so I gave it 24ish hours and started sanding. I didn’t sand to perfection but got pretty good. Heavy orange peel to mostly smooth and sanding marks in the valleys of the texture, lap marks all gone and I took another shot at rolling it.
I got my paint ready in the little rolling tray and opened this velour cover I bought yesterday to realize it doesn’t fit the regular weeny roller, you have to have their proprietary roller handle. Only other thing I had handy was a 1/4” nap cover, I don’t even know where my other foam rollers are since there are boat parts everywhere right now.
I rolled out the transom trying to be a little heavier but not leave runs. I never back rolled more than twice the width of the roller to clean up lap marks and generally tried not to mess with this paint too much.
So now a few hours later I can see my vertical passes but I don’t have ridges, and there is still more orange peel than I am ready to accept. I’ll see how much it tightens up tonight.
I think the nap cover carries a lot more paint on to the surface and helps me go faster, but the next coat I will try using a napped roller to roll, and a foam roller to tip.
In the mean time my mom and my son stripped all the carpet and vinyl from the various parts that make up interior- it’s a lot of parts. I pressure washed all the sheet metal parts and etch all the corroded spots. I think the only other thing I am going to do today is get a list of materials I know I still need and get some more online shopping done. I would bet the there are more than 100 pop rivets in the interior of this boat. Most of them were pretty corroded, probably different enough from the base metals to be galvanic. I’m contemplating getting vinyl coated rivets just so they may have a little insulation. I might also put a little silicon in a dish and dip them before inserting them. Also- eyeing a Milwaukee m12 rivet gun. A bare tool is around $200. I have compressors and can get pneumatic for cheaper but electric in my eyes is so much more convenient.
 

Fj40fiji

Petty Officer 3rd Class
Joined
Sep 13, 2024
Messages
94
Still can’t post pics but the second coat came out much much better. Very lite roller stipple. Pretty sure I have get some thinner and shoot it if I want it better. It does tighten up a lot when it dries.
 

Gibbles

Commander
Joined
Nov 14, 2009
Messages
2,043
I installed a rule bilge pump in my boat while the engine was out. I went for the best revews, and took into consideration of count of reviews.
My bilge pump pretty much requires the engine to be out in order to do anything with it, so that was a factor.
 

Fj40fiji

Petty Officer 3rd Class
Joined
Sep 13, 2024
Messages
94
I can get my 850 you pump out with the engine in, the 2200 will have to mount clear of the engine. I haven’t settled yet on exactly where. The low boy fits under the cuddy floor, it’s very low, and I got a round screw type access hatch to cut in, I can pull the pump through the frame of the cover, hope to make it serviceable, but if it isn’t readily changeable then I will get a bigger hatch before the floor is permanent.

Stilllllll can’t post pics. Didn’t make progress last week really anyway. Just burned out on it and didn’t want to mess with it directly. I spent a few hours though going through fasteners and figuring out how many and what sizes and styles I’d likely need to put it back together. Oval, Truss, machine and sheet metal threads, cup or trim washers, Keps nuts- which I couldn’t find in 316 stainless like I ordered for pretty much everything else. All in O think I spent about $150 on new hardware, I also did spring for the Milwaukee M12 rivet gun. $220 for the bare tool, it’s not necessary for this job but when I think about popping off 200-250 manually, especially having to adjust the tool down the mandrel between pulls, it seems like a great time and frustration saver.
Taking my boys camping this weekend, and doing a little bank fishing since we lack a boat, but taking a couple days off during the week next week and planning to assemble the transom and get the engine back on its mounts. It should start coming together from there.
 

redneck joe

Supreme Mariner
Joined
Mar 18, 2009
Messages
12,519
See posts 7 and 9


Top