"It Happened!" Transom has to be replaced! (NOW W/PICS)

ondarvr

Supreme Mariner
Joined
Apr 6, 2005
Messages
11,527
CSM is the weakest type of glass there is, you should have multiple layers of wroving or 1708 for this type of repair.

And that bondo is not a marine product, not very strong either, the laminate on the outside should be solid glass. 1 layer of CSM then multiple layers of 1708, sand smooth and fill any defects with a waterproof marine product

(2408 would work too).
 

LX Kid

Ensign
Joined
Sep 5, 2008
Messages
993
CSM is the weakest type of glass there is, you should have multiple layers of wroving or 1708 for this type of repair.

And that bondo is not a marine product, not very strong either, the laminate on the outside should be solid glass. 1 layer of CSM then multiple layers of 1708, sand smooth and fill any defects with a waterproof marine product

(2408 would work too).

Well I'm guessing what's used by my partner cause he's doing the glassing. What ever has been used will have to stay. He still has a five inch wide glass to add. I did notice that the glass was woven on one side and stranded on the other. I'm sure that it will last the life of this old 35 year old boat. It's an I/O so there is no real weight hanging off the transom. We will just have to keep an eye on it in the future for cracks etc.
 

tpenfield

Moderator
Staff member
Joined
Jul 18, 2011
Messages
18,180
The challenges that I thought you would face by doing an external cutting/removal of the transom are:

1) Re-building the external skin of the hull along the cut seams to a point where they would have enough bond and strength to avoid separation cracks in the future.

2) Getting the inner and outer transom surfaces 'true' enough to re-install the transom assembly without having leaks in the future.

I think those challenges are upon you at this point, and CSM is probably not going to do the job very well. A stitched bi-axial cloth (like 1708) is a better choice to lap the seams together.
 

ondarvr

Supreme Mariner
Joined
Apr 6, 2005
Messages
11,527
Well I'm guessing what's used by my partner cause he's doing the glassing. What ever has been used will have to stay. He still has a five inch wide glass to add. I did notice that the glass was woven on one side and stranded on the other. I'm sure that it will last the life of this old 35 year old boat. It's an I/O so there is no real weight hanging off the transom. We will just have to keep an eye on it in the future for cracks etc.

If it had strands on one side then you should be ok, just couldn't tell from the pic.
 

LX Kid

Ensign
Joined
Sep 5, 2008
Messages
993
I went looking for transom mounting bolts today at Lowe's & Home Depot and an independent hardware store. I can't believe none of them stock 7/16" bolts. They don't even stock 7/16 steel rod that I could make my own. The transom bolts that twisted off were 7/16x6x20TPI on one end and 14 TPI on the other. The more course thread, 14 TPI, threads into the aluminum.
 
Last edited by a moderator:

Stumpalump

Chief Petty Officer
Joined
Dec 5, 2013
Messages
413
Most towns have a store called fastenall. They sell nuts and bolt mostly to commercial users. Google nuts and bolts in your town and you should be able to find a supplier. Caterpillar bulldozer dealers and farm supply like TSC also have a decent supply as does ACE hardware.
 

LX Kid

Ensign
Joined
Sep 5, 2008
Messages
993
No Title

Question about corrosion on aluminium gimbal assembly. After dismantling the gimbal assembly I've started tackling all the corrosion pits. I'v used a course sandpaper and cleaned the areas as best I could. I've heard that using vinegar, on those areas, will neutralize the corrosion for painting. I've decided to use a black epoxy paint in a rattle can. Don't know if I should use a primer or not and if I do what kind of primer? I really didn't intend to do any JB Quick epoxy filling of anything but rather just treat it and paint it.
 

Attachments

  • photo278217.jpg
    photo278217.jpg
    318.8 KB · Views: 0
  • photo278218.jpg
    photo278218.jpg
    341.6 KB · Views: 0
Last edited:

Stumpalump

Chief Petty Officer
Joined
Dec 5, 2013
Messages
413
The best stuff is the stuff you already have on hand. It's free at this point. Zink chromate aluminum primer is great stuff on pure aluminum. Cast aluminum has more than aluminum in in. You can treat it just like rusty steel if you want and is why if I needed primer I'd buy the zink. If I already had some in the shop I'd use any primer I especially like rusty metal primer from rustoleum. That's pretty good stuff but you have to let it dry a long time then wipe off any oil with a solvent rag to remove any oil that may have risen to the top. If you use rusty metal primer it will soak into and stop the corrosion but the oils tend to rise if you spray it over clean or painted surfaces. Spray it light or make sure it's good and dry. Yours does not look that bad. It should come out great! Keep up the good work! I gotta mess with trailer bunks today. Yuck
 

LX Kid

Ensign
Joined
Sep 5, 2008
Messages
993
You find those bolts yet?

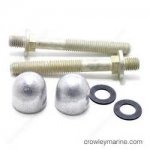
Not yet. In haven't had time to look for them yet. Today's work was sanding and painting the three parts of the gimbal assembly. "Also" I don't know about the two bolts that are at the bottom of the housing. My partner removed the nuts and or bolts and he can't remember what they looked like. I do know they have to be like carriage bolts because to the square mount holes. They also are where the anodes screw onto the bolt end. Been looking for a parts schematic for the older pre-alpha but haven't found one yet.
 

Jcris

Chief Petty Officer
Joined
Apr 23, 2016
Messages
466
Are those the bolts that just hold the anodes on?
My drive is a gen 2 so prolly not the same. Sure like to see a pic of the gimbal paint work. What did you end up using to clean the corrosion off?
 

LX Kid

Ensign
Joined
Sep 5, 2008
Messages
993
20171001_095857_resized.jpg
Are those the bolts that just hold the anodes on?
My drive is a gen 2 so prolly not the same. Sure like to see a pic of the gimbal paint work. What did you end up using to clean the corrosion off?

Yes the bottom two do hold the anodes on but also pull the gimbal housing up tight against the transom and "squishing" the transom seal flush at the bottom.

Paint is drying and will take 24 hours to cure nice and hard. I used Appliance Epoxy paint from Home Depot. As far as the corrosion I just sanded everything I could where corrosion was visible. There is so much corrosion up under the existing finish I figured it was going to have to be sand blasted and that just wasn't an option for me. I'm sure it will do for the next few years. No corrosion is causing any structural problems. It looks worse than it actually is!
 
Last edited:

RDSJR

Cadet
Joined
Jul 20, 2011
Messages
15
Check out a product called sea cast. It's a resin and will not rot or retain moister. Not sure if it is useful for a craft this size but seems to be a perfect fix vs using wood to replace.
 

LX Kid

Ensign
Joined
Sep 5, 2008
Messages
993
Check out a product called sea cast. It's a resin and will not rot or retain moister. Not sure if it is useful for a craft this size but seems to be a perfect fix vs using wood to replace.

Wow! your really a "Johnny come lately." Please read the whole posting. Sea Cast is not an option as it is an inboard motor. The transom is already repaired and putting final touches on for painting.
 

LX Kid

Ensign
Joined
Sep 5, 2008
Messages
993
Are those the bolts that just hold the anodes on?
My drive is a gen 2 so prolly not the same. Sure like to see a pic of the gimbal paint work. What did you end up using to clean the corrosion off?

Just watched a YouBoob video and happen to see those two bottom bolts. They are stove bolt style, instead of studs, that attach to the gimbal plate inside the transom. However they are "special" cause they have a thread for attaching the anodes on the transom outside. Have to give a good look around. I'm sure we didn't discard them
 
Last edited:

LX Kid

Ensign
Joined
Sep 5, 2008
Messages
993
No Title

Anyone know where I can get the three "O-rings" for the exhaust Y-tube to gimbal housing seal. Here is a web picture of where they fit on the gimbal housing. (Web photo, not mine.)
 

Attachments

  • photo278440.jpg
    photo278440.jpg
    70 KB · Views: 0

LX Kid

Ensign
Joined
Sep 5, 2008
Messages
993
Good morning everyone! I guess I'll start putting the gimbal assembly back togather this morning. Painted all the parts couple days ago with epoxy paint and have all the new parts necessary to make a good rebuild job. Should last long time. I need to heat up the old bearing to remove the inner bearing race out of it's outer shell. I have a shop press but can't find something to use to push it into the housing. Don't want to push on the inner race for fear of damage. I plan on using the outer race to hammer/push in the new gimbal bearing. I'll post pics later this evening.
 
Last edited:

LX Kid

Ensign
Joined
Sep 5, 2008
Messages
993
No Title

Didn't get it totally built today. Had to go to doc appointment. Took a little over an hour to make two double ended studs. I'll finish it off tomorrow. I did find the anode bolts but as I feared they had been twisted off during disassembly. They are special bolts that would take me a while to make, cause I stink at welding, and will see if I can find a source for them.
 

Attachments

  • photo278480.jpg
    photo278480.jpg
    102.8 KB · Views: 0
  • photo278481.jpg
    photo278481.jpg
    110.6 KB · Views: 0
  • photo278482.jpg
    photo278482.jpg
    98.4 KB · Views: 0
  • photo278483.jpg
    photo278483.jpg
    116 KB · Views: 0

LX Kid

Ensign
Joined
Sep 5, 2008
Messages
993
No Title

Have you read our rules?
 

Attachments

  • photo278487.jpeg
    photo278487.jpeg
    6.9 KB · Views: 0
Last edited by a moderator:
Top