My 1988 6hp Johnson Rebuild

NoEcm

Petty Officer 3rd Class
Joined
Jan 22, 2010
Messages
90
Re: My 1988 6hp Johnson Rebuild

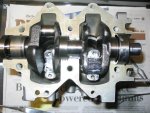
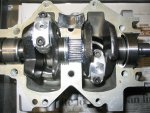
Crankcase assembly time and oh joy, a total of 90 uncaged needle bearings to work with:

#1 Rod Bearings:
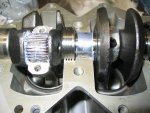
IMG_5268.jpg

#2 Rod Bearings:
IMG_5267.jpg

Center Crank Bearing:
IMG_5271.jpg


On a side note, I inventoried all the parts that I received by part # but I never verified that the correct part was inside the bag.
This was supposed to be a Crankshaft Seal but instead I received a tiny O-Ring:
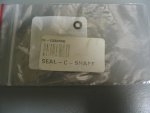
0330550.jpg
Time to email about the wrong part being sent.
 

NoEcm

Petty Officer 3rd Class
Joined
Jan 22, 2010
Messages
90
Re: My 1988 6hp Johnson Rebuild

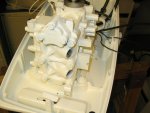
My camera batteries died during the reassembly of the crankcase, everything went together with no issues:

Crankcase assembled, exhaust tube not attached just sitting on top of the midsection (I have one bolt installed so it doesn't fall off the midsection):
IMG_5299.jpg
 

NoEcm

Petty Officer 3rd Class
Joined
Jan 22, 2010
Messages
90
Re: My 1988 6hp Johnson Rebuild

So I started to do some comparisons between my 1988 6hp (the one that I am rebuilding) and my 1990 6hp (just purchased - new/unused) and noticed that the 2 crankcases were very similar.

The 1988 Crankcase is NLA and last sold for $400.55

The 1990 Crankcase still available new and sells for $50.00 (which I think is a screaming deal. I may just buy one as a spare for my recently purchased 1990 6hp)

In checking, they both use the same Outer Exhaust Cover, same Intake Manifold Gaskets, Leaf Plates and leaf valves, head gaskets and exhaust tubes. Many of the carb parts are the same too.

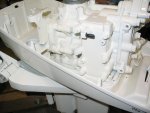
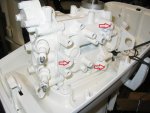
The only difference that I can see is that the 1988 crankcase has 3 tapped holes on the right side of the crankcase and the 1990 does not have those tapped holes (still has the same boss just not tapped):

1988 Crankcase.jpg


Is there any chance that OMC gave these 2 parts different part numbers just because one was tapped and the other wasn't?
Think the 1990 would work with the 1988 components?
 

1946Zephyr

Vice Admiral
Joined
Oct 21, 2008
Messages
5,556
Re: My 1988 6hp Johnson Rebuild

Well, it looks like you'll have two new motors. LOL Nice work on the rebuild. ;)

You can compare a lot of parts at marineengine.com for that motor.
 

NoEcm

Petty Officer 3rd Class
Joined
Jan 22, 2010
Messages
90
Re: My 1988 6hp Johnson Rebuild

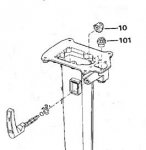
Cleaned up the and reassembled the midsection yesterday and I noticed that I forgot to take position photos of the shift rod gears (#10 & 101) while in the neutral position:

ScreenShot001.jpg


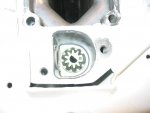
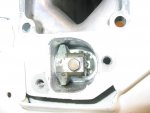
Does this look correct in the neutral position?

IMG_5304.jpg

IMG_5306.jpg
 

NoEcm

Petty Officer 3rd Class
Joined
Jan 22, 2010
Messages
90
Re: My 1988 6hp Johnson Rebuild

Drained the gear oil and installed the Water Pump Repair Kit today.

IMG_5310.jpg
 

NoEcm

Petty Officer 3rd Class
Joined
Jan 22, 2010
Messages
90
Re: My 1988 6hp Johnson Rebuild

While replacing the O-Rings (71 cents each) on the Drain and Vent Plugs I got to wondering if I could buy these O-Rings in bulk and found the following:

Drain and Vent O-Rings.jpg

$5.75 for 100 (< 6 cents each) and my son gets free shipping so I had him place the order for me. 8 oil changes (4 on the 6hp and 4 on the 70hp) and I'll break even. The break even period gets shorter if you consider the gas to drive to the J/E parts dealer or shipping from your favorite parts house.

These O-Rings are used on both my 6hp and 70hp and it appears that it's used on may J/E outboards between 1987 and 2001.
 

1946Zephyr

Vice Admiral
Joined
Oct 21, 2008
Messages
5,556
Re: My 1988 6hp Johnson Rebuild

Well, since you're now addicted to outboards and love restoring these beauties.......yes buying bulk would be best. :D
 

NoEcm

Petty Officer 3rd Class
Joined
Jan 22, 2010
Messages
90
Re: My 1988 6hp Johnson Rebuild

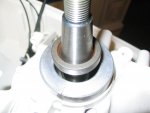
Time to install the upper crankshaft seal:
IMG_5319.jpg

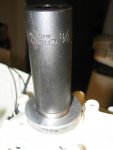
A deep socket works perfectly for a seal driver:
IMG_5325.jpg

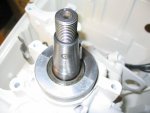
Seal installed and ready for the next step:
IMG_5327.jpg
 

Mas

Lieutenant Commander
Joined
Oct 3, 2006
Messages
1,656
Re: My 1988 6hp Johnson Rebuild

Seems very odd that the ring locating pins are in line with the port (from your earlier picture). I would think that there would be a greater chance of the ring ends catching on the port and breaking??? What do I know!

Very nice work!!

Mas
 

NoEcm

Petty Officer 3rd Class
Joined
Jan 22, 2010
Messages
90
Re: My 1988 6hp Johnson Rebuild

Seems very odd that the ring locating pins are in line with the port (from your earlier picture). I would think that there would be a greater chance of the ring ends catching on the port and breaking??? What do I know!

Very nice work!!

Mas


Thanks.

Actually though, the ring locating pins do not line up with any of the ports. I rotated the pistons purposely to show what to look for just for the photo. When the pistons are properly lined up, the top end gap is at the top of the cylinder and the bottom ring gap is 180 degrees from the top.

This is my "rebuilding for dummies" (me :) )posting so I tried to document everything that I did, and learned.
 

Mas

Lieutenant Commander
Joined
Oct 3, 2006
Messages
1,656
Re: My 1988 6hp Johnson Rebuild

That makes a lot more sense...thanks for the clarification.

Mas
 

NoEcm

Petty Officer 3rd Class
Joined
Jan 22, 2010
Messages
90
Re: My 1988 6hp Johnson Rebuild

Not much time to work on the little outboard lately due to work (+ I'm waiting on a missing and last part but thats another story in itself).

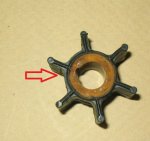
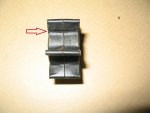
I did take the time to inspect the old water pump impeller that I changed last month and this must be why it is suggested to replace this often:

A small hairline crack. Not much to worry about huh?
Impeller-Top.jpg

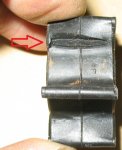
Side view of the hairline crack:
Impeller-Side.jpg

I guess there was something to worry about after all as the crack was deeper than I thought.
Impeller-Open.jpg
 

NoEcm

Petty Officer 3rd Class
Joined
Jan 22, 2010
Messages
90
Re: My 1988 6hp Johnson Rebuild

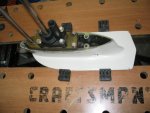
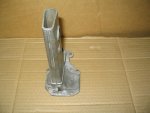
Media blasted the Exhaust Tube and now it's ready for painting and reassembly:

IMG_5402.jpg


IMG_5403.jpg
 

Haffiman

Commander
Joined
Dec 17, 2009
Messages
2,454
Re: My 1988 6hp Johnson Rebuild

Paint will not last due to the exhaust heat, have it anodized.
 

orbanp

Petty Officer 1st Class
Joined
Jun 26, 2011
Messages
324
Re: My 1988 6hp Johnson Rebuild

Seems very odd that the ring locating pins are in line with the port (from your earlier picture). I would think that there would be a greater chance of the ring ends catching on the port and breaking??? What do I know!
Mas

My guess would be that the OP just rotated the pistons (not attached to the crank yet) so that he could check the ring ends.
Nice work all along!

Peter
 

NoEcm

Petty Officer 3rd Class
Joined
Jan 22, 2010
Messages
90
Re: My 1988 6hp Johnson Rebuild

Paint will not last due to the exhaust heat, have it anodized.

I used a High Heat Header Paint:

http://www.vhtpaint.com/products/flameproof/

Curing this paint does not seem like much fun though:

Off the Vehicle
?Paint must be completely dry before curing
?Heat to 250?F (121?C) for 30 minutes
?Cool for 30 minutes
?Heat to 400?F (204?C) for 30 minutes
?Cool for 30 minutes
?Heat to 650?F (343?C ) for 30 minutes


23 years before this 1st rebuild so if the same holds true, my next rebuild will be in 2035. I'll update this thread again for the 2nd rebuild and let everyone know how the header paint worked out. :)
 

NoEcm

Petty Officer 3rd Class
Joined
Jan 22, 2010
Messages
90
Re: My 1988 6hp Johnson Rebuild

The exhaust tube was bolted to the power head and the power head bolted back onto the mid-section:
IMG_5358.jpg

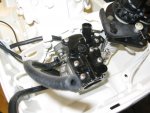
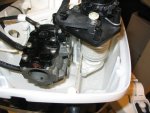
Now, time to start hanging the "stuff" back onto the power head:
IMG_5355.jpg

IMG_5354.jpg

This part is not going to be much fun:
IMG_5360.jpg


But, I was able to replace the pull rope and get the spring wound back on successfully:
IMG_5361.jpg
 

NoEcm

Petty Officer 3rd Class
Joined
Jan 22, 2010
Messages
90
Re: My 1988 6hp Johnson Rebuild

Fuel pump and primer pump mounted:
IMG_5362.jpg

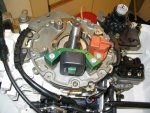
Plate, sleeve, coil and sensor:
IMG_5363.jpg

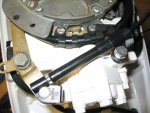
Throttle lever and cable:
IMG_5364.jpg

Kind of screwed up here. The knob for the primer pump gets mounted AFTER the air silencer is installed:
IMG_5365.jpg
 
Top