My 85' Riviera Tri-hull Rebuild

Numlaar

Chief Petty Officer
Joined
Jul 9, 2009
Messages
633
Re: My 85' Riviera Tri-hull Rebuild

I also had a cracked case up near the cowling...

I still had the pieces for it (they were laying down inside), but here are a couple pics of how it was broken:

09crackedcasing1.jpg


10Crackedcasing2.jpg


Basically I test fit the pieces, mixed up a batch of JB weld, and set them back in place, then slathered it all over it to fill any voids or pockets:

11crackedcasingrepair1.jpg


Once it hardened, I sanded it all back down smooth. (Picture for that to come).
 

Numlaar

Chief Petty Officer
Joined
Jul 9, 2009
Messages
633
Re: My 85' Riviera Tri-hull Rebuild

While that was hardening, I kept working at sanding the mid section:

08sandedmid.jpg


I got it pretty well stripped down...

I also completely sanded the lower unit, and sandblasted all the corrosion pits out of it as well.

Once all of the pitting on the lower unit was blasted, I filled it all with JB weld, let it harden over night, then sanded it down again flush, so that the JB filled all of the pitting and the missing piece of the skeg.

In this picture you can see how everything is filled and sanded, ready for paint:

12Lowerunitbefore.jpg
 

Numlaar

Chief Petty Officer
Joined
Jul 9, 2009
Messages
633
Re: My 85' Riviera Tri-hull Rebuild

Once the lower unit was done being sanded, I hit it up with a nice thick coat of Zinc Chromate primer:

13lowerunitafter.jpg


I think it looks 1000% better!!!

About 95% of the pitting was filled nicely, and after priming you can't see it was ever there!

You can, however, still see some of the pitting near the mounting holes under the cavitation plate, and some on the plates themselves, but they were a bit too difficult to fill, so hopefully being re-sealed and painted will keep them ok for a while.

(i'll do the final paint once the motor is all back together, and show you those pictures as well).

There is still some worked needed on the lower unit:

Still to go on the Lower unit, is to:
1. replace the water pump impeller (complete kit)
2. water pump housing,
3. all the seals, (shift rod, exhaust, etc.)
4. intake screen,
5. and most importantly, the shift rod housing!!!

It was completely rotted away, I am surprised that it didnt leak, and the gear oil was still clean... check this out:

04ShiftHousing1.jpg


05shifthousing2.jpg


Once I get the parts in for the Lower unit, I'll post up how it looks once its all back together.

Thats it for this update! Next one will probably be in a week or so. Hope you enjoy!
 

Rickairmedic

Commander
Joined
Apr 24, 2009
Messages
2,576
Re: My 85' Riviera Tri-hull Rebuild

Num she is looking fantastic and the motor looks new already and you havent even painted it yet :D.


Rick
 

lowkee

Lieutenant Commander
Joined
Dec 13, 2008
Messages
1,890
Re: My 85' Riviera Tri-hull Rebuild

1000% better is right! I didn't know JB weld worked on alum. I'll be sure to use that trick to fill the nicks in my outdrive. That is just a killer improvement. I won't like mine unless it looks that nice, now.. thanks a lot! :mad: :p
 

Numlaar

Chief Petty Officer
Joined
Jul 9, 2009
Messages
633
Re: My 85' Riviera Tri-hull Rebuild

1000% better is right! I didn't know JB weld worked on alum. I'll be sure to use that trick to fill the nicks in my outdrive. That is just a killer improvement. I won't like mine unless it looks that nice, now.. thanks a lot! :mad: :p

LOL

Sorry Lowkee... Yeah it was horrible to look at before, and I knew the JB would stick... just clean it all off good, and give it a nice acetone wash before applying, then make sure you let it set up a good 24hours before sanding off the excess and your good to go... I tried picking at some on a test spot to make sure it held, and it bonded extremely well, no way it's coming off.

If I wanted to spend a few more days on it, I am sure I could get at the rest of the pitting ... but I just want this thing done! Maybe after I get it back on the water, I'll make that a future "touch up" project once I see how everything works. MY main goal at this point was to hit the worst of it....

I haven't seen a motor pitted up this bad before ever. :(

But Hopefully once its done, it will look decent... at least it runs good LOL.
 

Numlaar

Chief Petty Officer
Joined
Jul 9, 2009
Messages
633
Re: My 85' Riviera Tri-hull Rebuild

New question:

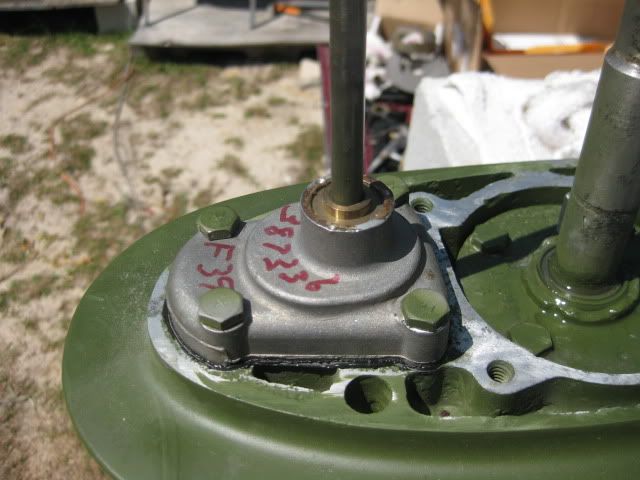
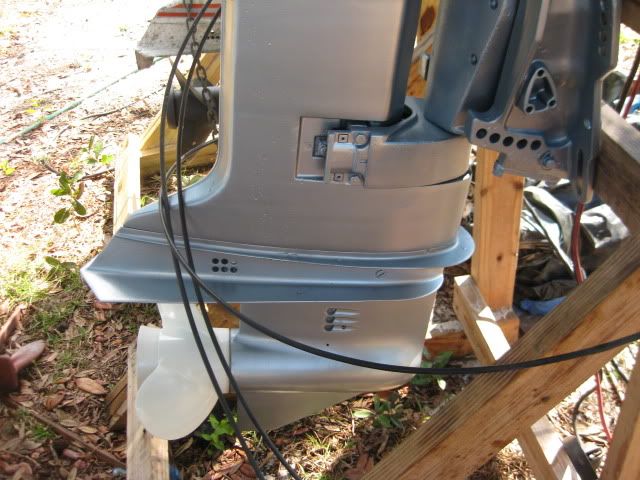
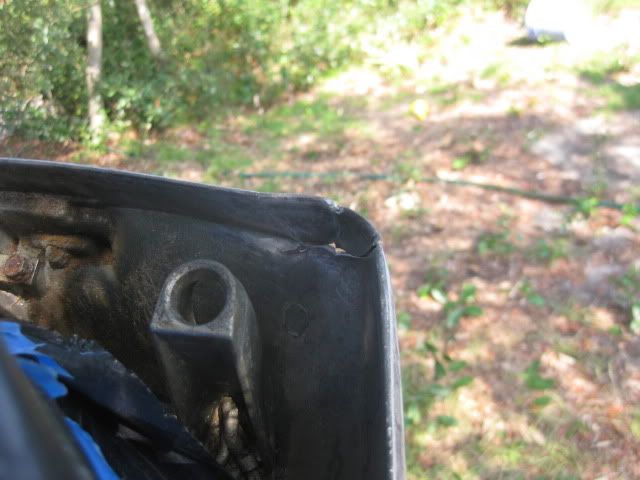
I am still working on my motor, but one thing I didn't mention is that the boat originally had a kicker plate on the back of it...

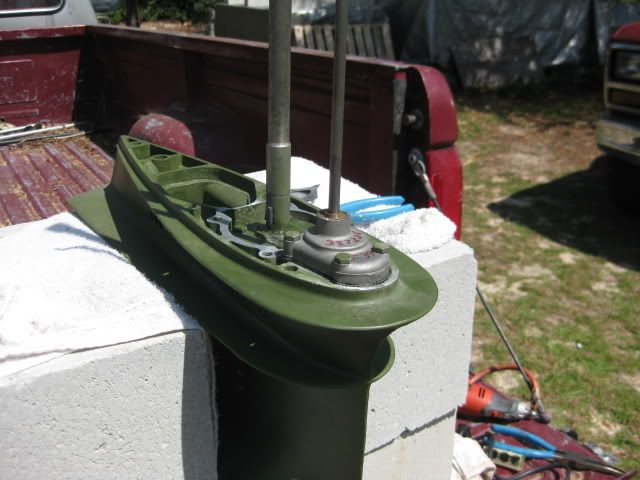
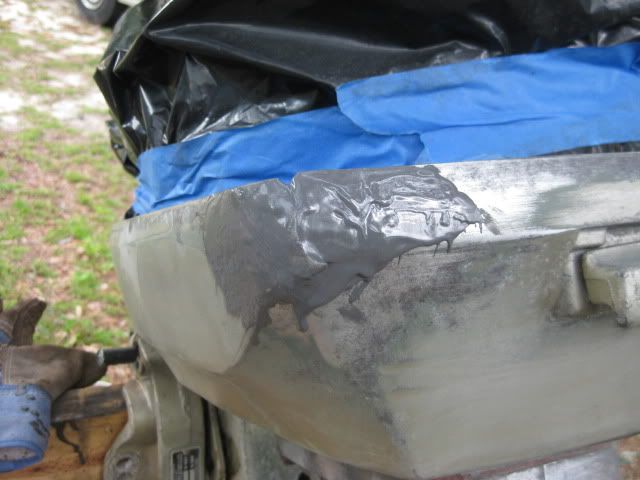
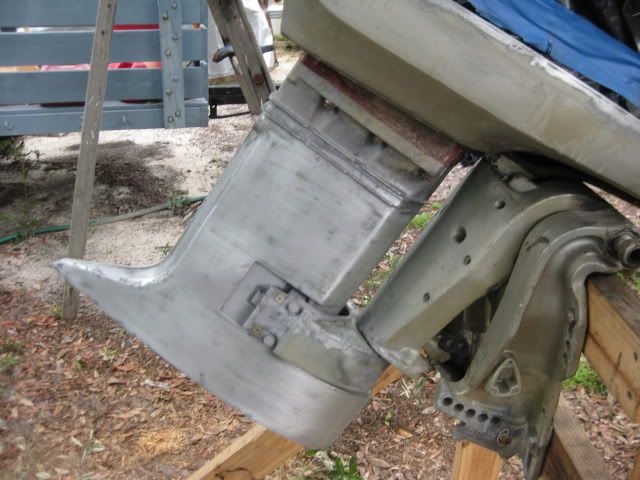
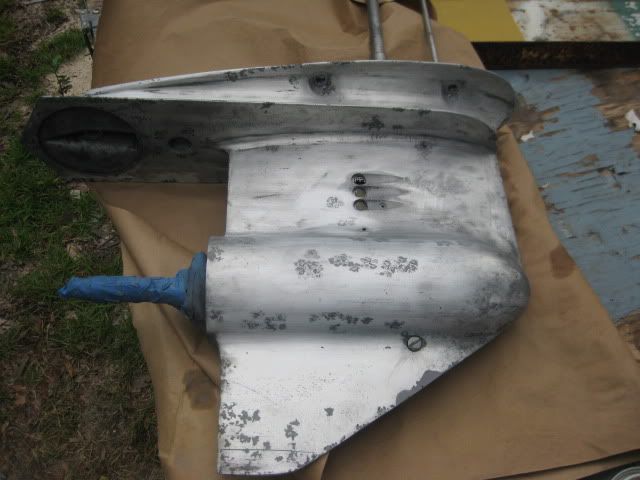
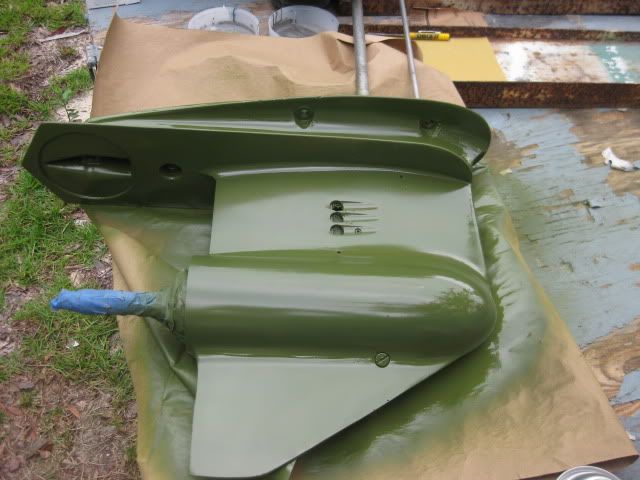
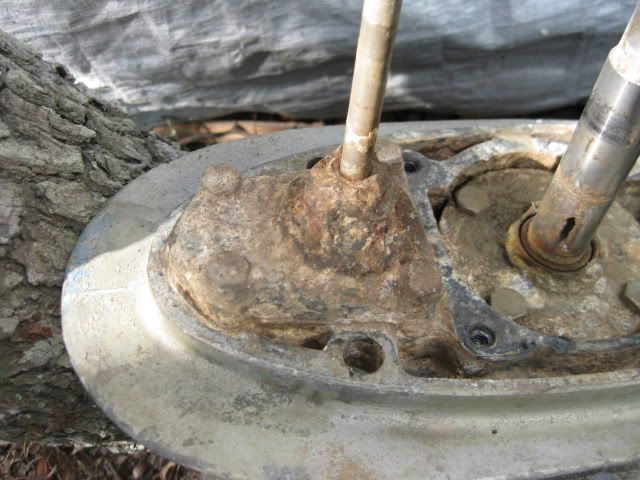
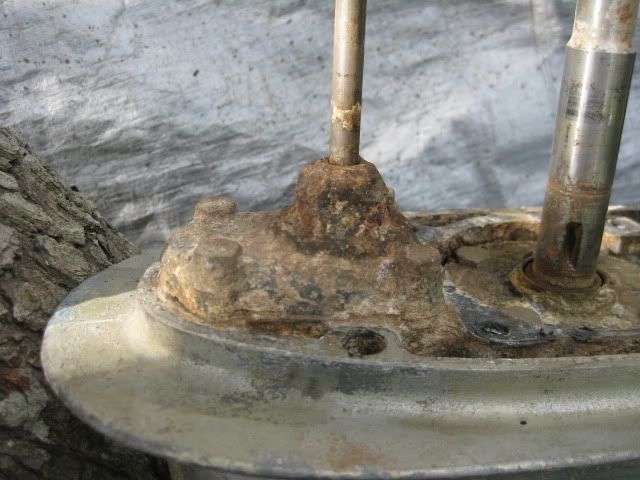
(The thing (bracket) is pretty much disgusting to look at, but I am sure if i sandblasted it up and then gave it a good zinc chromate prime and then paint. (Its aluminum, and I could even match it to the engine color), It can look pretty decent when finished... but here it is for now... (pics below)

Bracket:
98kickerbracket2.jpg


Bracket:
97kickerbracket1.jpg


I have a 15hp 4-stroke Honda for my jon boat... I think it would make an excellent kicker for a larger boat, but it may be a bit too big/heavy for this one... (weighs around 100lbs ish).

1. Do you think this is too much of a kicker for my boat? (boat weighs about 400lbs empty hull, 650 with the main O/B, probably 900 with everything in it and fueled up).
2. Would this put too much weight to the rear of the boat? (it will have the main O/B, two batteries, and two 6-gal. tanks all at the arse end of the boat)(then the extra weight of the kicker if I add it).
3. Do you think this old bracket will support the weight of a 15HP 4-stroke?
(I have no idea what it was for originally), or should I invest in a new one (which I don't have the money for).(If you think the 15HP would be ok as a kicker).

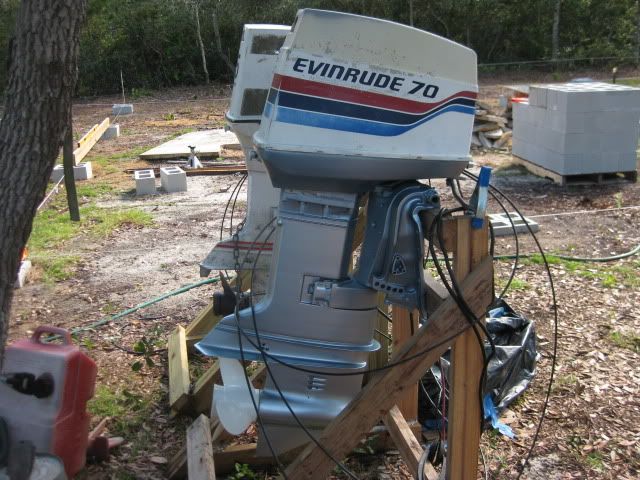
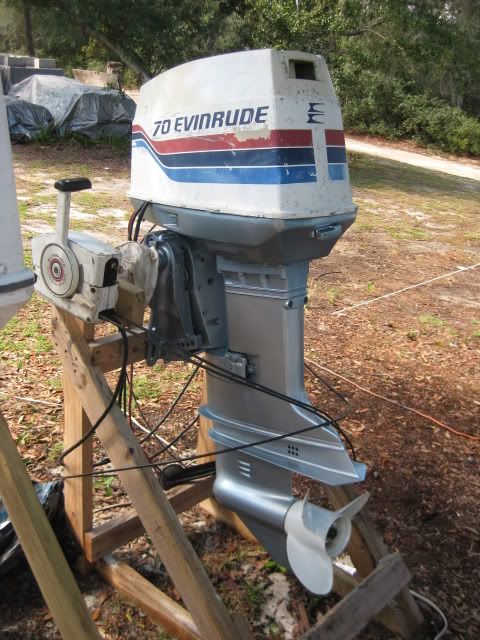
My main O/B is a 77' evinrude which I have never had in the water... and I'm a bit leary of it until I get some water time on it, (starts and runs ok on the stand, but won't know for sure till its in the water). So it would be nice to have a good backup that I know runs perfectly... but I am debating the pros/cons of adding the bracket back on...(more holes in the transom, the extra weight, etc.)

Also as a side note, I have a 44lb thrust saltwater Trolling motor I am going to bow mount as well for fishing, so worse case I will have an electric backup if nothing else.

So what do you all think?

/edit - also now is the time to do it if I am going to... while I am sandblasting and painting the rest of the motor...
 

oops!

Supreme Mariner
Joined
Oct 18, 2007
Messages
12,932
Re: My 85' Riviera Tri-hull Rebuild

hi bud....sorry i took so long but i started reading from post one....

therte was too much so i skipped to page three....ill catch up on the whole thread in a bit.....

but.,...

an extra 100 lbs on the back wont make much difference....just move some stuff around in the boat.....re mount a battery here and there....

keep a cooler full up front....

if i read right you are a 14 footer??? keep a day tank under the deck....

ok....im gonna read up some more.......i missed page two....lol
looks good as of the end of page one tho....:)
 

Numlaar

Chief Petty Officer
Joined
Jul 9, 2009
Messages
633
Re: My 85' Riviera Tri-hull Rebuild

hi bud....sorry i took so long but i started reading from post one....

therte was too much so i skipped to page three....ill catch up on the whole thread in a bit.....

but.,...

an extra 100 lbs on the back wont make much difference....just move some stuff around in the boat.....re mount a battery here and there....

keep a cooler full up front....

if i read right you are a 14 footer??? keep a day tank under the deck....

ok....im gonna read up some more.......i missed page two....lol
looks good as of the end of page one tho....:)


Awesome! Thanks for the feedback oops! Glad you made it here (with a little nudging hehe).

well almost 15... its 14'10" OAL...

There is no built in gas tank, its only portables and they are both in the back, don't really have anywhere else to put em...


One more question for ya... I am at the 400grit sanding stage on my gel-coat... I have 600grit available... but thats all the sandpaper I have... do you think 600 then compound/polish/wax will give a decent shine??? I really really really am sick of sanding (probably not as much as you), but I want to know what your thoughts are... I really dont want to sand anymore! heh
 

Numlaar

Chief Petty Officer
Joined
Jul 9, 2009
Messages
633
Re: My 85' Riviera Tri-hull Rebuild

Man... wheres the feedback?!?!? :)

cmon lowkee, rich, kev, ez, anyone else want to chime in on my two questions?

(kicker and gel-coat)...

Took a break from the boat today, but want to get back on it tomorrow or Monday!
 

ezmobee

Supreme Mariner
Joined
Mar 26, 2007
Messages
23,767
Re: My 85' Riviera Tri-hull Rebuild

well I don't know anything about gel coat....if that kicker bracket works then go ahead and use it. If it seems really sturdy then it could probably handle a 15. I wish you'd posted this before I ended up selling a 15HP bracket at a yard sale for $10 because I couldn't get anyone on CL to pay me anything decent for it!!!! (I would have given it to you for shipping)
 

Rickairmedic

Commander
Joined
Apr 24, 2009
Messages
2,576
Re: My 85' Riviera Tri-hull Rebuild

Hey Num sorry been workin on work a little to much here lately :D. I hate to tell you this but you really want to go to at least 1200 grit before buffing .


Rick
 

Numlaar

Chief Petty Officer
Joined
Jul 9, 2009
Messages
633
Re: My 85' Riviera Tri-hull Rebuild

Hey Num sorry been workin on work a little to much here lately :D. I hate to tell you this but you really want to go to at least 1200 grit before buffing .


Rick

Its ok Rick...

Thanks for making my crappy day worse! LOL... J/K man...

I kind of already knew the answer, but didn't want to face the reality of it... I despise sanding with every fiber of my being....

Roof cement in my eye... dead ATV, dead tractor, now more sanding, UGH when's it going to end!
 

lowkee

Lieutenant Commander
Joined
Dec 13, 2008
Messages
1,890
Re: My 85' Riviera Tri-hull Rebuild

I am at the 400grit sanding stage on my gel-coat... I have 600grit available... but thats all the sandpaper I have... do you think 600 then compound/polish/wax will give a decent shine???

trust me, i hear you on the sanding. I am using an HVLP to paint my boat with Pettit topside and BOTH sides I managed to screw up something royally and have to re-sand the entire thing back to the beginning. I can no longer lift heavy objects (I consider a glass heavy, ATM) with an outstretched arm.

With that said, I'm here to ruin your day and make it better at the same time.. Yes, you need to keep sanding, but from 600 grit on it will become easier (much less resistance). I would recommend 600, then 800, then 1000, then compound, then polish, then wax. You only have to do it once, so life will only be a living hell until it is finished. it sucks having to spend the coin, but get good polishing liquids, like meguires or 3m. You don't want to risk burning through after all of that work.

Here is a video series on buffing, as it seems just as involved as painting the stupid thing: http://www.youtube.com/view_play_list?p=F208E6B6869312E5&playnext=1&playnext_from=PL

Personally, I'm not looking forward to swapping out a palm sander with a heavy buffer. The palm sander is bad enough after 5 hours.
 

Numlaar

Chief Petty Officer
Joined
Jul 9, 2009
Messages
633
Re: My 85' Riviera Tri-hull Rebuild

Hey guys,

I am very sorry, seems I have been away for a lot longer than I thought it was....


All kinds of things have been happening, but I should be back on track here shortly... still gotta get this thing finished for the april get together!

I did some work while offline (not much) but i'll get some pics posted soon for you.

Glad to be back,

Num
 

tallcanadian

Captain
Joined
Sep 7, 2006
Messages
3,250
Re: My 85' Riviera Tri-hull Rebuild

That's good to hear. I've been sitting here since August waiting for you to continue with your build. I've got a beard down to my knees, ribs are sticking way out and my boss has stopped calling me, guess I'm no longer employed. But seriously, great looking boat, nice job so far. Can't wait to see it finished.
 

Numlaar

Chief Petty Officer
Joined
Jul 9, 2009
Messages
633
Re: My 85' Riviera Tri-hull Rebuild

Ok as promised, here are the updated pictures....

First off, I finished about 95% of the work on the outboard....

Remember that shift rod housing?(its on page 3)

Well here is the nice new one:
14ShiftHousing1.jpg


and another view:
15shifthousingtwo.jpg


All told, the lower unit needed the most work on the motor...
I ended up replacing:
Shift Rod housing,
water pump (complete),
exhaust gasket,
Intake Screen
Shift Rod grommet
All the external mounting bolts
Steering tab (zinc)

Other work:
Clean/rebuild carbs
Fuel filter screen
Replace all fuel lines
New spark plugs

Re-work controls (basically took it all apart, cleaned and lubed everything, replaced some cracked wiring, and re-assembled).


Then I re-painted it... (next post)
 

Numlaar

Chief Petty Officer
Joined
Jul 9, 2009
Messages
633
Re: My 85' Riviera Tri-hull Rebuild

I decided to go with the 1984 color scheme for the motor... I know I know, its a 77.... but I cant get decals for a 77, and the colors for 84 go better with my boat... anyway, here is the lower unit:
16LowerUnitdone.jpg


17Lowermiddone.jpg


A little further back so you can see the mid section:
18Lowermiddone.jpg


and finally what the whole thing looks like:
19Motorright.jpg

20MotorLeft.jpg


Still to be done:

The entire cowl still needs to be sanded, primed, and painted. I have the new decals and cowl seal ready to go.

Also need to install the mid section (Ex housing) plates. They were drying when I took the picture.

Overall, I think it came out pretty good. The water you see is from me test running it, and it runs great.
 

Numlaar

Chief Petty Officer
Joined
Jul 9, 2009
Messages
633
Re: My 85' Riviera Tri-hull Rebuild

In between the motor, I was also sanding on the boat... (400grit, 800 grit, 1000 grit, 2000 grit.... UGH) sand sand sand and more sand,,,

I also prepped the trailer, since I would be flipping the boat back over soon...

The trailer frame didnt really need much (it's galvanized), so it got new rollers, and new bunks, lights, winch, floorjack, and front bumper:

04Completefront.jpg


05Completerear.jpg
 
Top