My tri-hull transom replacement w/ pics

Status
Not open for further replies.

drewpster

Commander
Joined
Oct 17, 2006
Messages
2,059
Re: My tri-hull transom replacement w/ pics

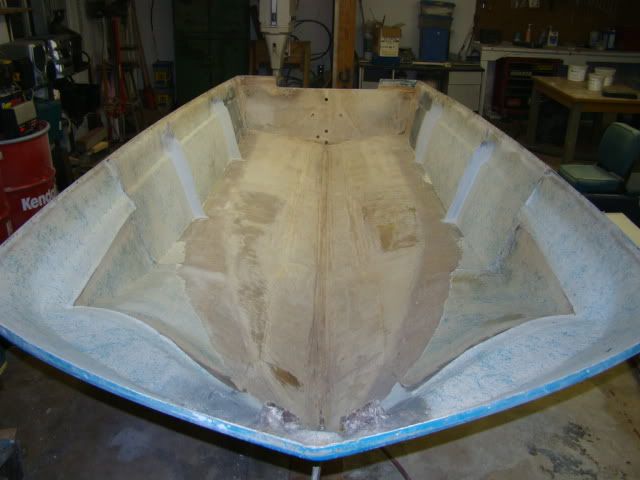
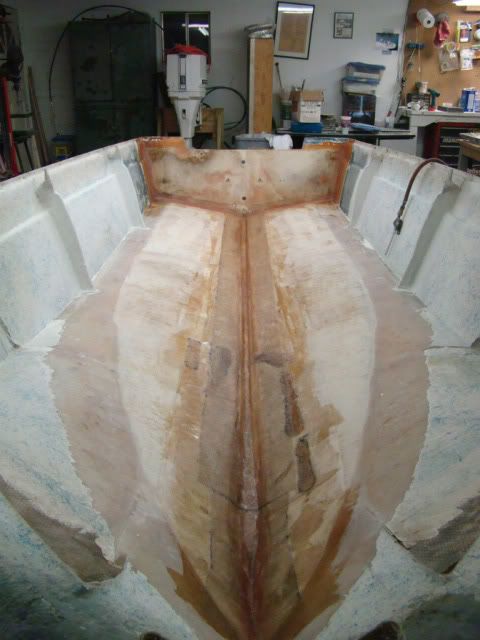
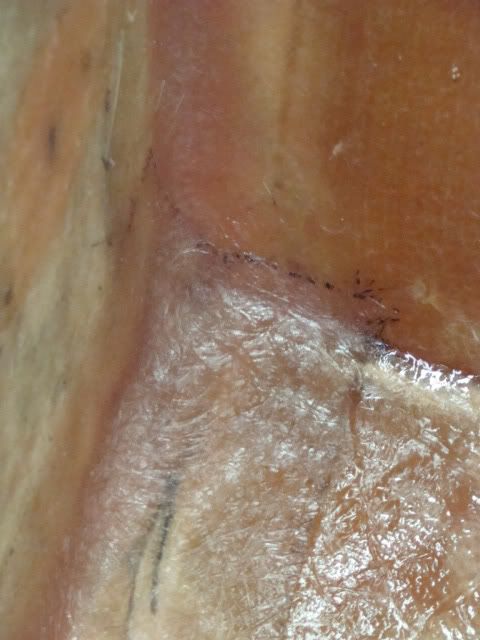
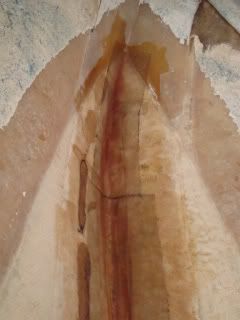
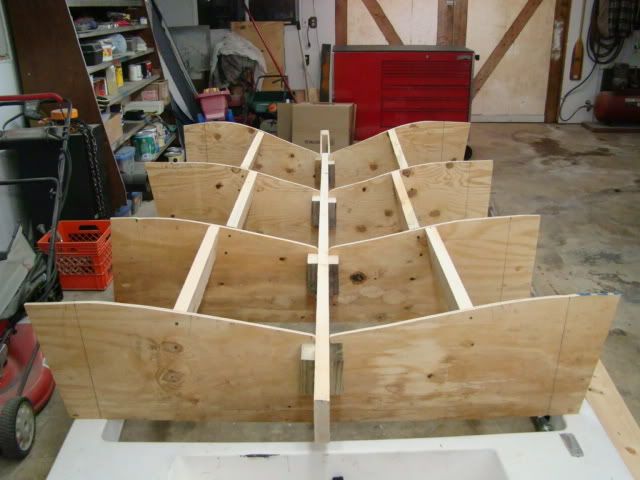
I have been without a camera for awhile but now I am back in business. The tri-hull is going well at this point. I have a good start on all the bottom repairs. I also completed a hull platform to keep the hull from getting out of shape.
DSC01398.jpg

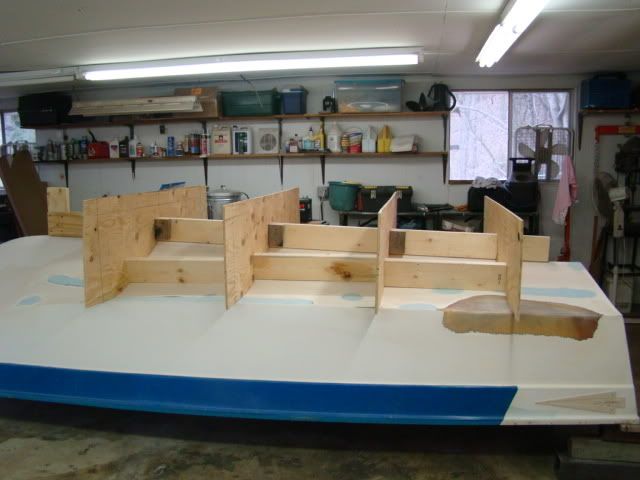
I built it out of ply and 2x6. It took a long time to shape all those supports.
DSC01399.jpg

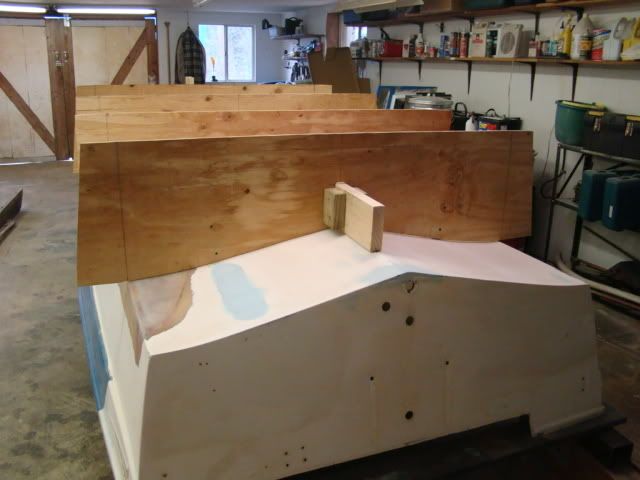
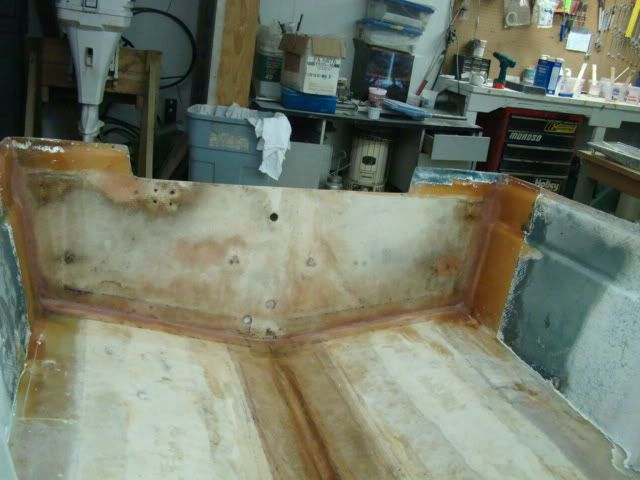
Once the hull gets flipped back over the form will include side bracing to support the sides. I will leave the hull in the form until the transom, stringers and deck get glassed back in.
DSC01403.jpg
 

drewpster

Commander
Joined
Oct 17, 2006
Messages
2,059
Re: My tri-hull transom replacement w/ pics

My next move will be to complete the rough repair work to the hull bottom. Next I will flip the hull back upright and begin the fun part. I have all my supplies together. I bought 5 gal of laminating resin, 10 yards of CSM and 10 yards of roving to get started. I have also collected mixing pots (qt.) mixing sticks, resin rollers, pan liners, a groove roller (6" alum.), fiberglass shears, gloves....the list goes on.
I look forward to the reassembly. I think I have planned fairly well and educated myself well enough to get in to real trouble.:redface:
 

Bob_VT

Moderator & Unofficial iBoats Historian
Staff member
Joined
May 19, 2001
Messages
26,066
Re: My tri-hull transom replacement w/ pics

Wow that platform is nice! That looks like some real work went into that!
 

drewpster

Commander
Joined
Oct 17, 2006
Messages
2,059
Re: My tri-hull transom replacement w/ pics

Thanks Bob, Yes it took me all day, I mean ALL day. I am not a carpenter and I knew it had to be right to keep the hull from warping. Each ply former was cut from an individual template. I had to measure each contact point from floor to keel to cut each correctly. It was a real pain. The floor where the form will rest is flat. I took great pains to make sure of it. When the hull gets flipped over and rests in the form it will keep its shape. I wish I could come up with a use for the platform after the boat gets done.
 
Last edited:

woosterken

Lieutenant
Joined
May 18, 2005
Messages
1,431
Re: My tri-hull transom replacement w/ pics

use it to make a completely wood boat,you already have the perfect skeleton!

woosterken
 

92excel

Chief Petty Officer
Joined
Oct 6, 2008
Messages
477
Re: My tri-hull transom replacement w/ pics

That looks great!

Im no carpenter either but you make want to add some more support on the
ends (outer ends and where its going to rest on the floor) of the plywood to keep it solid in all directions.
 

drewpster

Commander
Joined
Oct 17, 2006
Messages
2,059
Re: My tri-hull transom replacement w/ pics

Thanks for the suggestion 92excel,
That is exactly what I ended up doing. The hull is now flipped back and resting in the form. It had some movement so I added some cross supports under it to stabilize it. It worked great. The boat sits solidly on the floor and does not move when I climb in and out. I also did some thorough measuring and double checking to make sure the boat has not changed shape.
I started the prep process to get the hull ready for new glass. I have about 8 hours in it so far and I have at least another 8 to get it done. There is allot of contaminated glass and under saturated woven roving that needs to be removed before any layup. Pics to follow.
 

drewpster

Commander
Joined
Oct 17, 2006
Messages
2,059
Re: My tri-hull transom replacement w/ pics

Its been awhile since I have checked in, I know. Be proud of me. I got a promotion at work. Its great, but it leaves less time to get in the shop. I have made some progress finally.

After getting the hull resting on its form the grinding began. Allot of grinding! I found delaminated glass layers and contaminated roving everywhere. There is no great mystery here. I simply took a grinder and rubbed off every bad lay-up I could find.
DSC01585.jpg


Here is a good example of what I am talking about. The roving in this pic is obviously lacking resin. The gaps left in the welt have absorbed water and every nasty thing that got into the bilge. All of this had to be ground away until a clean glass surface was left.
DSC01613.jpg


Here is a shot of the example area. All of the stringers were covered with this roving, and all of it had to be removed. There is no way that the new glass would have adhered to this stuff.
DSC01586.jpg


Here is a shot of the clean transom. I found a hidden leak in one corner of it that will have to be addressed before the new transom can go in.
DSC01590.jpg


In this pic you will notice an obvious hole in the center of the dark area. The glass in this area was very thin and allowed water to seep in causing the damage.
DSC01593.jpg


When the hull was built roving was used to reinforce the corners. Instead of filleting the corners the factory allowed the glass to bridge this area. the corner was weak and water seeped in soaking the transom.
DSC01594.jpg


I found bridged roving everywhere. All up and down each stringer the cloth was allowed to bridge in the corners and wet wood and rot is the result. The roving used to cover the stringers delaminated due to water intrusion. It is likely that water has seeped into these areas for a long time. I see allot of filleting in my future!

Needles to say the clean hull will need some work before the new stringers and deck get glassed in. The fillers and chopped strand came in yesterday to get the job done. A little more grinding, some sanding and reassembly will commence!
 

jonesg

Admiral
Joined
Feb 22, 2008
Messages
7,198
Re: My tri-hull transom replacement w/ pics

wow..bad glasswork, it looks like it was designed for a 4 yr lifespan and then off to the dump. Its no exaggeration when you hear we rebuild them better than the factory original.
 

bear_69cuda

Commander
Joined
Oct 10, 2008
Messages
2,109
Re: My tri-hull transom replacement w/ pics

I found some areas in my boat where the factory skimped... Fortunately I had no water issues, and fixed all the areas I came across...

Congratz on the promotion!

Great job so far Sir!

Peace out!
 

beezee28

Master Chief Petty Officer
Joined
Jun 3, 2004
Messages
804
Re: My tri-hull transom replacement w/ pics

drewpster, I am following your progress intently as I will have to under take the same thing as you did as I have soft spot on the deck of my boat and very apprehensive to get started. I am new to fibreglassing. What do you mean by "I see allot of filleting in my future!". Basically how do you do filleting? Can you please explain for those untaught in fibreglassing. I will keep watching your post for info and pictures. thanks.
 

drewpster

Commander
Joined
Oct 17, 2006
Messages
2,059
Re: My tri-hull transom replacement w/ pics

Basically to fillet is to fill an inside corner so that it forms a rounded inside surface.

A boat is made with layers of fiberglass cloth and resin. The cloth serves as means of reinforcing the resin. It is difficult to force fiberglass cloth, wet with resin, in to a sharp inside corner. The cloth tends to bridge the corner causing a gap or void in the corner. When it is dry and hard the void in the corner will remain. This means there is a gap between the outside skin of the corner and the inside skin. This void can collect water over time.

I my case the void left by the bridged fiberglass collected water which came in contact with the wood core of the transom. The wood then soaked up this water. This caused the wood core of the transom to get fully wet over time. The same occurred in the bilge under the floor (deck). All of the wood cores eventually became wet causing them to un-stick (delaminate) from the surrounding fiberglass. This also caused the fiberglass itself to delaminate.

All this leads to rot which leads to soft spots and a weak structure.

The cure is to form fillets in any sharp corner allowing the fiberglass cloth to firmly adhere to the underlying layers in the corners. No gaps or voids means there is nowhere for the water to collect. NO ROT.

There are many ways to fillet an inside corner. The basic idea is to mix up a thickened batch of resin and fill the sharp corner with it. On my transom I used 1/8" chopped fiberglass and fumed silica mixed with resin to make a paste. I then used a plastic spreader to smear the mixture in to the corners filleting them. I then covered this mixture with a piece of Chopped strand mat in the corner. This made a inside curve on top of which I will lay roving (heavy fiberglass cloth) to make a smooth inside curve. I will continue this practice anywhere I find a sharp inside corner.

Filleting the corners will insure that any fiberglass cloth used in the corners will not bridge leaving gaps for water to do its damage.
 

19ftSigna

Seaman Apprentice
Joined
Apr 6, 2009
Messages
44
Re: My tri-hull transom replacement w/ pics

Looks great man, I wish I had the guts to tear into mine and see what kind of damage, but today I finally got my 115 running and found blown head gaskets, and took off the heads and then found a scorched cylinder. Oh well throw some new gaskets on and ride her till she bucks me!! lol
 

drewpster

Commander
Joined
Oct 17, 2006
Messages
2,059
Re: My tri-hull transom replacement w/ pics

I am finally starting to put someglass back instead of spraying it all over the shop with a grinder.
I started making fillets in all the inside corners of the transom. I also filled the keel. I covered all the fillet areas with a layer of chopped strand mat.

DSC01718.jpg


It may not be professional grade but they turned out ok. No voids.
DSC01724.jpg


To make the filler I used chopped strand fiber, Cabosil and Talc. I kicked the resin before mixing in the components. I added enough of each until it took on a firm consistency. I also kicked a second pot of plain resin to wet the surface and the chopped strand mat I used to cover the filler.

DSC01726.jpg


I applied the filler using a plastic spreader. I cut one spreader in to a round shape to help form the fillets. The mix was easy to shape in place and held in the corner until the CSM was applied over it.

I used the same filler/ CSM procedure to fill and cover the keel area inside the hull. After grinding, I found many thin and weak areas all along the keel. I am going to try to cover it further with a layer of Woven roving later if I can. I may not be able to work Roving into the deep groove. If not I will used CSM.

DSC01721.jpg


The bow end of the keel is very narrow. It will be next to impossible to work the roving I have in to it. If I decide to build more in to this area I will need to use CSM.

DSC01723.jpg


So far things are progressing nicely. After a short time using it I learned how to control the work time of the resin somewhat. We have had some cooler days (50-60 deg.) and the shop stays pretty cool. I was worried I had not used enough hardener until it finally started to gel.
I will be starting on the transom next weekend if time allows.
 
Last edited:

maxum247

Lieutenant
Joined
Sep 18, 2007
Messages
1,363
Re: My tri-hull transom replacement w/ pics

Nice looking work so far on the hull! Looking back on my boat project I find myself wishing I had gutted my hull like you've done. I did mine a section at a time and don't feel as confident that I got everything replaced as neatly as if I had of ripped it all out and started with an empty hull. But I've decided the next time I redo a boat it will be cleaned out from the start like yours. Keep up the good work, I'll be checking out your progress from time to time.

max
 

jcsercsa

Captain
Joined
May 21, 2007
Messages
3,401
Re: My tri-hull transom replacement w/ pics

Looking Good there drewpster !!!!! dont see a lot of bubbles, nice work !!!! Keep it up and keep them pic's comming !!!!!! John
 

ezmobee

Supreme Mariner
Joined
Mar 26, 2007
Messages
23,767
Re: My tri-hull transom replacement w/ pics

I don't know much about glass but it looks to me like you've done a really great job on those fillets. Keep it up.
 

bear_69cuda

Commander
Joined
Oct 10, 2008
Messages
2,109
Re: My tri-hull transom replacement w/ pics

Looks pro-grade to me Sir!

Great work!

"Cabosil and Talc. I kicked the resin before mixing in the components"

Please excuse my ignorance, but what does kicked the resin mean? And what are Carbosil and Talc used for? :confused:
 

mike64

Lieutenant Junior Grade
Joined
Apr 10, 2008
Messages
1,042
Re: My tri-hull transom replacement w/ pics

Great post! Don't know how I overlooked this one till now. Going to add this one to my subscribed threads, as I know a transom repair is lurking in my future.
 

drewpster

Commander
Joined
Oct 17, 2006
Messages
2,059
Re: My tri-hull transom replacement w/ pics

"Cabosil and Talc. I kicked the resin before mixing in the compoents."

"Kicked" is probably is misuse of the term. By kicked I mean that I mixed the hardener with the resin prior to mixing in the thickeners and Glass fiber. Kicked normally refers to the resin beginning to harden or gel up.

The Cabosil and Talc are both thickeners. The Cabosil (also called Areosil or fumed silica) is basically exploded glass. It is very light weight and makes the resin thicken to a creamy consistency for easy spreading. The talc (talcum powder) is just a thickener. It is less expensive than Cabosil but very heavy in weight. I used both to save money. BTW- If you ever use Cabosil make sure you use a mask or respirator. It is very light and will float around in the air. Bad news stuff if you inhale it.

Thank for all the kind words everybody. Its a real motivator. Can't wait to get started on the transom!
 
Status
Not open for further replies.
Top