Need help with transom repair w/pics

Jon Sob

Master Chief Petty Officer
Joined
Jun 11, 2011
Messages
827
Re: Need help with transom repair w/pics

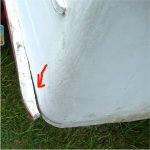
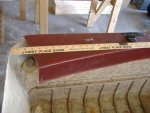
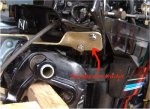
Sorry for all the questions but I am trying to figure this all out and have answers before I go out and do the work. I had to cut the cap to get to the transom and, as you can see in the photos, the cap has pulled away from the hull. I am planning on grinding a bevel where the hull meets that seacast stuff, or whatever it is that is under the cap, and filling it with PB. My question is will the PB bond to whatever that stuff is or is there something else I should be using?

This is the area that I am talking about:
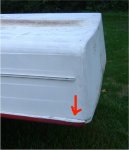
DSCF1950.JPG


This is where it pulled away:
DSCF1949.JPG
 

Woodonglass

Supreme Mariner
Joined
Dec 29, 2009
Messages
25,929
Re: Need help with transom repair w/pics

If she were mine, I'd PB it + lay a couple layers of CSM. I would also fill those depressions in the keel first with some PB and then lay a layer or two of CSM. Don't forget to acetone wash it all before application.
 

Jon Sob

Master Chief Petty Officer
Joined
Jun 11, 2011
Messages
827
Re: Need help with transom repair w/pics

Thanks Wood ..... That's what I will do.
 

*EdC*

Senior Chief Petty Officer
Joined
Oct 31, 2007
Messages
661
Re: Need help with transom repair w/pics

If she were mine, I'd PB it + lay a couple layers of CSM. I would also fill those depressions in the keel first with some PB and then lay a layer or two of CSM. Don't forget to acetone wash it all before application.

Hey Jon,

Woodonglass is the master here. Certainly, I am not :redface: Follow his advice and you can't go wrong! I do however, have a keen interest in your project though. Like you, my MFG has the same stuff between the hull and the deck. Sure would be nice to know, just what the heck it is! It's almost like the deck is an inch or so wider than the hull.. [all the way around]. Also, what's weird is, the deck seems glued on with this stuff :confused:.
From what I can figure, MFG must have mated the hull to the deck in the 'up-side down position' then poured this stuff around the perimeter. Mine has no fasteners at all at the deck/hull joint, just the same stuff you got.
Hopefully someone will chime in here who knows what it is, and how to repair it. I'll be watching!
 

Jon Sob

Master Chief Petty Officer
Joined
Jun 11, 2011
Messages
827
Re: Need help with transom repair w/pics

Hey Ed .... You are right about Woodonglass he has given me excellent advice throughout my project as well as a lot of others on iboats.

As for that stuff I have no clue what that is. I posted photos and asked if anyone knew what it was and didn't get a response. I tried to remove my cap like everyone else did but I didn't get very far 'cause I was a little worried when I removed the rub rail and found no bolts, screws or rivits. I didn't want to cut the entire cap off because (being new to boats) I had no clue how I would put it back on..... LOL. I had no clue how to do any of the things I have done so far and have to give credit to everyone who has help me along the way.

You can see from the photos that I cut just enough of the cap off to get to the transom and replace it. I am going to clean all of that stuff out of the part of the cap that I had removed and fill it with PB and stick it back on and hope that it works.

I worked the cap loose from the transom
DSCF1720.JPG

Then I cut it enough to get to the transom
DSCF1762.JPG
 

Jon Sob

Master Chief Petty Officer
Joined
Jun 11, 2011
Messages
827
Re: Need help with transom repair w/pics

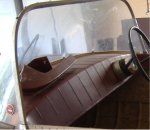
Went down to the plastics supplier and bought a sheet of 1/8" Lexan. Took my old scratchy and cracked windshield and made a template of it out of heavy paper. Tried real hard not to let the paper fall into the curve of the windshield but kept it pretty straight. Laid the template onto the Lexan and traced it out. Took a jigsaw with a very fine blade and cut out the shape of the template. Cleaned up the frame from the windshield and everything looks good and is ready to put together. I followed the instructions on Mark42 '65 Niagara tutorial. I didn't put it together yet but I will let you know how it goes.

Old windshield
windshield.jpg

Template all cut out
DSCF1951.JPG

Lexan cut and ready to go
DSCF1843.JPG
 

Jon Sob

Master Chief Petty Officer
Joined
Jun 11, 2011
Messages
827
Re: Need help with transom repair w/pics

I am going to put the final layer of mat on my keel in the morning and I am going to add wax. Do I add the wax before the hardner, after or all at the same time or does it really matter? By adding the wax will it change anything as far as how much time till it starts to set?(working time)
I have not used wax before and was kind of wondering what to expect.
 

Woodonglass

Supreme Mariner
Joined
Dec 29, 2009
Messages
25,929
Re: Need help with transom repair w/pics

Hardener then wax but... You don't have to add the wax unless you just want to. It will stay tacky for a while longer but it will eventually harden and be fine. MFG's hardly ever use wax. For a Deck, I probably would, but for the keel, I'd wouldn't bother. But if you've got it and want to use it, then go for it.
 

Jon Sob

Master Chief Petty Officer
Joined
Jun 11, 2011
Messages
827
Re: Need help with transom repair w/pics

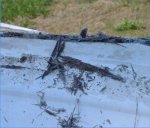
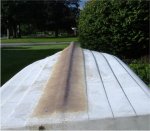
DONE!!! I am finally done with the keel. It was an unexpected repair that set me back a couple of weeks but it is all done now. Now I can sand the hull, paint it and flip it back over and get started on the sole.

It went from this:
DSCF1893.JPG


To this:
DSCF1957.JPG
 

Woodonglass

Supreme Mariner
Joined
Dec 29, 2009
Messages
25,929
Re: Need help with transom repair w/pics

JS, IMHO, that is an excellent repair on the keel. You can officially call yourself a "Glasser" now. What paint R U going to use?
 

Jon Sob

Master Chief Petty Officer
Joined
Jun 11, 2011
Messages
827
Re: Need help with transom repair w/pics

Thanks Wood ....... I have a friend that paints cars and he said that he would spray it for me all I have to do is buy the paint. I am going to use the stuff in your thread on page 10. I am going to try and get him to spray the hull ASAP so that I can flip it and get started on the sole..... It's going to start getting cold over here in Ohio.... LoL. Did you get my e-mail?
 

Decker83

Commander
Joined
Apr 5, 2011
Messages
2,593
Re: Need help with transom repair w/pics

Hey Jon
The keel looks great. You did a really good job. Looking forward to seeing it painted. You have put in alot of work.

Kent
 

rrumba

Ensign
Joined
May 31, 2011
Messages
901
Re: Need help with transom repair w/pics

looks just like it should, nice job........
 

Jon Sob

Master Chief Petty Officer
Joined
Jun 11, 2011
Messages
827
Re: Need help with transom repair w/pics

Thanks Kent and RR .... It wasn't as bad as I thought it was going to be.
 

Jon Sob

Master Chief Petty Officer
Joined
Jun 11, 2011
Messages
827
Re: Need help with transom repair w/pics

Well, I searched the site for a thread that would show me how to connect the controls to the motor and was not able to find one so I went to a repair shop in Akron, Ohio ( 1hr drive ) and this fellow had all the parts I needed to connect the cables and the steering. I am going to try to detail the process here so if anyone else is trying to convert from a tiller to controls maybe this will help.

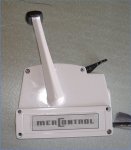
Ok first here are my controls and motor:
DSCF1939.JPG DSCF1844.JPG

First thing is to change the tilt tube for the rotary steering cable. You have to be careful not to over tighten the plastic nuts:
tilt tube.jpg Plastic nuts.jpg

After that was installed then I removed the tiller handle. You have to loosen the nuts holding the cables in place and then remove the cables from the wheel attached to the throttle.
tiller cables.jpg
 

Jon Sob

Master Chief Petty Officer
Joined
Jun 11, 2011
Messages
827
Re: Need help with transom repair w/pics

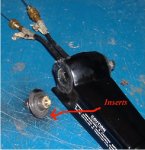
Then remove the bolts on either side of the tiller handle to remove it but be careful 'cause these bolts go into an insert that will fall out easily:
DSCF1984.JPG

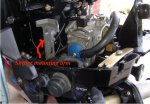
Now that the tiller handle is off you will see a mounting hole on that wheel where the cable ends were attached. This is where the part (not sure of the correct part number) goes for attaching the cable to the wheel:
DSCF1985.JPG DSCF1986.JPG

There is a barrel on the end of the control cable along with a plastic sleeve that attaches to the end of the cable. The barrel slides over the post on the part that is attached to the wheel and the end sleeve slides onto the pin and it is locked into place by the wire bracket.
DSCF1987.JPG DSCF1990.JPG

And now your throttle is connected.
 

Jon Sob

Master Chief Petty Officer
Joined
Jun 11, 2011
Messages
827
Re: Need help with transom repair w/pics

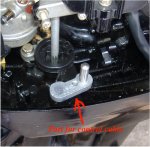
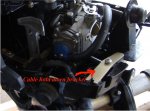
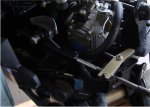
Now for the shifter. This is pretty simple. Inside the hood near the shifter you will find a mounting arm with a hole in it. This is where your cable will attach:
DSCF1992.JPG

You need to remove the cable hold down bracket:
DSCF1991.JPG

You need to install the plastic sleeve, which has the screw with a spring attached, onto the end of the cable:
DSCF1989.JPG

You then run the cable thru the hole under the cable hold down bracket and attach the cable by inserting the screw into the mounting arm and turn it a 1/4 turn and replace the cable hold down bracket:
DSCF1998.JPG

Sorry for not using the proper terminology but I don't know what these parts are called...... LOL
 

Jon Sob

Master Chief Petty Officer
Joined
Jun 11, 2011
Messages
827
Re: Need help with transom repair w/pics

You will need to attach the steering arm bracket to the bottom of where the tiller handle was:
DSCF1993.JPG

Now the cable for the steering slides into the tilt tube and is attached by a large nut on the cable:
DSCF2000.JPG

Now to attach the steering arm to the cable end and to the steering arm bracket. Check your clearence and range of motion and you are ready to go:
DSCF2001.JPG
 

Jon Sob

Master Chief Petty Officer
Joined
Jun 11, 2011
Messages
827
Re: Need help with transom repair w/pics

I did leave out the obvious such as lubricating the cable end before installing into the tilt tube and stuff like that but I think you can figure that out on your own. I hope it helps anyone taking on this task and feel free to ask questions or to make corrections.
 
Top