SS Mayfloats Nightmare Project -Phase II

SS MAYFLOAT

Admiral
Joined
May 17, 2001
Messages
6,372
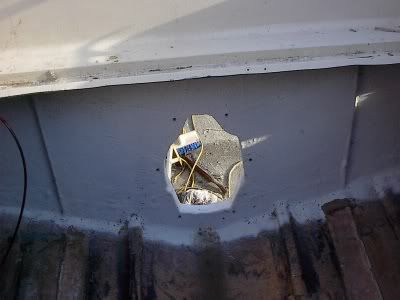
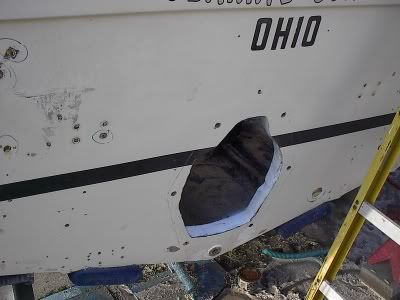
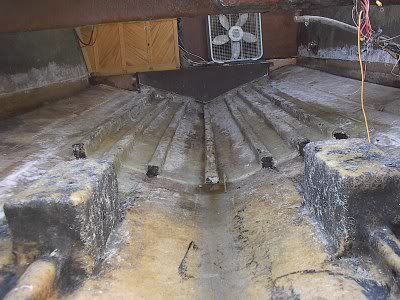
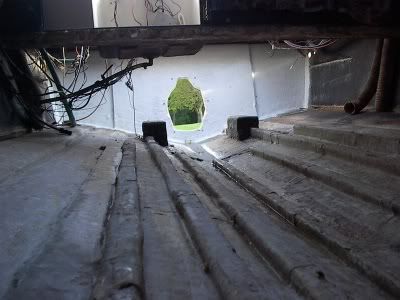
Trying my best to aquire energy to get-r-done, I have managed to get the transom in. A night of long necks after a hard day/nights work, my trusty chainsaw went wild and wouldn't stop at the transom. Yeah, it opened up more cans of worms than I wanted. There were 2 stringers that I didn't replace 5 years ago and thought I might as well do them now. Douglas Fir on order and waiting for it to come in. Normally it would have been here in a week, but with the gas prices up, the shippers are now waiting for a full load before sending. Now that just makes me want to cry! <br /><br />Saturday I started grinding down all the hull glass on the inside. Found that using a knotted wire brush really does a great job on a mini grinder. Took me about 7 hours. At least I'm ready for my wood that is not here. :( <br /><br />Here are some pics of my progress so far. The Gorilla glue worked excellent for glueing in the wood for the transom. Painted it white vs black. Why do they paint bilge areas black? What were they thinking? <br />
K.jpg
<br />
J.jpg
<br />
I.jpg
<br />
H.jpg
<br />
G.jpg
 
D

DJ

Guest
Re: SS Mayfloats Nightmare Project -Phase II

They paint bilges black so you can't see the defects. ;)
 

SS MAYFLOAT

Admiral
Joined
May 17, 2001
Messages
6,372
Re: SS Mayfloats Nightmare Project -Phase II

DJ, I supose they call it "Bayliner Black"?
 

JasonJ

Rear Admiral
Joined
Aug 20, 2001
Messages
4,163
Re: SS Mayfloats Nightmare Project -Phase II

Looks sweet so far. You can't beat a white bilge and engine compartment. Why anyone would go with a dark color is beyond me...
 

Boomyal

Supreme Mariner
Joined
Aug 16, 2003
Messages
12,072
Re: SS Mayfloats Nightmare Project -Phase II

Here's the template for yer bilge SS. :D Keep up the good work. <br /><br />
DSCF0777.jpg
 

Tail_Gunner

Admiral
Joined
Jan 13, 2006
Messages
6,237
Re: SS Mayfloats Nightmare Project -Phase II

:eek: That's some quality work there Boomyal.
 

SS MAYFLOAT

Admiral
Joined
May 17, 2001
Messages
6,372
Re: SS Mayfloats Nightmare Project -Phase II

That is very sweet Boomyal!<br /><br />Well Sundays progress went unproductive. It was mostly a sit and think day. 5 years ago, I had problems getting the fuel tank back in. It just wouldn't sit level. Finally it came to me why my boat always listed to the starboard side. It seems that the tank being lower on the starboard side let the gas in the tank move to that side.<br /><br />Found the problem. One of the port tank stringers is an inch higher than the rest causing it to lean to the starboard side. At least that will give me something to do until my douglas fir comes in.<br /><br />I'm starting to loose my ambition on this project, but I know I need to get it done.
 

willamettejeff

Chief Petty Officer
Joined
Nov 15, 2004
Messages
550
Re: SS Mayfloats Nightmare Project -Phase II

Looking good so far SS. One guestion, though. Did you use the Gorilla glue to glue the transom wood into the boat? Thanks, Jeff.
 

KaGee

Admiral
Joined
Aug 14, 2004
Messages
7,069
Re: SS Mayfloats Nightmare Project -Phase II

Lookin good SS! Don't be discouraged!
 

woosterken

Lieutenant
Joined
May 18, 2005
Messages
1,431
Re: SS Mayfloats Nightmare Project -Phase II

SS,don't get dishearted,remember one amateur built the ark,but a whole team of engineers built the titanic!<br />in other words any body can do it fast,perfect takes time.<br />ken
 

SS MAYFLOAT

Admiral
Joined
May 17, 2001
Messages
6,372
Re: SS Mayfloats Nightmare Project -Phase II

Thanks guys, little by little, I'll get it done. Right now figuring out how to make my fuel tank bed level with the hull of the boat. Compound angles is not my best work. I have a plan now, but I need to get my rear deck back in and the scuppers hooked up. This will keep water out when it rains. Ooops I said the "R"word.<br /><br />Yes William, I did use the Gorilla glue. I added a few new holes through the hull skin above the water line. Used 2" square blocks with washers and screws to pull the plywood up to the hull skin. I used the existing hardware holes for the swim deck, trim tabs, and other stuff to run my hold down screws through. Then I glassed in the edges, painted, and then removed the fasteners holding in the plywood. I smacked it with a rubber mallet, and it sounds solid. Not like before. Now to get my lumber in so I can get it finished. Thanks for the replies.
 
Top