TB's 1977 Starcraft Chieftain 22?

Status
Not open for further replies.

g0nef1sshn

Lieutenant
Joined
Feb 24, 2015
Messages
1,291
what type of plywood did you use exterior grade the marine is very expensive.is the spar urethane by hellsman better than the west marine expoxy? or are they the same?

Thanks

I used exterior grade (acx) from local lumber yard.
 

thebrain

Banned
Joined
Jun 3, 2010
Messages
358
You have old wood in the transom and you're going to "slap a sheet of Arauco plywood on and call it a day."

You will also be calling SeaTow when the bracket and motor fall off in the ocean.

Are you going to continue on your merry way and ignore all you've been told? I'm sorry, but you are headed down the road to disaster. You don't fool around with boats when they can kill you!

Please do the job right!

I've kindly asked many times how to remove the transom all I get is a link to a bunch of builds that the images have been removed it also makes zero sense on not being able to respond to old threads.
 

GA_Boater

Honorary Moderator Emeritus
Joined
May 24, 2011
Messages
49,038
Please do not question the rules you agreed to follow when you joined the forum. Replying to old threads when the OP no longer visits will get you no answers. Also we have no control over how photos are inserted in threads - Absolutely none. Depending on the photo attachment method used, the pics are in the forum forever or they can disappear. Nothing can be done when the original poster leaves the forum.

You need to sit down and think about what you really want to do. One day it's get another Mercruiser motor and later that same day you are going with a bracket and outboard, Then you swing like a pendulum back and forth. Make up your mind! Any advice you are looking for will be different and dependent on going with a bracketed OB or staying with a Mercruiser.

Now lets talk about removing the transom wood, which needs to be done whichever way you go. You keep asking for pictures, well we've asked for pictures from you. Are you going to help us help you? Pick one of your threads and ask questions in only one thread.

I want to see pictures of the inside of the transom with the motor, outdrive and all transom hardware removed. The later, larger Starcrafts are built differently in regards to the transom. We need to see exactly what you have. I don't want to see pictures from another builder's thread! I want pics of your boat.

Lets start off fresh - OK?
 

dozerII

Admiral
Joined
Oct 25, 2009
Messages
6,527
Please do not question the rules you agreed to follow when you joined the forum. Replying to old threads when the OP no longer visits will get you no answers. Also we have no control over how photos are inserted in threads - Absolutely none. Depending on the photo attachment method used, the pics are in the forum forever or they can disappear. Nothing can be done when the original poster leaves the forum.

You need to sit down and think about what you really want to do. One day it's get another Mercruiser motor and later that same day you are going with a bracket and outboard, Then you swing like a pendulum back and forth. Make up your mind! Any advice you are looking for will be different and dependent on going with a bracketed OB or staying with a Mercruiser.

Now lets talk about removing the transom wood, which needs to be done whichever way you go. You keep asking for pictures, well we've asked for pictures from you. Are you going to help us help you? Pick one of your threads and ask questions in only one thread.

I want to see pictures of the inside of the transom with the motor, outdrive and all transom hardware removed. The later, larger Starcrafts are built differently in regards to the transom. We need to see exactly what you have. I don't want to see pictures from another builder's thread! I want pics of your boat.

Lets start off fresh - OK?


Keep banging your head on the wall and it hurts GA:D:frusty:
 

g0nef1sshn

Lieutenant
Joined
Feb 24, 2015
Messages
1,291
I've kindly asked many times how to remove the transom all I get is a link to a bunch of builds that the images have been removed it also makes zero sense on not being able to respond to old threads.


The missing pics is the reason I do not like the photo bucket method. Once all bolts and hardware are out of the transom you and maybe screw a 2x4 to the old and use a jack to lift it out, Some have come alongs and hoist them out from over head support or engine hoists. If the gunnel goes over the corners, some bend it up and remove the wood. some like my PO cut what was needed to remove the old wood. either way, all transoms seem to be in different conditions of rot that require the owner to use multiple methods to get the wood out.

I think I had one splash well screw that I didnt drill out enough causing me extra hours trying to figure out what was up. Keep at it TB. I had a few run in's with the rules early on and although never on purpose, I just said my apologies and stuck with these guys. And I am glad I did. Some unfortunatley leave disgruntled and then there photo bucket pics disappear along with the builder leaving picless threads?
 

jbcurt00

Moderator
Staff member
Joined
Oct 25, 2011
Messages
25,197
All pix posting sites and methods have their pros and cons. ALL Do, even both the iboats 'onsite' uploader.

Lets focus on getting TBs project under way and headed in the right direction and leave the posting method discussion for somewhere else.

TB, its always best to use your boat for reference. That way there is no mistaking what needs to be done, or has been done. Since you didnt own this boat originally, even a different boat of the exact same year, make and model may be slightly different.

And TB is correct, simply bending up the gunwale isnt going to release his transom. More involved then that, hence his request for how to pix and GAs request for pix of his own transom cap
 
Last edited:

classiccat

"Captain" + Starmada Splash Of The Year 2020
Joined
Dec 20, 2010
Messages
3,412
+1 on the pics. :photo:

sitting here letting our Easter feast digest, I found a thread in the rebuilds section that might apply...but we won't know until ya snap some pics of that bad boy.

Description and pictures.

Re: Well, I did it!

I made some progress today. I ordered a rivet gun, bucking bar and some rivets. Then I went out and stated on the boat. I took out the rotted part under the windshield and then took out the transom! It was a total loss. I pulled it out in 2 big hunks, and 5 gallons of pieces. I took some pictures, but I don't have the camera with me at the moment.

To get the transom out, I took off the railing around the back of the boat. I took out the screws that went through the transom from the outside of the boat. I then took the corners off the rub rail and took the back rub rail out. I then took the screws out of the metal rub rail housing and pulled it off the boat. Then I took the rub rail off the sides. I had to pull the front cap from the boat and drill out the rivets that held the rub rail in place. Then I could slide the sides out.

I loosened the rub rail housing at the transom where it was holding the metal in place preventing the transom from coming out. Then I drilled out the rivets that hold the piece of metal over the transom and took it off the boat. The tabs from the gunwhale that were over the transom bent out of the way easily. I will have to problems putting the new one in!


Now my next step is fixing rivets, and fixing that cracked rib in the front of the boat. I am going to start cutting out panels for the boat, but im not going to install them until i have the gluvit finished.

Sorry for the typing. Im using a really, really little laptop to do this and the keyboard and my fingers arn't getting along. It's painful!

I will upload pictures when Im back behind my machine.

Foster


Re: Well, I did it!

Here are the pictures of the job. Tomorrow I am going to fab up the new board to support the bow and the board in front of the transom. I plan to install it the following day. My trip to Japan is postponed to next Wednesday so I still have time.

Oh yeah, and my bucking bar arrived today! I can't wait to start painting this beast!

DSC00509.jpg

DSC00512.jpg

DSC00522.jpg

DSC00523.jpg

DSC00524.jpg
 

North Beach

Commander
Joined
Sep 29, 2008
Messages
2,022
Maybe this will help a little?

QUOTE=North Beach;n4637714]Re: 75 Starcraft Islander 22 I/O to CC Conversion

JAS, before I paint I need to remove the rub rail or it won't look right. Plus the rails need polishing!! And I do plan on talking to the metal fab guys about whether they can get me pieces that long and at least cut new side pieces with the turn down and return in it. We'll see?

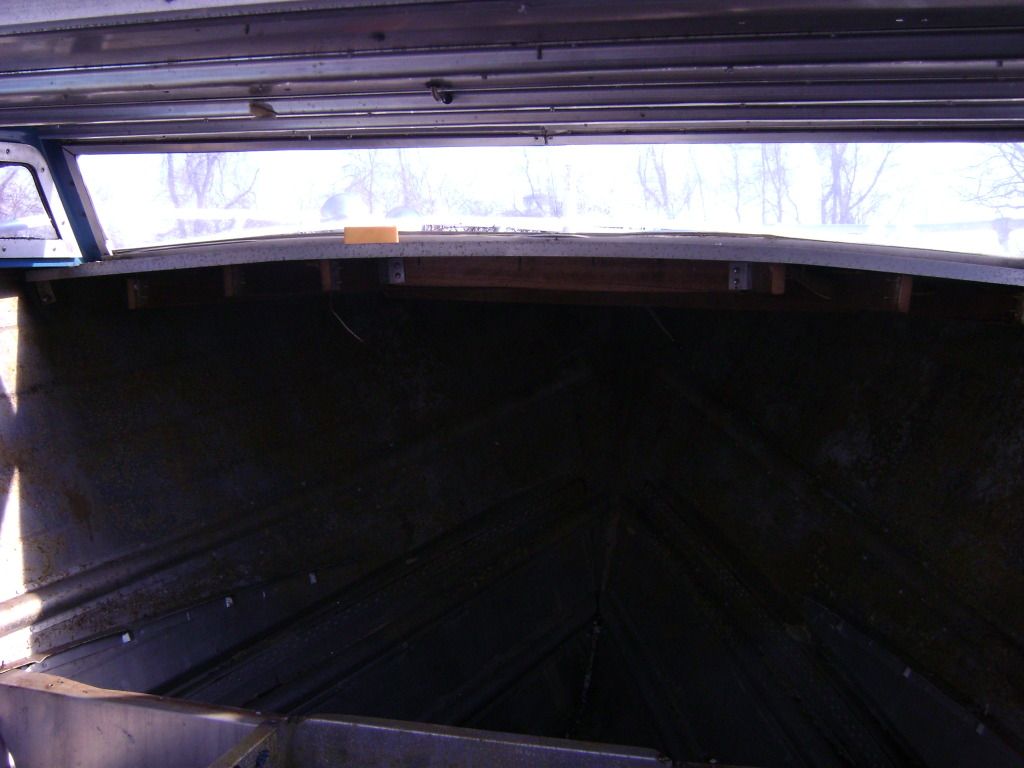
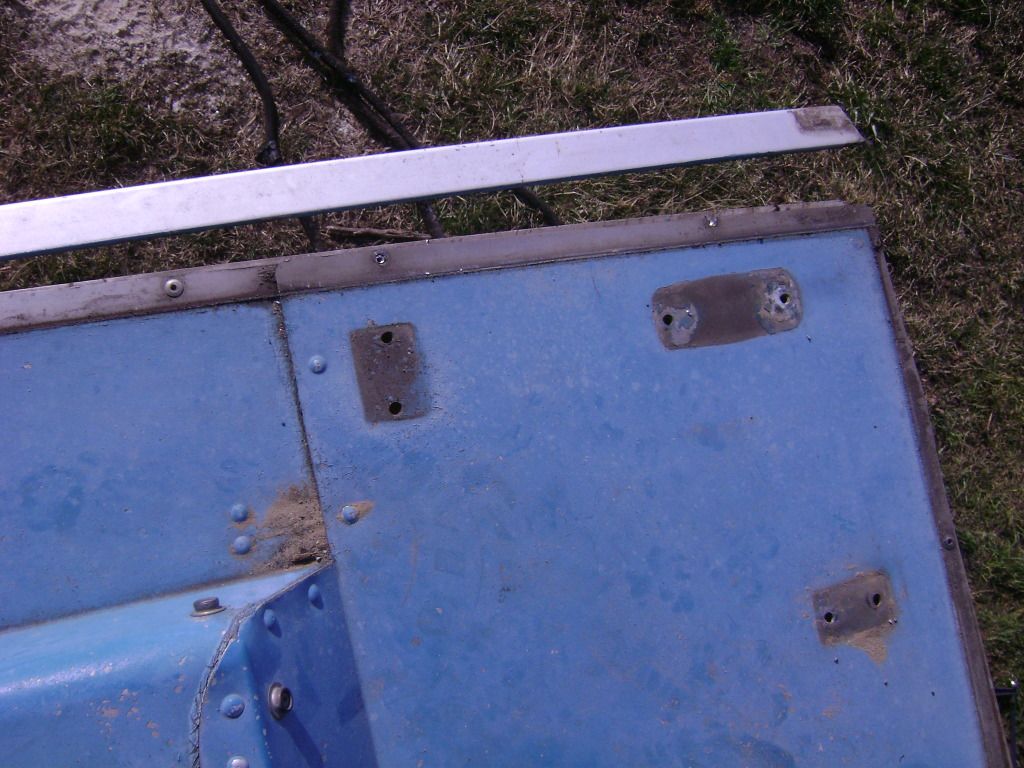
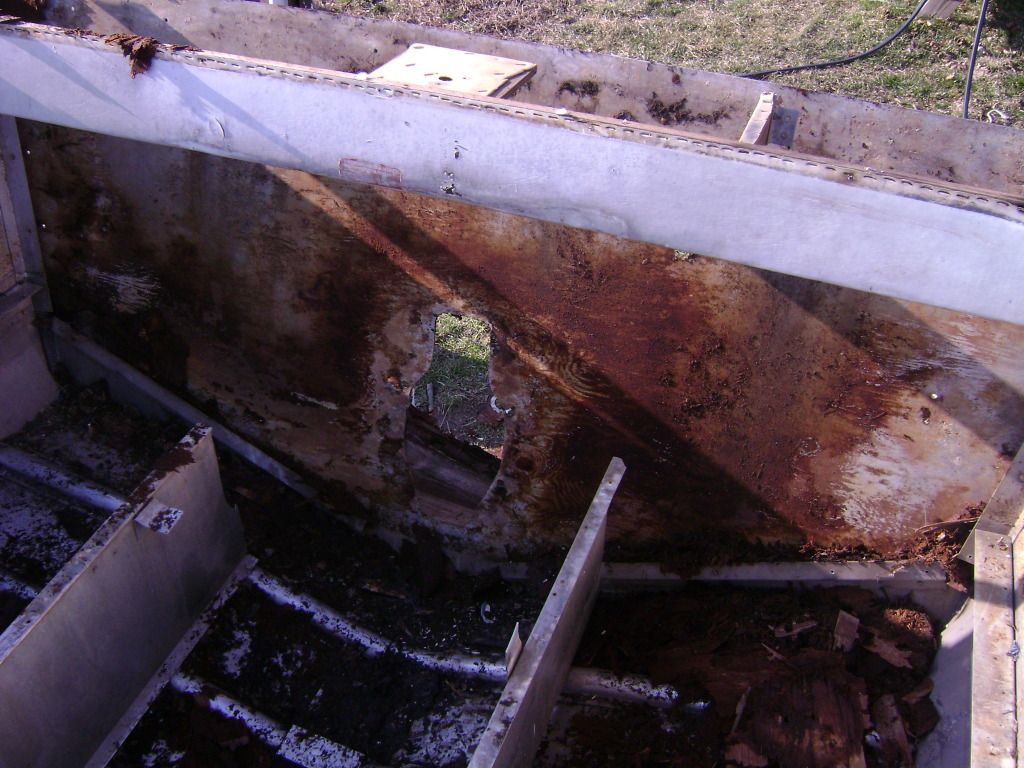
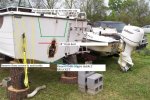
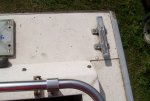
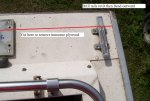
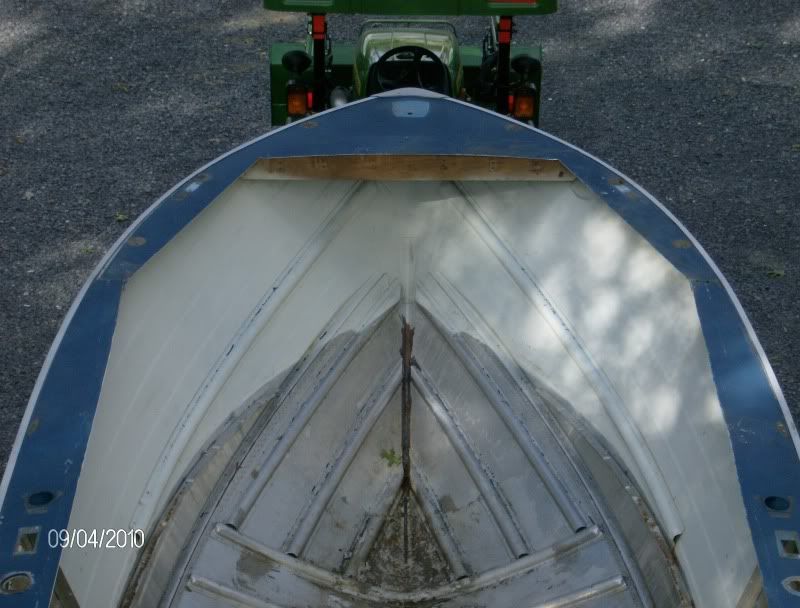
OK, got up this morning and jumped on it again. First thing to do was run a line and trim up the gunwales to final cut. I?m bound by the narrowest area that used to be the front corner of the cabin which measures 5? from the inside edge of the outer rub rail. I decided to cut straight angles to the bow in order to allow for the channel we?re gonna have to fabricate that goes vertical on the inside face of the gunwale. That way we can use straight pieces of sheetmetal and we?re not trying to break any radius stuff. Next I removed all the remaining hardware, lights, rod holders etc. and the two side rub rails and the arrowhead end caps. Good thing I saved the ones off of Old Blue cause these were shot. I climbed up on the roof to get you folks these shots so you can get an idea of how she?s gonna lay out. I?m really starting to get excited!!!!

Islander40.jpg


Islander41.jpg


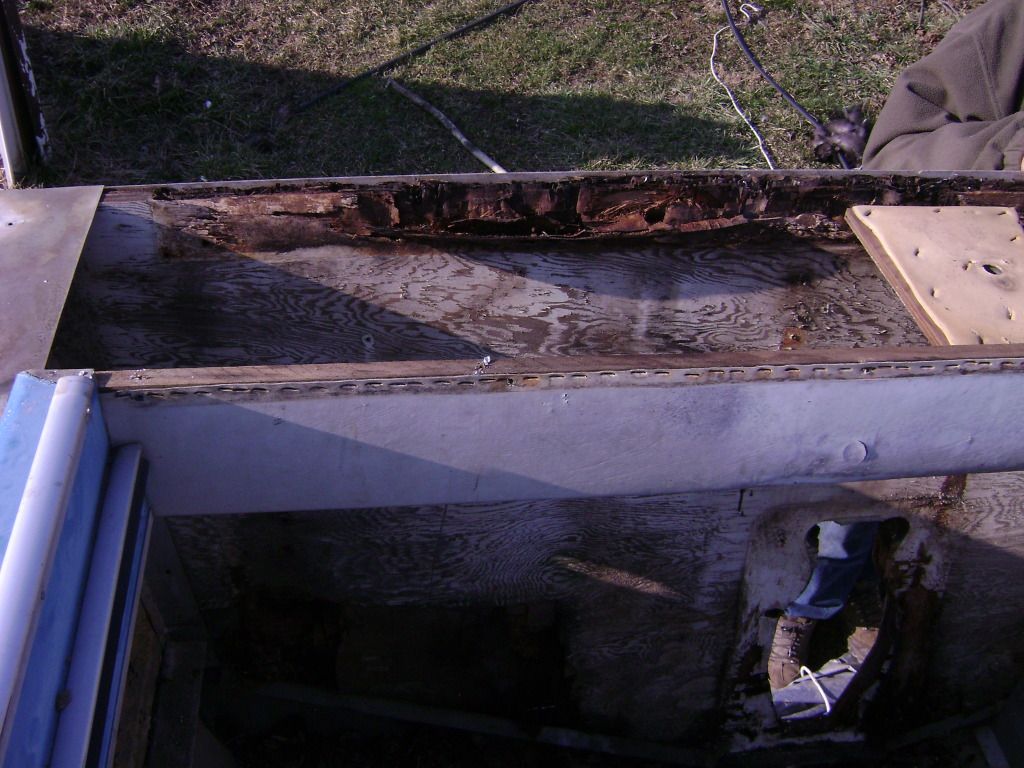
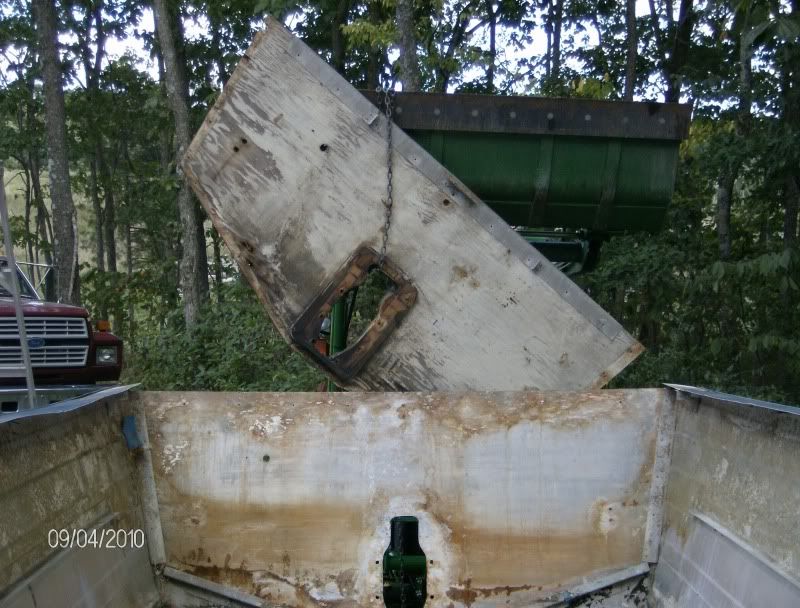
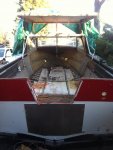
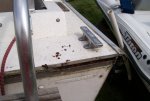
Next to do was remove the 5 thousand thru transom bolts and screws. Then I removed a few of the outer rub rail thru bolts on each side at the stern and the entire transom cap after I removed the remainder of the vertical gunwale extension in the back. Hooked up the ole JD and a chain and gave it a yank. The transom wood didn?t really want to budge, so I went all around the edge with a big honkin screw driver and the ball peen hammer and once it loosened the entire edge it popped out like butter.

Islander42.jpg


Islander43.jpg


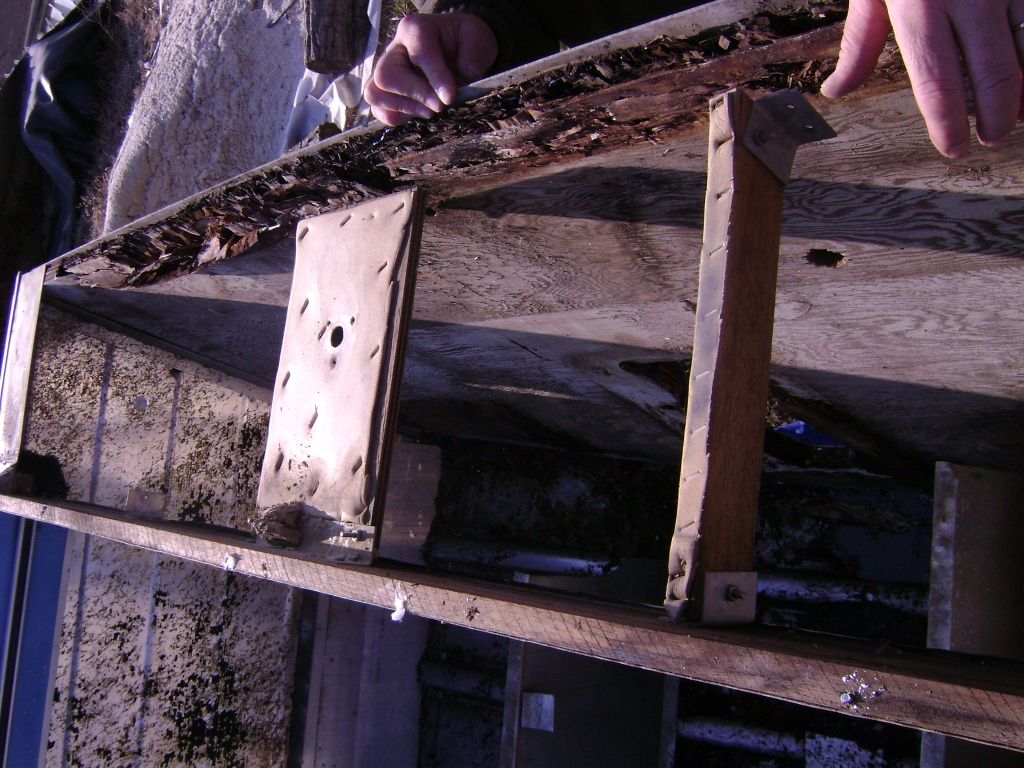
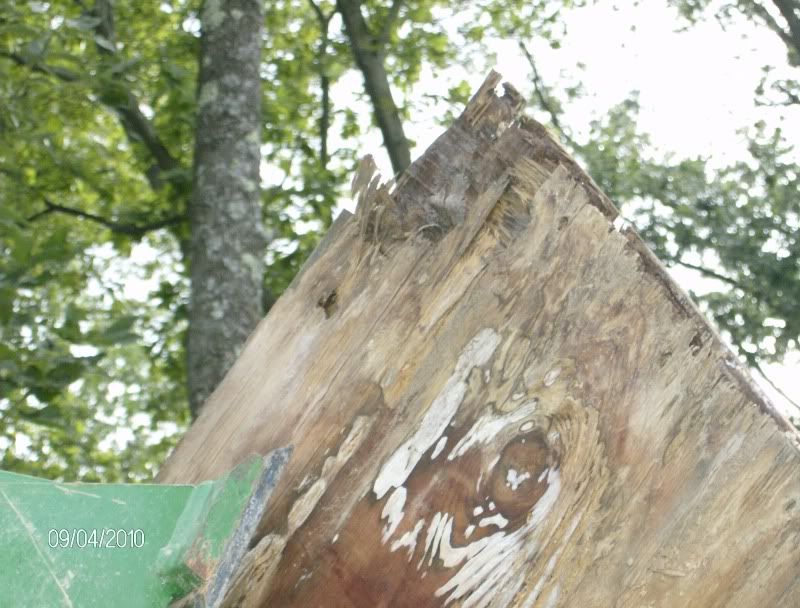
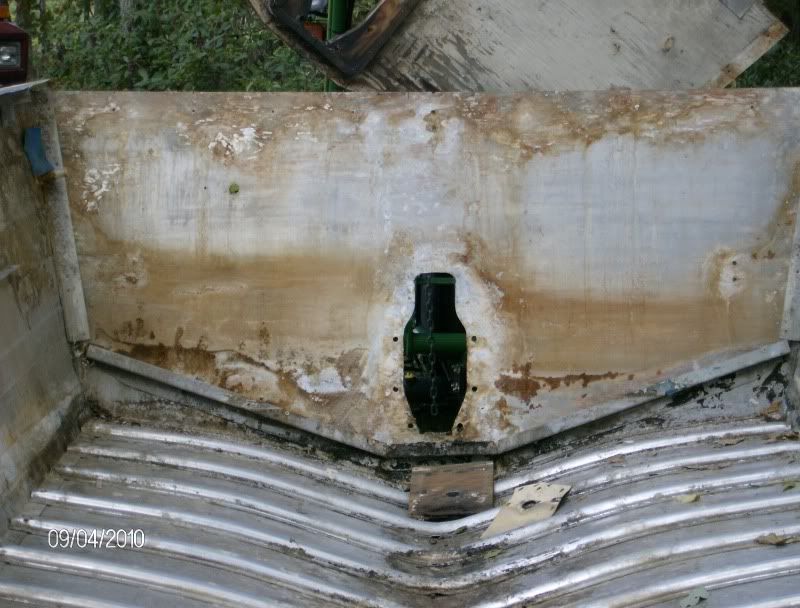
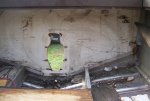
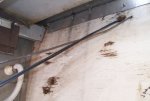
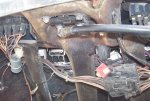
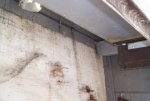
Man that transom was rotted all to crap. Some of it looked like paper mache and you can see all the staining from water leaking. The two transom tie down bolts were rusted away to nothing. I?ll feel a lot better knowing there?s new wood in there.

Islander44.jpg


Next step is in & out power washing and the leak test![/QUOTE]
 

Watermann

Starmada Splash of the Year 2014
Joined
Jan 12, 2013
Messages
13,827
TB I know all the guys here would love to have the exact answer for you and you're frustrated because nobody with your exact boat has taken the time to document everything for you.. Have you thought of documenting the process for the next guy years down the road? Sorry but I would guess probably not as I don't think I've seen you reply in any of the dozen ongoing current SC projects.

So about your boat project. if you slap the new piece of wood over the old then what about the MC keyhole that remains? It's a weak spot for sure right dead center where the OB pod forces are at their greatest. What about repairs or corrosion cleaning that most likely needs to be done to the transom skin?

Please do take some pics of your transom cover for us so we can see that too. I know some of the larger Chiefs are a real bear to get just the wood out. Personally to do the job right you should remove the entire cap and gunnels to replace all the ferrous metal bolts and steel mandrel blinds.

Oh I forgot to add the one crucial thing any OB pod maker will ask for and that's the transom angle degree. The SC MC transom angle is 15 degrees.
 
Last edited:

thebrain

Banned
Joined
Jun 3, 2010
Messages
358
very nice images I really appreciate it.

I have been imformed that I have the wronge engine I thought I was getting a 25" shaft when I actually got a 20" shaft also been imformed that w/ my pod being setback 29" the short shaft will be to close to water.

so it looks like plan B cutting the transom like the red boat and using the hydrolic jack plate.

I will be removing and partially replacing the plywood in transom

Will replace the lower section w/ two pieces of 3/4'? marine plywood w/ a ?? piece of exterior plywood in-between.

The lower section will be about 24? high the original transoms plywood is in excellent condition plan to reuse the two top sections on each side.

I will take some images of my progress however the green transom is the same as mine.

Will remove rear rub rail maybe bend up transom cap to remove plywood.

I have a few images w/ the L6 still inside boat will update w/ o the engine.
Thanks TB
 

Attachments

  • cutTRANSOME.jpg
    cutTRANSOME.jpg
    165.9 KB · Views: 3
  • cuttransome.jpg
    cuttransome.jpg
    142.7 KB · Views: 3

GA_Boater

Honorary Moderator Emeritus
Joined
May 24, 2011
Messages
49,038
Why are you cutting the transom like that with the deep notch? I thought a bracket was going on.
 

Watermann

Starmada Splash of the Year 2014
Joined
Jan 12, 2013
Messages
13,827
very nice images I really appreciate it.

I have been imformed that I have the wronge engine I thought I was getting a 25" shaft when I actually got a 20" shaft also been imformed that w/ my pod being setback 29" the short shaft will be to close to water.

so it looks like plan B cutting the transom like the red boat and using the hydrolic jack plate.

I will be removing and partially replacing the plywood in transom

Will replace the lower section w/ two pieces of 3/4'” marine plywood w/ a ?” piece of exterior plywood in-between.

The lower section will be about 24” high the original transoms plywood is in excellent condition plan to reuse the two top sections on each side.

I will take some images of my progress however the green transom is the same as mine.

Will remove rear rub rail maybe bend up transom cap to remove plywood.

I have a few images w/ the L6 still inside boat will update w/ o the engine.
Thanks TB

Now your're doing a plan B with the transom cutout for the OB? A splashwell and what goes with it will be needed.

Original almost 40 year old plywood in excellent condition?... My thought is why but how're you going to patchwork attach the old chopped up transom ply with new ply? I can say for sure I've never heard of anyone doing that sort of thing on the single most important structural piece in a boat and I've read 100's of threads.

Why create serious challenges for yourself when plenty come your way in the process as is?
 

jbcurt00

Moderator
Staff member
Joined
Oct 25, 2011
Messages
25,197
Why create serious challenges for yourself when plenty come your way in the process as is?
Why indeed?

The notched transom would provide even less support for the additional stress of an OB pod and make the added knee braces even more critical and probably require more substantial knee braces.
 

thebrain

Banned
Joined
Jun 3, 2010
Messages
358
I have been imformed that I have the wronge engine I thought I was getting a 25" shaft when I actually got a 20" shaft also been imformed that w/ my pod being setback 29" the short shaft will be to close to water.is this bogus info.?
update here's images of my transom you guys where right when I removed the rear rubraill the plywood was rotton also image of the bass boat hydrolic steering sys.

hopefully I can easly transplant into the chiefs helm station.
thanks Guys for the surport.
TB
 

Attachments

  • inside transom.jpg
    inside transom.jpg
    150.9 KB · Views: 3
  • inside transom2.jpg
    inside transom2.jpg
    116.7 KB · Views: 3
  • outsidetransom.jpg
    outsidetransom.jpg
    139.2 KB · Views: 3
  • rubremoved.jpg
    rubremoved.jpg
    132.4 KB · Views: 6
  • steering1.jpg
    steering1.jpg
    185.9 KB · Views: 6
  • steering1.jpg
    steering1.jpg
    185.9 KB · Views: 3

thebrain

Banned
Joined
Jun 3, 2010
Messages
358
upper inside transom

I'm assuming this is where to cut? and bend
TB
 

Attachments

  • upperinsidetransome.jpg
    upperinsidetransome.jpg
    111.9 KB · Views: 3
  • outsidetransomP.jpg
    outsidetransomP.jpg
    205.6 KB · Views: 3
Last edited:

Watermann

Starmada Splash of the Year 2014
Joined
Jan 12, 2013
Messages
13,827
Hows that 40 year old plywood looking? :heh:

fetch


That helm is not the type I'm familiar with (rack & pinion / rotary) it must be hydraulic.

fetch
 

Alumarine

Captain
Joined
Feb 22, 2005
Messages
3,756
You know you're going to have to also rig new controls, steering and wiring for the outboard setup.
It would be much easier,cheaper and safer to fix or replace the current I/O motor than go this route.

I know others have said this. Just thought I'd say it again.

Good to see pictures though!
 

FrankenCub

Petty Officer 1st Class
Joined
Dec 29, 2015
Messages
296
Before you go to cutting the transom, pull the cleats and try to gently bend it up after the rub rails are loosened enough for it to clear. Your transom top is different than mine but I think I seen someone here do it that way. I've read so many threads I don't know which one it was though.
Personally, I agree with marc, I would use the OB as a money maker and put it towards the I/O if it's in decent enough shape. I think this would save you much more hassle and butchering, not to mention the headaches. And you're also guaranteed she will be just as safe on the water as she once was.

edit: or if you still want to cut here's this post http://forums.iboats.com/forum/owne...hieftan-express-project?p=6848931#post6848931
 
Last edited:

Grandad

Lieutenant Commander
Joined
Jun 7, 2011
Messages
1,504
upper inside transom

I'm assuming this is where to cut? and bend
TB

I wouldn't cut the top deck. I'd make every attempt to remove it, then cut only the ends of the gunnels as they sit on top of the transom plywood. Details in post #25 above. - Grandad
 
Status
Not open for further replies.
Top