Baylinerchuck
Commander
- Joined
- Jul 29, 2016
- Messages
- 2,740
Great work there!! :yo:


That's some really nice progress! And I like the block you made for your steering wheel. Gives it a nice angle and brings it a little bit closer to the seat.
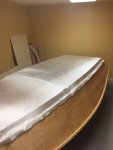
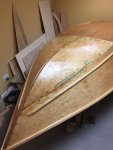
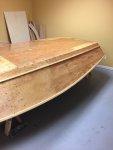
The decking looks great as well. I agree, it is amazing how the entire boat changes and takes shape during the build process. Are you going to leave the top section of your transom wood color? Also, what type of paint is that grey on the inside? Oh, and did you use that Rustoleum primer Woodonglass had suggested?
")
Hate to be this guy but I would epoxy first and then Paint. The epoxy will penetrate and seal better than the primer and paint. If you are going to use epoxy, use it first, then prime and paint. I'm sure it will be bullet proof just the same SG but would think you could have saved a few coats of paint if you used two or three coats of epoxy and then painted. I'm no expert and am just throwing out my opinion for future boat builders who might read this thread. She is looking great. Keep on making saw dust!!!
That would be my luck, build a 40ft cruiser in the garage and have to tear the building down to get it out.