New to outboard repair - 1972 Evinrude Sportwin 9.5 no spark troubleshooting help

jasonejasone

Seaman Apprentice
Joined
May 4, 2020
Messages
45
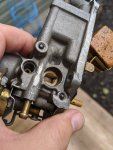
I recently acquired a 1972 Evinrude Sportwin 9.5 HP from a Craigslist ad. Paid $200 without being able to test it... but I had read that these engines are largely considered 'bullet proof' so I went ahead with it.

Well, obviously it won't start or else I wouldn't be here, right?!?!

I've done a lot of work to it already - replaced the spark plugs, cleaned the carb, replaced the kill switch (I thought this was my main issue until I replaced it and nothing changed), and a few more odds and ends.

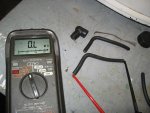
My current issue is I'm not getting any spark.

I have already cleaned and gapped the points to .020, and inspected the other electrical parts of the ignition system.

I decided to replace the coils, because the ones in there looked quite old, so I figured it wouldn't hurt.

Now I get spark on the lower cylinder, but not the top.

I double-checked that I have a good seat on the plug cord and boot for both cylinders, still had spark only in the lower cylinder.

My question is: Where do I go from here? How can I test / troubleshoot each piece of the ignition system so that I don't buy parts that don't need replacing?

I considered replacing the points (advice online says to do so once per year, is that accurate???), and replacing both the plug wires and connectors... but that brings up another question: which cylinder is associated with which coil? One coil is closer to the throttle handle/transom, the other is closer to the prop side of the engine. Which of those powers the spark to the top cylinder?

Whichever one it is, that's the one I need to troubleshoot since I'm getting spark in the lower cylinder.

Any help or advice would be appreciated! I've been powering my jon boat with an old Sears Gamefisher 3HP motor (which is MUCH simpler and easier to work on) so I am ready to get this boat moving with this new (to me) Sportwin!!

Also - I did not find a thread discussing a similar topic, but if one exists, please feel free to point me in the right direction.

Thanks, all!
 

F_R

Supreme Mariner
Joined
Jul 7, 2006
Messages
28,226
I'd almost bet the points are not as clean as you think they are. Take them apart (remove them from the engine) and polish each contact shiny bright and reassemble & set gap to 0.020".

Coil closest to the front of the motor is the top one.
 

jasonejasone

Seaman Apprentice
Joined
May 4, 2020
Messages
45
I'd almost bet the points are not as clean as you think they are. Take them apart (remove them from the engine) and polish each contact shiny bright and reassemble & set gap to 0.020".

Coil closest to the front of the motor is the top one.

That simple bit of info will be extremely helpful!!!

I am worried it's the plug wire... and I'm not super confident about removing the entire plate to run new plug wires.

I'll remove and clean the points, thanks!
 

racerone

Supreme Mariner
Joined
Dec 28, 2013
Messages
38,886
4 screws and linkages and the plate is off.------And you have to do that procedure to properly put the new plug wires into the coils.
 

Crosbyman

Vice Admiral
Joined
Nov 5, 2006
Messages
5,811
take some time to read Leroy's article on the 9.5. and don't be afraid of jumping in to fix it up. there are lots of utubes on the 9.5hp

http://www.leeroysramblings.com/OMC_9.5.htm

become familiar with timing adjustments… not that hard really …. meters are useful but a simple buzzer or light bulb or LED in series with a small battery can do as long the points are clean

make certain the .020 is set at the hight point of the cam lobe .. it is a good start but the meter method is best

http://www.youtube.com/watch?v=ga1Cjymj6ms&feature=youtu.be

the front coil is for the top cyl.


btw resistance from plug boot to engine frame should read about 4-8 Kohms if not you have no continuity so you will have to find out why (corrosion, broken wires etc... bad coil to !)

the basic magneto you are working on is basically the same as early 50's motors like 5.5, 7.5. 10. 18 etc... so you can find lots of info reading the Bible red book

https://bit.ly/2wqMPTb


do get back to us with your progress
 

Attachments

  • photo323656.jpg
    photo323656.jpg
    1.2 MB · Views: 3
  • photo329623.png
    photo329623.png
    610.9 KB · Views: 3
  • photo329624.png
    photo329624.png
    11.3 KB · Views: 3

jasonejasone

Seaman Apprentice
Joined
May 4, 2020
Messages
45
take some time to read Leroy's article on the 9.5. and don't be afraid of jumping in to fix it up. there are lots of utubes on the 9.5hp

http://www.leeroysramblings.com/OMC_9.5.htm

become familiar with timing adjustments… not that hard really …. meters are useful but a simple buzzer or light bulb or LED in series with a small battery can do as long the points are clean

make certain the .020 is set at the hight point of the cam lobe .. it is a good start but the meter method is best

http://www.youtube.com/watch?v=ga1Cjymj6ms&feature=youtu.be

the front coil is for the top cyl.


btw resistance from plug boot to engine frame should read about 4-8 Kohms if not you have no continuity so you will have to find out why (corrosion, broken wires etc... bad coil to !)

the basic magneto you are working on is basically the same as early 50's motors like 5.5, 7.5. 10. 18 etc... so you can find lots of info reading the Bible red book

https://bit.ly/2wqMPTb


do get back to us with your progress

I've got a quick update!!

I went back in and removed the fly wheel to take another look... I was prepping to remove the points, clean them and then gap them again.

HOWEVER... looks like I actually bent the little adjustment plate a bit when I installed that new coil. The points were not moving properly as the flywheel turned because the plate was bent, pushing the point against the contact plate the entire time.

I bent it back into place, readjusted the point and BINGO WE HAVE SPARK!!!

I still have one part left to install once it arrives: My new kill switch.

I read Leeroy's page and have it book-marked. He even helped me how to figure out how to install the choke retainer clip (my engine was missing the choke completely when purchased). I did find that the clip was poorly designed and I had to wrap some wire tight around the bottom part of the clip to keep the choke arm in place. Works like a champ now!

Once I get the kill switch installed, I will feel better about actually testing it.

I'll post the results in a few days when the kill switch arrives!

Thanks for the very quick, and very smart help y'all!
 

Crosbyman

Vice Admiral
Joined
Nov 5, 2006
Messages
5,811
you can actually take the kill switch apart by pulling the rubber top and shine the inner contact surfaces...should work fine for years with a dab of oil on the inner cone

try these push nuts they worked great on my latest 9.5 problem they come in various sizes
 

Attachments

  • photo329654.png
    photo329654.png
    166.3 KB · Views: 1

jasonejasone

Seaman Apprentice
Joined
May 4, 2020
Messages
45
you can actually take the kill switch apart by pulling the rubber top and shine the inner contact surfaces...should work fine for years with a dab of oil on the inner cone

try these push nuts they worked great on my latest 9.5 problem they come in various sizes

Unfortunately, the wiring for the old kill switch had no insulation, and one of the wires had been pulled out of the plastic housing of the switch itself. I couldn't see a way to get a new wire into that plastic piece, so I found an affordable and compatible replacement already.

Thanks, though!
 

jasonejasone

Seaman Apprentice
Joined
May 4, 2020
Messages
45
Quick update on my progress:

I installed the new kill switch today without issue.

I filled up my water and hooked up the fuel. When I squeezed the bulb a few times, fuel was forced out of the throttle arm. Thanks to Leeroy, I already know that there's a vent hole in the carb that gets clogged... and the fuel will come out of this spot if that happens (I had this issue first time I tried to test the engine).

My float is original and crumbling, so I'm sure it was just clogged again (I have a carb rebuild kit on order, which includes a new float and a lot of other parts).

So the good news: the engine started right up!

The bad news: it died after about 5 seconds of a rough idle and wouldn't start again.

I'm pretty confident that the jet is clogged/dirty, and there's like a LOT of little pieces of cork from the float running around... so I think the issue is definitely the carb / associated systems.

I'm going to rebuild the carb and clean it, replace the jet, replace the float and all the other parts. I will also check the reed valves underneath... then I'll test it again. I'm pretty confident the float isn't floating and / or there is cork stuck somewhere it's not supposed to be.

Look for another update early next week since that carb rebuild kit is supposed to come Monday or Tuesday!

Small update today:

I received my carb rebuild kit. I took the carb apart and removed it from the motor, then let the carb pieces soak in acetone overnight (it's what I had).

I let them dry, then cleaned them out the best I could - I used compressed air to blow through all the orifices, etc.

Now, one thing I did NOT do here: remove the two small metal caps plugging two holes in the outside body of the carb. I certainly think I CAN get this done without damaging the carb, but I wasn't sure it was really necessary.

Do you guys think I should remove the carb and replace those two caps? Let me know what you think, and how important it is!

I replaced the little jet, the housing, new float and the little shephard's hook looking pin (this was missing from the existing carb and I did NOT realize).

Both gaskets replaced, too, of course.

I also replaced the little bushing on the idle adjust needle (pin? needle?)

I hooked it all back up expecting it to start right up.

Nope. I got a little 2-3 seconds of trying to run on the first pull, then NOTHING afterwards.

I did all this on my lunch break, and am now about to finish my work for the day.

Here's all I've done to date:

- replaced spark plugs
- replaced coils
- Adjusted points (I DO have spark now)
- Removed / cleaned / rebuilt the carb
- Installed a new Kill Switch
- Replaced the choke arm (missing from the motor when I purchased)

I am hoping someone can give me some guidance on where to go from here, or maybe someone in the upstate of SC that can help me get this running for a reasonable price. I am open to either one at this point lol!!!

I am thinking the fuel pump may need to be rebuilt... but there WAS fuel in the carb for sure this last time. I'm not sure if that pump is needed to get the thing just to start. As of right now, I pull and pull and pull and it does zip, zilch, nada.

I am going to double check I have good spark and then remove the plugs to take a peek at them and the cylinders, too, later today.

Thanks for any help / advice / guidance!!
 

Crosbyman

Vice Admiral
Joined
Nov 5, 2006
Messages
5,811
well .. that carb needs to be real clean ...if you pull the dome size caps there is a plastic insert not included on the carb (read Leroy's on the carb)

I would say reclean the carb clean the fuel pump screen under the pump cap !

get it started and use the fuel bulb in case the pump is defective if it works by pumping the bulb the pump is likely in need or change open the vent

carb vents are for atmospheric balance ...if the inlet valve works no fuel will come out of the vents

see utubes on 9.5hp carb job 2 part utube

https://www.youtube.com/watch?v=r-VTkOuSg00

https://www.youtube.com/watch?v=Y2pwU5aho9U
 

jasonejasone

Seaman Apprentice
Joined
May 4, 2020
Messages
45
well .. that carb needs to be real clean ...if you pull the dome size caps there is a plastic insert not included on the carb (read Leroy's on the carb)

I would say reclean the carb clean the fuel pump screen under the pump cap !

get it started and use the fuel bulb in case the pump is defective if it works by pumping the bulb the pump is likely in need or change open the vent

carb vents are for atmospheric balance ...if the inlet valve works no fuel will come out of the vents

see utubes on 9.5hp carb job 2 part utube

https://www.youtube.com/watch?v=r-VTkOuSg00

https://www.youtube.com/watch?v=Y2pwU5aho9U

I was wondering where the heck those screens were supposed to go! They must sit between the fuel pump and the part underneath the carbs.

I also forgot to vent my fuel canister this time (DUH).

I will do both of those things and try again!
 

Crosbyman

Vice Admiral
Joined
Nov 5, 2006
Messages
5,811
just to clarify

get it started and use the fuel bulb in case the pump is defective if it works by pumping the bulb the pump is likely in need or change open the vent …..on the tank or temporarily remove the fuel cap
 

jasonejasone

Seaman Apprentice
Joined
May 4, 2020
Messages
45
just to clarify

get it started and use the fuel bulb in case the pump is defective if it works by pumping the bulb the pump is likely in need or change open the vent …..on the tank or temporarily remove the fuel cap

Thanks!

I've got the carb all ready to rock and roll, but I keep going back to the ignition system as the main issue.

I have a new fuel pump on the way - mine is likely fine, but I found a new one for a good price and figured it can't hurt.

I am also swapping out the points and the rest of the ignition system once the parts arrive (I have already swapped out the coils with new ones). The observed spark I'm getting is really weak.

I've already confirmed compression (a little over 60 psi in each cylinder), I've got good fuel (tank vented, bulb pumped until firm), brand new plugs, cylinders appear fine, and if it's not getting fuel somehow, the new pump should address that.

So all of that tells me maybe the spark is just too weak. It appears super weak visually when tested.

So that'w where I am. The new fuel pump arrives today, and I'll give it another try once I swap it out. If that doesn't do the trick, I'll swap those points and adjust them, then try again.

I am really hoping it'll start after one or both of those items get swapped out!
 

jasonejasone

Seaman Apprentice
Joined
May 4, 2020
Messages
45
Does spark jump a gap of 5/16", yes or no ?

I honestly don't know how to measure how far it will jump... I have a spark tester that goes inline, one end goes into the plug wire and the other end goes onto the plug.

It lights up if there's a spark.

Mine is lighting up but is very, very small... I don't know if that helps or not.
 

racerone

Supreme Mariner
Joined
Dec 28, 2013
Messages
38,886
The concept is quite clear I believe.----You need to find or make ( couple of pieces of wire glued on carboard ) a test device so that you force the ignition coils to produce maximum output.
 

Crosbyman

Vice Admiral
Joined
Nov 5, 2006
Messages
5,811
try a regular plug
break off the side electrode ground the plug body to the engine ….

pull the cord does the spark jump across the void from tip to the plug body ??


btw for now forget the pump…. just pump the fuel hose to get fuel in the that carb


jasonejasone

Seaman Apprentice
Joined
May 4, 2020
Messages
45
Took the carb off to clean it again and decided to try to get these caps off since they came with the carb cleaning kit.

See the photo. I drilled out the caps so I could pull them and damaged the (plastic???) underneath.

Is this carb ruined now?

I have swapped out the coils, points, and condensers now, so I am confident the spark isn't the issue. My in-line spark tester shows a spark every time.

Let me know if I've ruined this thing, and if so I guess I'll hope to find one on eBay!

Thanks!


Edit: Seems like I've just damaged a filler plug part #0312909, so I'll grab a new one of those.

So, I've got compression at just over 60# each cylinder, I've got good spark, I've got fuel... and I still can't get this thing to even come CLOSE to starting.

Any general troubleshooting advice? Steps I maybe skipped?
 

Attachments

  • photo330788.jpg
    photo330788.jpg
    1 MB · Views: 1
Last edited:
Top