'89 Arriva 2050 Restoration

Crazy_Pilot

Cadet
Joined
Oct 27, 2017
Messages
28
A tale as old as time. Man see boat, man buy boat, man discover soft floor (6 years later), man ignore wife suggestion to buy new boat, man get itchy arms.

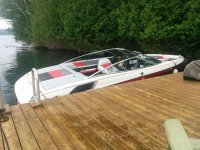
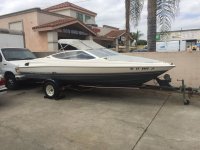
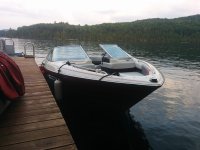
Back in 2018 we picked up an Arriva 2050 with a 5L and have enjoyed it well since then. It's had a couple issues but just normal boat stuff. Last summer when I hopped in I felt the dreaded softness underfoot and knew the time had come. The boat isn't a trailer queen, it goes into the water in May and comes back out in September/October, so it deals with all the elements. The cover on it is new and works well but nothing is perfect, and the 29 years before my ownership undoubtedly had their periods of neglect.

The happy times at the dock:IMG_20180630_195241.jpg
IMG_20180630_195302.jpg

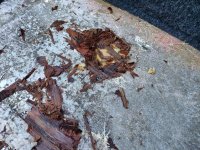
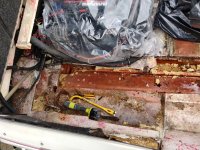
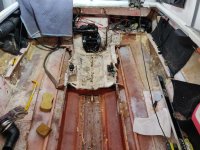
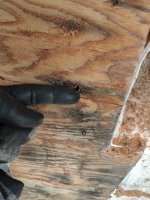
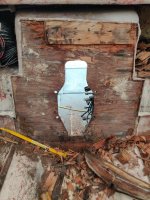
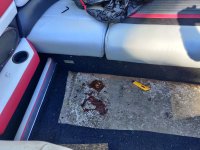
Some experimental prodding at the soft spot revealed a bunch of sopping wet mush under a thin coat of CSM. This is of course where you step down into the boat so years of people hopping in were taking their toll.
IMG_20241018_133058.jpg

IMG_20241018_133102.jpg

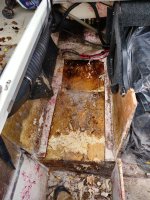
The first cuts into the foam revealing a nice puddle underneath. Maybe I'll get some goldfish.

IMG_20241018_133915.jpg

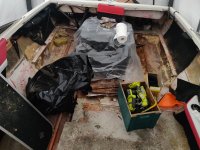
Time to start the demolition in earnest.IMG_20241020_142234.jpg


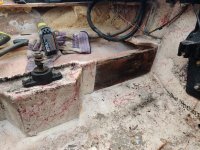
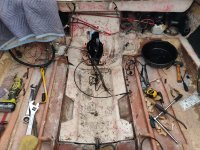
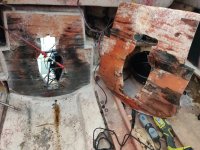
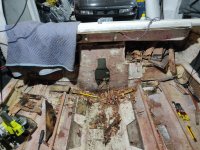
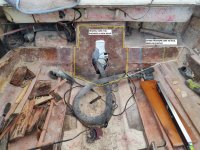
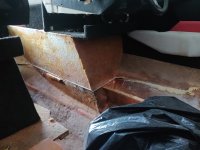
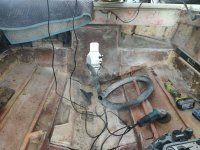
The boat has raised floors on with side of the main engine compartment. The port side was not so bad but the starboard was utterly trashed. The battery box had been screwed down to multiple locations over the years and the inevitable happened.
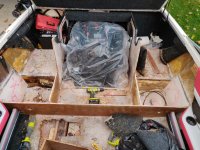
IMG_20241026_142200.jpg

IMG_20241026_144057.jpg

IMG_20241229_133102.jpg

IMG_20241027_150246.jpg

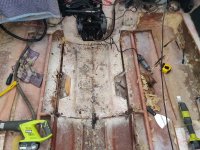
Moving forward to the rest of the floor. Discovered the fuel tank is just held in with great mounds of CSM. IMG_20241231_135352.jpg
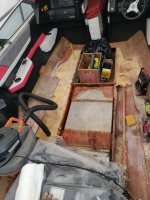
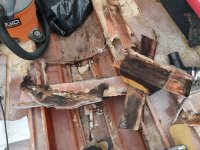
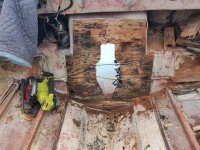
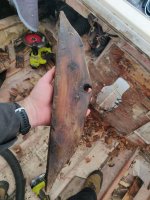
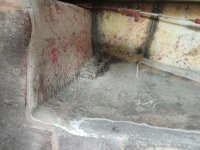
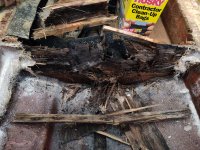
The fuel tank compartment was delightfully slimy. It has a small raised floor that was only glassed on the top side, and of course water from the ski locker is allowed to drain through this space. The result of which is wood here being basically wet sawdust in a vaguely board-shaped form.
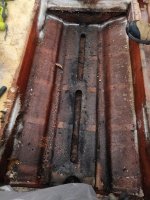
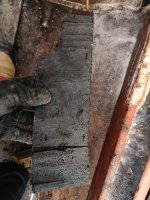
IMG_20241231_141211~2.jpg


IMG_20241231_143718~2.jpg

The bulkhead between the ski lockers and tank compartment after I stepped on it:
IMG_20241231_141407.jpg

Next up, engine removal and transom.
 
Last edited:

Crazy_Pilot

Cadet
Joined
Oct 27, 2017
Messages
28
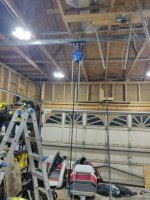
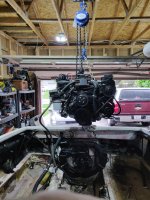
I built a gantry in my garage using doubled up Unistrut, bolted to a third strut sandwiching the trusses and supported by foundation posts on both sides.IMG_20250518_230323.jpg

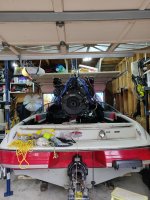
Worked a treat!IMG_20250522_110148.jpg


IMG_20250522_110235.jpg

Took a moment with some degreaser to get everything tidied up inside. IMG_20250531_133648.jpg

First cuts into the glass on the stringers. No surprises.
IMG_20250601_133027.jpg

Out they come after lots of measuring. So far as I can tell nothing is bedded to the hull at all. They simply keyed/stapled all of the wood bits together and glassed over the lot with matt.
IMG_20250601_134419.jpg

The weight of these pieces is incredible. I've got to imaging the boat will sit a couple inches higher once this is all finished.

IMG_20250601_134424.jpg

A first cut into the transom. Beautiful black rotten wood.
IMG_20250601_140033.jpg
 

Crazy_Pilot

Cadet
Joined
Oct 27, 2017
Messages
28
Drive removal went off without a hitch, except that the steering cable nut galled to the threads of the actuator tube and tore those up a little. That's future me's problem.
IMG_20250601_145844.jpg

Transom skin removed. The transom core on this boat is tiny, it only spans between the stringers. Before I pulled the floors up I assumed the core ran full width at one layer and was doubled up at the drive, as I've seen on other boats. But no, full thickness in only this area and nothing on the rest.
IMG_20250605_162127.jpg

The first layer removed. The only gift of poor craftsmanship is that it's easy to dismantle. Nothing was bonded. The core is 1 layer of 3/4 ply and 2 layers of 1/2, all simply stapled together (and not with stainless staples either). Pulling off the outer layers only took a few minutes.
IMG_20250607_134016.jpg

IMG_20250607_134029.jpg

Even the layer against the skin didn't present much of a challenge. It was vaguely glued in with raw resin but came off in big chunks. It wasn't until I reached the very top that I needed to deal with anything that put up a fight.
IMG_20250607_145726.jpg

All cleaned up and ready for grinding.
IMG_20250607_230706.jpg

Interesting that the bottom most part of the core was a solid chunk of timber, held to the plywood with gratuitous use of staples. No effort whatsoever to waterproof the drain.

IMG_20250607_145735.jpg

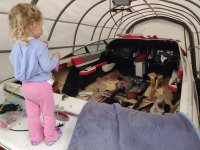
The boss inspecting my work and asking when we can go out in the boat again.IMG_20250605_163820.jpg
 

Scott Danforth

Grumpy Vintage Moderator still playing with boats
Staff member
Joined
Jul 23, 2011
Messages
50,597
surprised it took this long to rot.....

welcome to late 80's build quality.

welcome to the itch.....
 

MikeSchinlaub

Petty Officer 1st Class
Joined
Jan 14, 2025
Messages
266
Have fun :) Two bits of my opinion.

1. Using stainless fasteners in the structure really isn't worth it. If everything is sealed, they wouldn't rust anyway. If water gets in, the wood would rot anyway, and stainless fasteners still wouldn't be holding anything together.

2. Once you get used to this level of itchyness, other things become less itchy. Fiberglass insulation doesn't bother me anymore.
 

Crazy_Pilot

Cadet
Joined
Oct 27, 2017
Messages
28
Have fun :) Two bits of my opinion.

1. Using stainless fasteners in the structure really isn't worth it. If everything is sealed, they wouldn't rust anyway. If water gets in, the wood would rot anyway, and stainless fasteners still wouldn't be holding anything together.

2. Once you get used to this level of itchyness, other things become less itchy. Fiberglass insulation doesn't bother me anymore.

Ha, true enough. The staples used to hold the floor down might have accelerated things a little - as they rusted they acted as channels for moisture to wick down into the stringers - but you're right, once moisture gets that far there are bigger problems than what the staples are made of.
 

Crazy_Pilot

Cadet
Joined
Oct 27, 2017
Messages
28
Another weekend of demo and cleaning. I've started grinding the old transom tabbing away and planning for the new wood core. The original wood only spanned between the stringers and was obviously good enough for 35 years but it seems underbuilt compared to other examples I've seen here, so I'm wondering if there would be any benefit to extending the wings out. Options would be to extend to the mini-stringers (blue line), main floor (green) or full width (purple).Transom Options.jpg

I have a 5L but I believe the 5.7 was also an option for the Arriva. If my engine does ever call it quits I'll be upgrading so more power could be in the boat's future.

The original core was 1-3/4" thick, one layer of 3/4" and two layers of 1/2", so if I duplicate that I could even taper out the thickness. Run the 3/4" full width, the first 1/2" to the blue line and the second 1/2" at the center.
 

MikeSchinlaub

Petty Officer 1st Class
Joined
Jan 14, 2025
Messages
266
I'm no engineer, but I would think a center transom would be fine for an inboard because most of the weight is carried by the stringers. However, if you go full width, that will give you a solid mount for some trim tabs. Maybe move the tie downs to the transom too for easier future access, but I don't know how that will work with your trailer.

If you keep them where they are, I would replace the wood with a bigger piece.
 

bajaman123

Petty Officer 3rd Class
Joined
May 6, 2009
Messages
94
I love restoration threads like this! I had a 1990 Bayliner 2050 Capri, very similar boat to yours but the Arriva brand was much more refined and 'upscale'. Mine had a 5.0 also, came with a 2 bbl carb but I switched that out to a 4 bbl Edelbrock Performer carb and manifold...that really lit that boat up! Brunswick didn't spend a lot on quality back then, it is really amazing that your boat lasted as long as it did. It will be really cool to see it back on the water because it has been years...no, DECADES, since I saw one on a lake. Good luck with this awesome project!
 

Crazy_Pilot

Cadet
Joined
Oct 27, 2017
Messages
28
I'm no engineer, but I would think a center transom would be fine for an inboard because most of the weight is carried by the stringers. However, if you go full width, that will give you a solid mount for some trim tabs. Maybe move the tie downs to the transom too for easier future access, but I don't know how that will work with your trailer.

If you keep them where they are, I would replace the wood with a bigger piece.
I don't see too much need for tabs but it's worth keeping the option open. They might be challenging to install on my hull though - the stern has the two pods under the swim platform which limits the height for the trim actuators. Never really gave it much thought.
 

redneck joe

Supreme Mariner
Joined
Mar 18, 2009
Messages
11,964
I don't see too much need for tabs but it's worth keeping the option open. They might be challenging to install on my hull though - the stern has the two pods under the swim platform which limits the height for the trim actuators. Never really gave it much thought.
I would vote for wood the whole thing.

What are these pods you speak of?
 

redneck joe

Supreme Mariner
Joined
Mar 18, 2009
Messages
11,964
Side note, I had one of these back in the day. Really liked it for that perio of in my life. I think same hull, different cap or course.


1750242168303.jpeg
 

redneck joe

Supreme Mariner
Joined
Mar 18, 2009
Messages
11,964
Yeah thinking back to my bayliner I think I remember those. I didn't know about tabs at the time but for listing I would have liked them. If they will fit.
 

Crazy_Pilot

Cadet
Joined
Oct 27, 2017
Messages
28
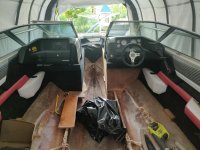
This week's update: More of the same. Life with a 2 year old means I only have a couple hours a week to spend on the boat when she's napping, and this Sunday was 45 degrees C with the humidex (~113 Freedom degrees) so no chance I was going to kill myself that badly. I did get the rest of the floor removed from the bow. The structure here is interesting, it looks like the seat boxes are integral to the hull rather than sitting on the floor, and the stringers terminate against the boxes. I'll cut the front of the stringer off to see how it all comes together. The boxes themselves are in okay shape but there is some darkening in the bottom corner, and I'll never be down here again so might as well deal with it now.IMG_20250622_200411.jpg
IMG_20250622_200425.jpg

The trailer tie downs in the stern pods are pretty sad layups of random bits of CSM half-assedly thrown on top of the wood and then sprayed with gelcoat and that stupid blood spatter paint.
IMG_20250622_200457.jpg

And of course more work around the transom.
IMG_20250622_200444.jpg

I'm still working on my dust mitigation strategies. I don't really care about being dirty but the breeze caries the dust out of the tent and onto my daughter's swing set and my wife's clothesline. Neither of these are places I want fiberglass dust to collect. My belt sander with the shop vac plugged in is a good solution for keeping things controlled but is also quite slow - even with 40 grit belts the removal rate is nowhere near the angle grinder/flap disc and the sander gets blazing hot so I have to set it aside to cool for extended periods when I want to keep working.

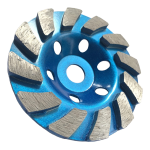
Has anyone tried a diamond cup wheel meant for concrete and tile on glass? One of these:
1750685045785.png

I'd like to get one of the grinder dust extractor attachments but it looks like they're too deep for a flap wheel to work with them. If these cup wheels are effective on glass then I can run that combo and let the shop vac keep everything contained.
 

Scott Danforth

Grumpy Vintage Moderator still playing with boats
Staff member
Joined
Jul 23, 2011
Messages
50,597
I normally worked with teh shop vac hose near the discharge of the grinder. however dust does get everywhere.

a few things I learned to keep the dust at a minimum:
  • new bags nearly every day to maximize the shop vac air flow
  • use your leg to hold the hose next to the grinder head
  • work away from the house, as dust will get everywhere

I tried 4-1/2" diamond saw blades for cutting concrete, didnt really work as well as 24 and 36 grit sanding discs. the fiberglass ate the diamond blade quickly
 
Top