I measured the deck bulkhead to the cabin, side box width, where the cutout for the engine was, where the seats were, any visible bulkheads all to one point of reference. Hatch locations etc. I measured transom forward. What you'll find is nothing is anywhere near perfect.
From there I cut the deck out and measured stringer location and on center spacing of them. I had 4 "stringers". The two main about 25 inches apart on center. These were heavily glassed in and the deck was stapled to the uncapped tops of them. Then two more 14 inches on center to the main center ones. These were glassed in on 1 side and were just dimensional lumber. I assume they were to simply support the span of the deck. When I rebuilt I made them structural. Looked like this:
View attachment 411579
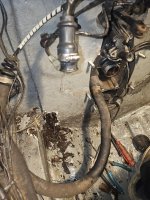
I used a shovel to break the foam. You can see there were no structural bulkheads in the foam cavity.
View attachment 411578
And this is what I built back:
View attachment 411577
Note I gave myself wood to nail to. Water should never get in the inner cavities and the one where the fuel tank is the 1708 on the deck runs down to the floor making the hull side and stringer all bonded together as one. The horizontal plywood is there for the deck seam. It is the only location there is a seam.
This is foamed and half glassed:
View attachment 411580


.jpg")
.jpg")

